 Learn about Linux in practice  1. Overview
GIMP (GNU Image Manipulation Program) is a free, open-source image editor for tasks ranging from simple drawing to professional photo retouching. It offers layers, brushes, selection tools, and filters like a basic paint app or an advanced photo-editing suite.
While working in GIMP, sometimes we need to swap colors, such as when modifying a logo using a new color scheme, adjusting a photo’s palette, or just having fun experimenting. Whatever the reason, we can apply these changes in GIMP using simple methods.
In this tutorial, we’ll explore multiple methods to swap colors in GIMP.
We can use the Color Exchange tool to directly replace one color with another. It works best on images with clear, solid colors or when we define the color that we want to replace.
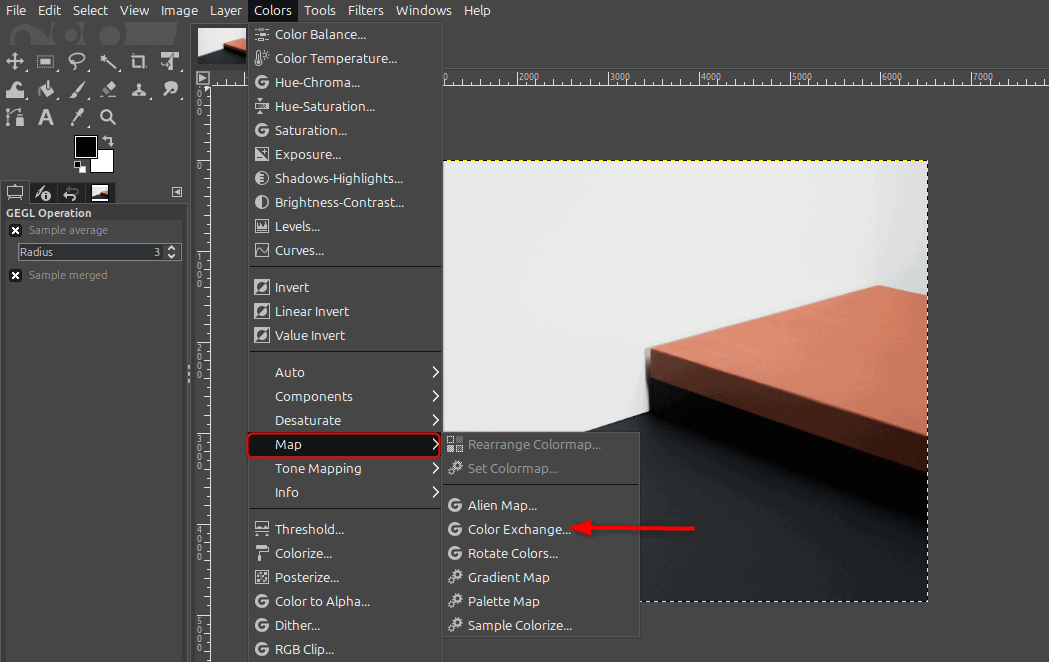
To swap one color with another, we first open our image and ensure the correct layer is selected. Then, we go to Colors > Map > Color Exchange:
A dialog box appears where we choose the color we want to replace by clicking the From Color swatch. Alternatively, we can use the eyedropper to select the color from the image. Next, we click the To Color swatch and choose the new color we want to apply:
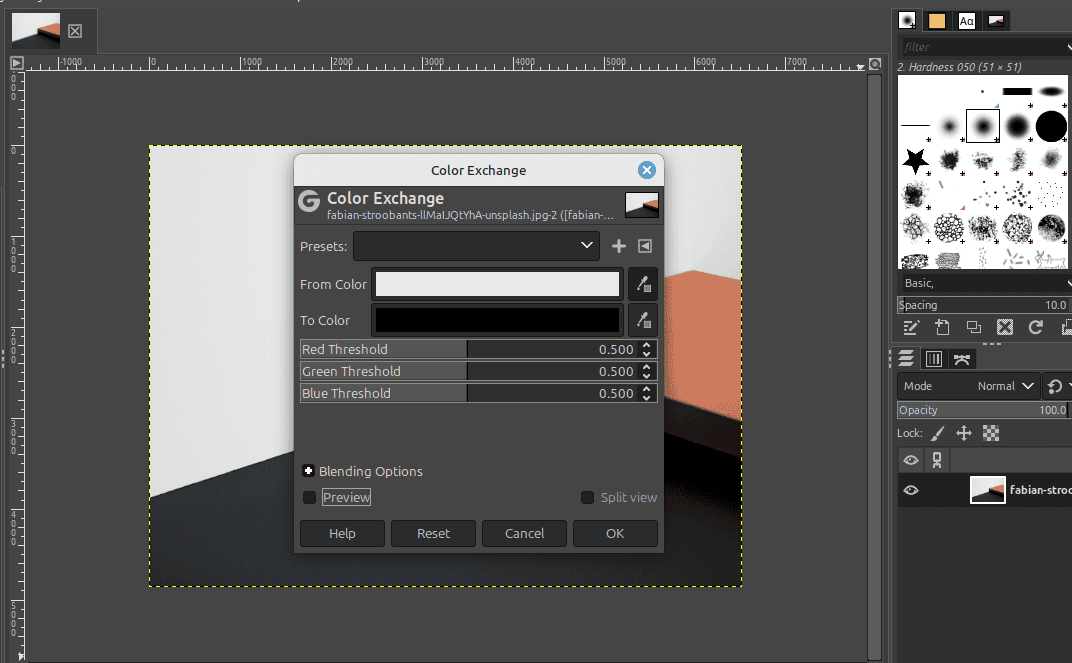
If the color in our image has variations, like shadows or highlights, we can fine-tune the change using the Red, Green, and Blue threshold sliders. These sliders control how closely a pixel’s color must match the original for it to be replaced. Lower values will replace only exact matches, while higher values allow for broader color replacements. Once we’ve set everything, we click OK to apply the changes:
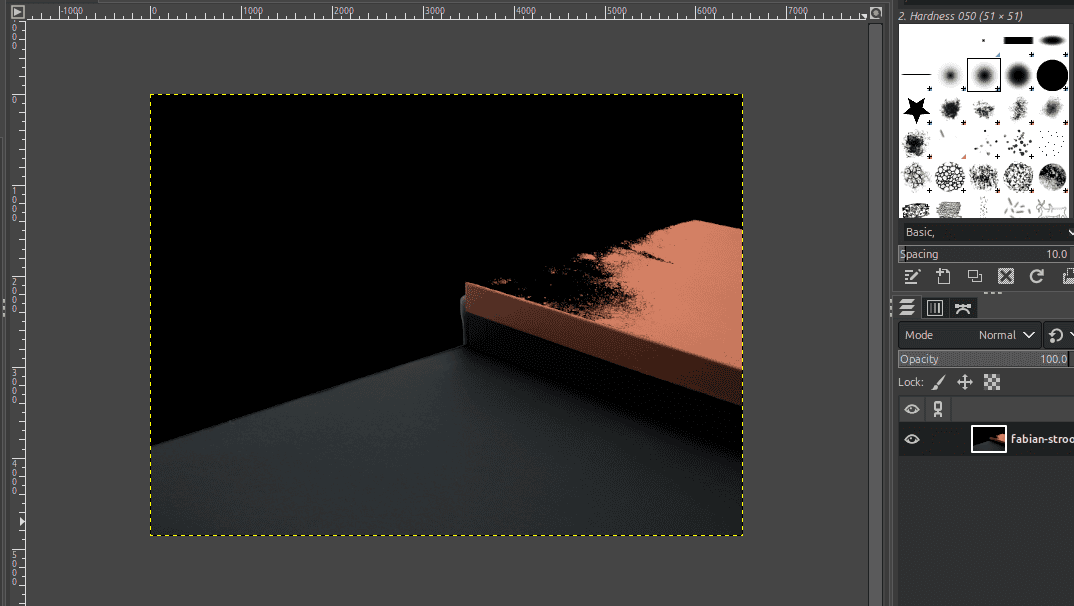
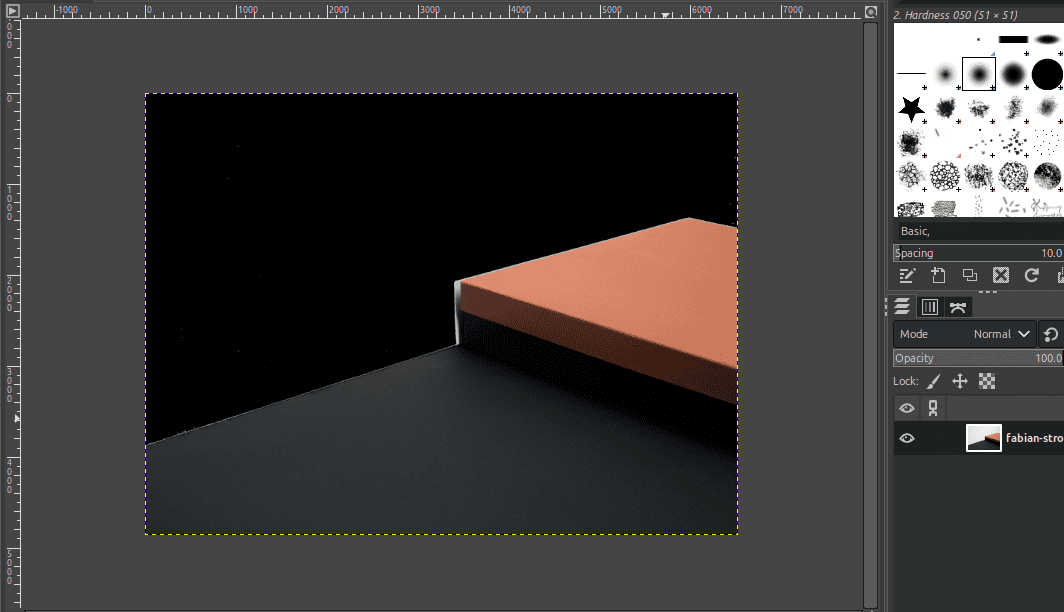
Here, because the threshold value is slightly higher, the image swaps colors over a broader area and may mix with other colors. To correct this, we can lower the threshold value from 0.500 to 0.2 or 0.3 so that only exact matches are replaced:
Furthermore, this method works best for simple graphics with flat, solid colors. It might not be ideal for detailed photos or images with complex textures, but it’s quick and effective for basic color swaps.
In GIMP, we can also use the By Color Select tool to change specific colors in an image, with more control than automatic color replacement. This method involves selecting all pixels of a specific color first, then changing the color of the selection.
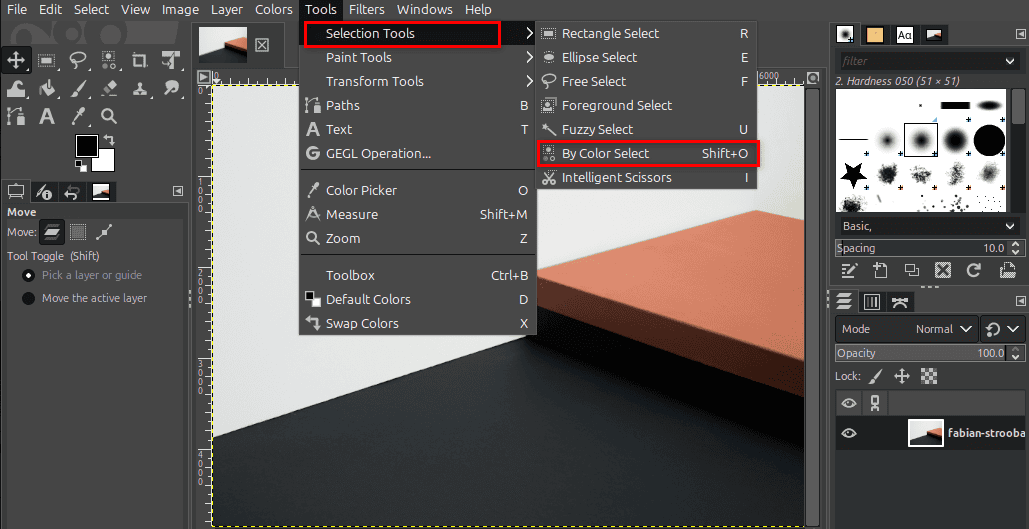
First, we open our image and choose the By Color Select tool from the toolbox, or we simply press Shift+O on the keyboard:
Then, we click on the color in our image that we want to change. GIMP selects all matching pixels based on the threshold setting, which we can adjust in the Tool Options. Again, a lower threshold selects only very similar colors, while a higher threshold includes a broader range of shades.
Furthermore, if we want to refine the selection, we can hold Shift to add more colors or Ctrl to remove areas from the selection. For softer edges, we can go to Select > Feather and choose a small value, like 2 or 3 pixels.
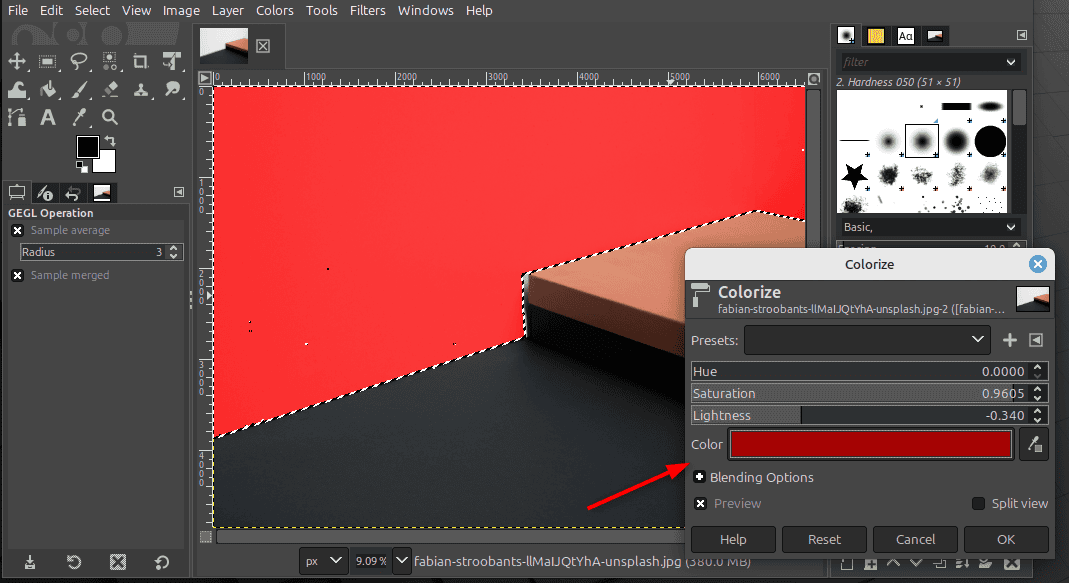
Once the selection looks right, we go to Colors > Colorize to apply a new color. Here, we can adjust the Hue, Saturation, and Lightness sliders, or click the color bar to pick an exact color using RGB or HEX values. After we’re satisfied with the preview, we click OK to apply the changes:
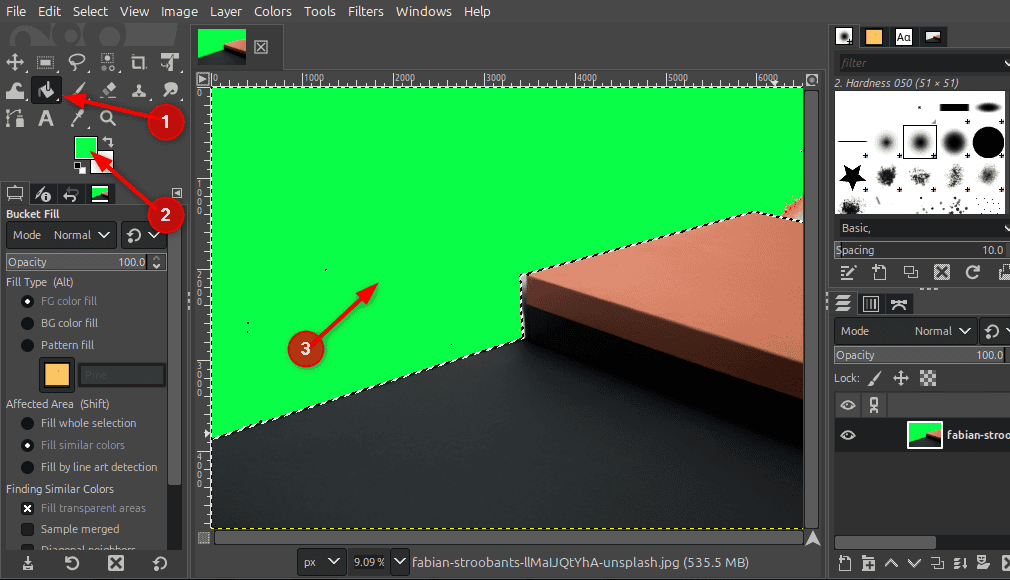
Alternatively, instead of using Colorize, we can pick the Bucket Fill tool, select a new foreground color, and click inside the selected area to fill it directly:
When done, we press Ctrl+Shift+A to deselect and view the results. This method is especially useful for images with patterns, shading, or complex textures where we need precise color control.
4. Using Layer Masks for Non-Destructive Swapping
We can also use layer masks in GIMP to swap or recolor parts of an image with more precision. For example, to start, we open our image in GIMP and duplicate the original layer. This helps us preserve the original image while we work on a copy.
Next, we use a selection tool like By Color Select or Fuzzy Select to isolate the area we want to recolor. If the object has a solid color, the By Color Select tool usually works best. We click on the target area and adjust the threshold if needed, so only the desired region gets selected.
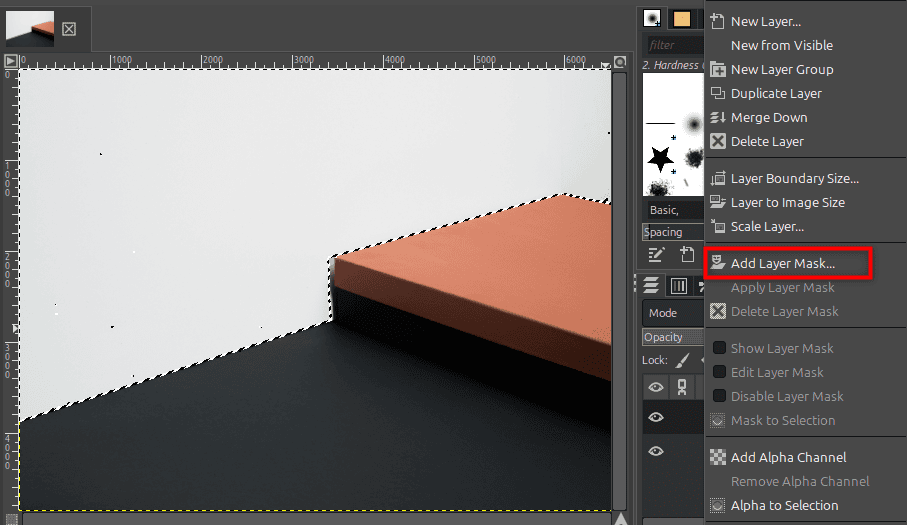
Once the area is selected, we right-click on the duplicated layer and choose Add Layer Mask:
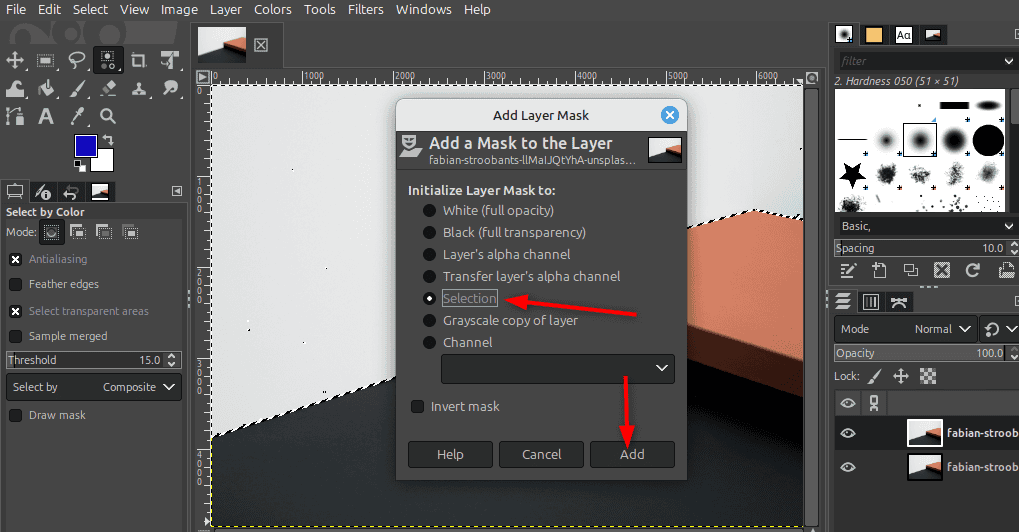
Next, in the options that appear, we choose the Selection option and hit Add:
This creates a mask that limits edits to only the selected part of the image. Now, with the layer thumbnail (not the mask) active, we go to Colors > Hue-Saturation or Colors > Colorize to apply a color change. The mask ensures that the adjustment only affects the specific region we selected earlier.
If the effect spills over too much or misses spots, we can fine-tune the mask. By clicking on the mask thumbnail, we can paint directly on it using a brush: black to hide, white to reveal, and gray for soft blending. This gives us full control over exactly where the new color appears.
Finally, we check our results by toggling the visibility of the original layer. Once we’re happy with the outcome, we can merge the layers or export the image as needed.
5. Conclusion
In this article, we explored three different ways to swap colors in GIMP.
First, we can use the Color Exchange tool, which is quick and works best for simple, solid colors. Next, the By Color Select tool, combined with Colorize or Hue-Saturation, gives us more control and preserves texture, making it ideal for photos. Finally, Layer Masks offer the most flexibility, allowing us to make detailed edits. The post How Can I Swap Colors With GIMP? first appeared on Baeldung on Linux. 
Content mobilized by FeedBlitz RSS Services, the premium FeedBurner alternative. |