
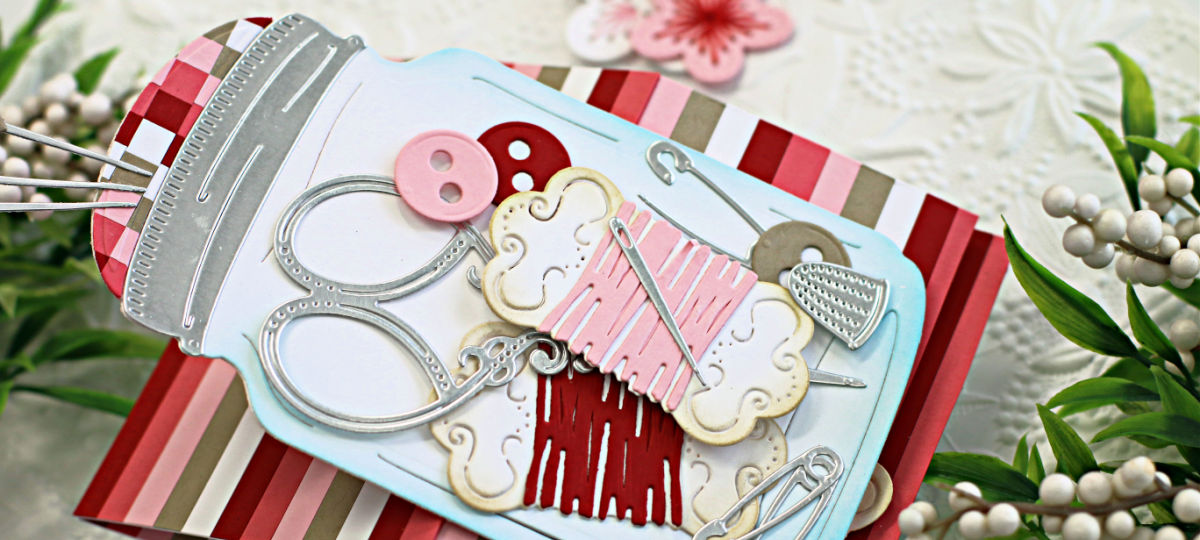
Hi crafty friends and welcome back. I have 3 cards to share with you today using products from the April Monthly Kits. Let’s start with the Spellbinders Pins and Needles Jar Easel Card. This is the Large Die of the Month Club, “Pins & Needles” and it’s full of all kinds of sewing and notions dies to create this fabulous (and very large) jar. Easel cards are making a come back of late so I thought I would create one to really show off this fabulous die set. Full card instructions are below for you.
PLEASE NOTE: This post contains affiliate links. See below for my full disclosure.
I got totally carried away making this card, starting by slicing up a bunch of card stock into 1/4″ strips to create my background paper. I used Altenew Double Sided Adhesive Sheets to glue them down and then attached them to my card base. I used Spellbinders card stock in Dahlia, Pomegranate, Pink Sand, White and Portabella.
I’m really enjoying the stitching theme of the kits this month. I’ve been a stitcher since about the age of 15, and recently just got back into cross stitching. Not only that, I have tons of quilting friends, so these cards are going to be perfect for them.
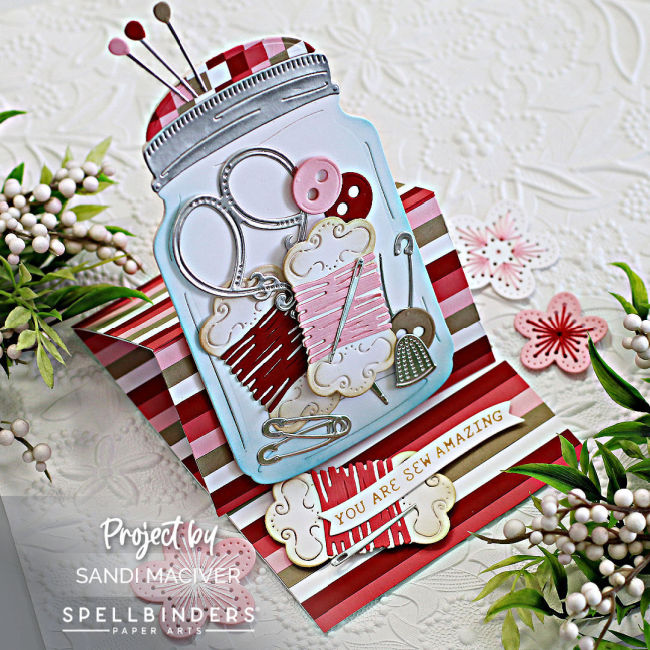
How to create the Spellbinders Pins and Needles Jar Easel Card
Start by creating the card base from white Hammermill cardstock 4-1/4″ x 11″, score and fold at 5-1/2″, then on one side, score in the middle again at 2.75″ to create the easel.
Next, Add Altenew Double Sided Adhesive sheets (one at a time), one on the inside for the base, and one on the outside easel piece. Add the strips of cut cardstock pressing hard to secure, and trimming off any overhang.
NOTE: You will have to score the easel fold a couple of times so it lays flat.
Next, Die cut the jar twice from white cardstock. Glue together and lightly ink blend Distress Oxide Ink Broken China around the edges to give the illusion of glass.
Then, Die cut all the notions using white and colored card stock along with silver. Use Brushed Corduroy Distress Oxide Ink to antique the floss holders a bit and then use white glue and foam squares to attach them to the jar.
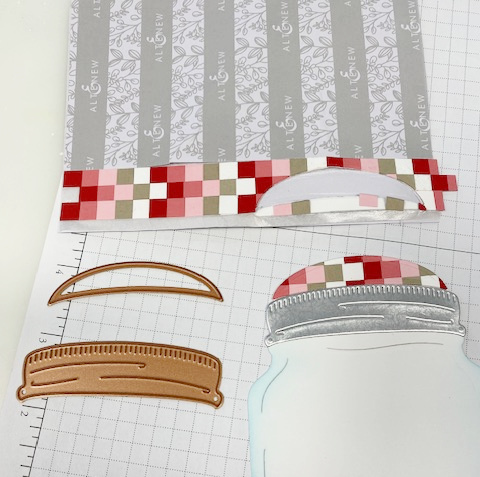
Finally, to create the pin cushion at the top of of the jar, I cut strips of the stripes paper at 1/4″, offset them and glued them to another piece of cardstock to create a patchwork. Use the lid die to cut it out and attach to the top of the jar, then cut the ring from silver and attach it last.
Add Bearly Arts White Glue to the bottom section of the jar only and attach it to the front part of the easel base. Place something heavy on top until it’s fully dry.
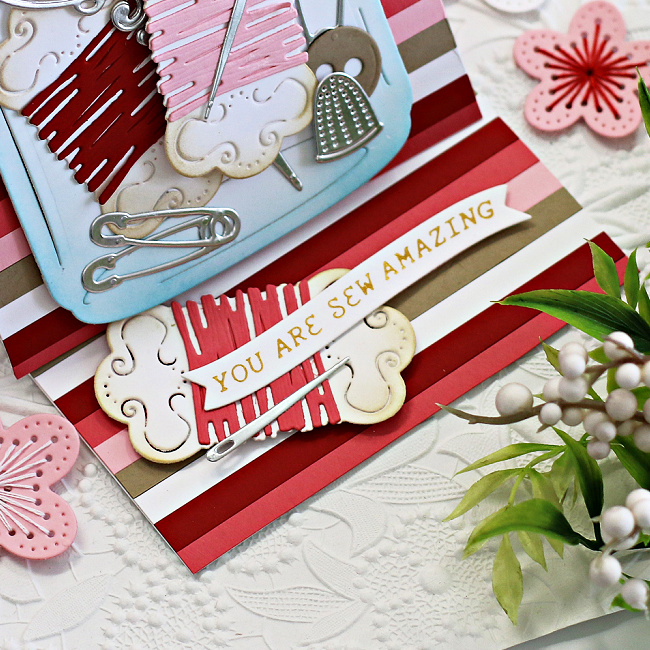
Meanwhile, cut out another floss holder, and use the Glimmer of the month kit to create a sentiment. Attach these with foam squares to the bottom (inside) of the card to create the footrest for the Jar when the card is open and displayed.
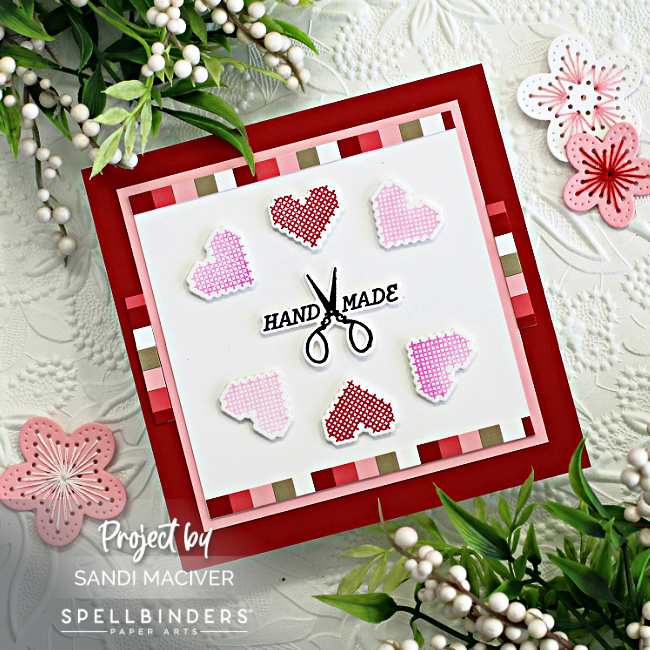
Spellbinders, Clear Stamp and Die Set of the Month: Happy Stitching.
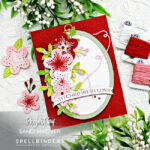
This adorable April Clear Stamp and Die of the Month, Happy Stitching, has all the sentiments for any sewing related card you could make. Along with “handmade” tags for your finished products, and this adorable cross stitched heart die which I absolutely adore.
Start by stamping the hearts two times in three different shades of pink and red ink to match the card stock used in the card. Once the ink is dry, cut out with the coordinating dies. Also stamp the “hand made” in black and die cut out.
Next, create the card base in Hammermill White: 5 x 10″, score and fold at 5. Cut a red card front 5″ x 5″ and attach flush.
Then cut a pink matte 4-1/4″ x 4-1/4″ and a white card front 4″x 4″. Cut 1/4″ strips of the stripes card stock you created to add a border at the top and bottom of the white panel trimming off any overhang.
Attach the white panel to the pink panel and then to the card base. Use the left over pieces of stripes at the sides for added interest.
Finally, using foam squares, attach the “handmade” to the center of the card and then the hearts in a circle.
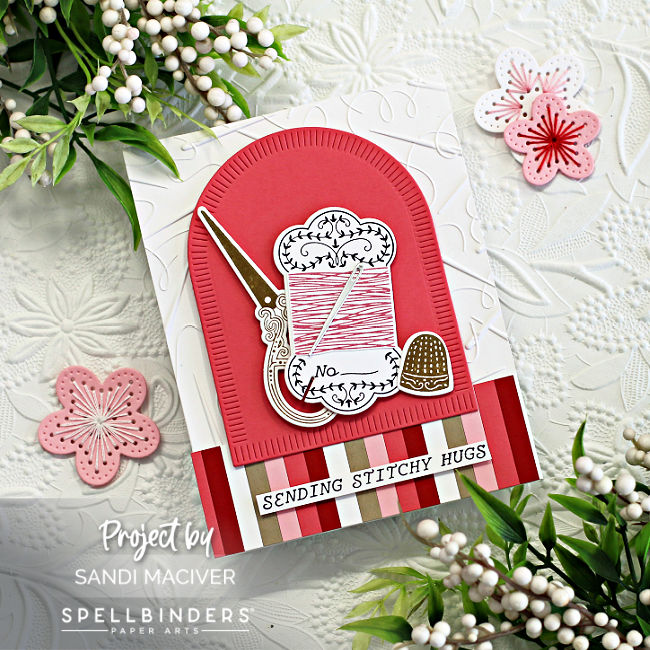
Spellbinders Stitched For You BetterPress Of the Month Club
Finally, we have the BetterPress of the month Club, Stitched For You. Again, more vintage sewing notion images.
Start by BetterPressing the images, I used black ink on the floss holder and sentiment. Tawny Brown for the scissors and thimble, and Garnet for the thread. The Silver Needle is from the Large Die of the Month.
Next, emboss the white card front with the One Stitch At a Time 3D Embossing Folder of the Month. Then, add a strip of the stripes paper at the bottom.
Then, Cut a smaller panel using the Make a Wish Arch Labels in one of the pink card stock (I used Dahlia for mine) and attach to the center of the card.
Finally, attach the art pieces using foam squares and white glue. Add the sentiment over the stripes paper also using foam squares.
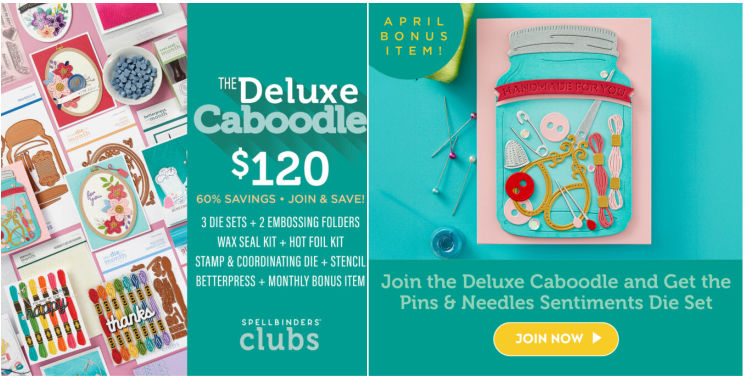
This has been a super fun month with all the stitching dies and folders. I hope you have enjoyed it too and have your colors all picked out for your projects. You have until the 27th to sign up for this month’s clubs, or choose the Deluxe Caboodle which includes all of them, plus a bonus gift. Now if my cross stitch project would work up as fast as these cards did, I’d be a happy camper, haha.
Here’s more inspiration for this months club kits:
 view two cards here
 I started with this beautiful hand stitched card here:

Visit my Card Making PDF Gallery for 350+ more card ideas

Card Making Supplies used for the Spellbinders Pins & Needles Jar Easel Card:
Here are the products I used today. Compensated affiliate links used where available at no cost to you.
Clicking on a thumbnail link and shopping provides me with a small commission which supports my website and allows me to continue bringing you new projects and videos. Thank you for your support. Affiliate and product disclosure are found on my disclosure page. All products were personally purchased except for Spellbinders Monthly Club Kits which were provided/sponsored by the company. As always, I was not paid to do this post. I only use and recommend products I love. Click on the icons below each product picture to go to my favorite stores.


-
-
- Follow me on INSTAGRAM
- Join 38,000+ following me on PINTEREST
- Subscribe to my YOUTUBE Channel
- Follow me on FACEBOOK
- JOIN my STAMP OBSESSION Facebook Group
- Check out my FREE PDF Gallery for over 350+ Card Making Tutorials
- How to make a SLIMLINE CARD – Info PAGE
- Do you like to stitch on cards? Then join our NEW FACEBOOK GROUP
-

– LOTS of great Paper Crafting Sales and New Releases going on this week – Check them out here
 Shop my Favorite Brands with my affiliate links
If you do place an order using my affiliate links (and thank you if you do) – please email me with the $$ amount before tax and shipping, and which company it was placed through, along with your mailing address and I’ll send you a hand made card as my thank you. Sandimaciver@gmail.com
The reason I ask for that specific info is the system that tracks the sales only gives us a dollar amount and company name, we do not know who made the sale.
Amazing cards Sandi! The colors are perfect and those die cuts are fantastic! 🙂
thanks so much Amy
Fabulous cards!
thanks so much Carol
fabulous cards, love this idea, thank you so much for sharing your beautiful creations, I will definitely try to make something similar!
thanks so much Anne, I hope you have as much fun as I did making them.
Beautiful cards, Sandi. Love the use of paper strips. Who doesn’t have some of those laying around! I’m also really loving the use of the red spectrum.
Thanks Gayle, I love chopping up paper and making designs with it, LOL, and it helps to pull all the cards together as one set.
Love them! These are fun especially the easel card with the jar. And you are my stripe loving spirit animal. I love to see stripes on a card!
Thank you Lisa, me too, isn’t it just so much fun to make them, I love it
Love all these cards, Sandi! They are just wonderful and so creative!
Definitely well worth the time and effort put into them!
Thanks so much Sharon. It was really fun to sit and create all 3 together because I could take bits of each design and incorporate it into the next, make a heck of a mess that I have to clean up today though, haha
Each one is beautiful!!!!!! Perfect for a crafty and creative friend!
aw thank you Natasha