
Remember Aims of Big Blue Barn Designs? She is a great friend of mine who lives in Alberta, Canada, who wowed many of us with her unique mobile jewelry design shop a while ago. You can read my post on how she single-handedly repaired and repainted an old fibreglass trailer of hers to use for her summertime outdoor craft shows. She also sells through her online shop as well as her local hair salon.
Aims was wondering what her next collection would be when her husband suggesting drawing on shrink plastic because she so enjoyed painting her trailer!

She was initially skeptical about using shrink plastic, such as the Shrinky Dinks brand. She said:
The whole shrink plastic experience was an eye opener. At first the name 'shrinky dinks' threw me off. To me it seemed 'cheap'? But when that plastic shrinks up and becomes thicker I was truly amazed. Then the resin on both sides makes them seem well worth the prices I put on my pieces and got orders for immediately at the salon.
Aims went back to my blog to look up the tutorials I wrote about (they are linked at the end) especially the one on easy charms and pins.

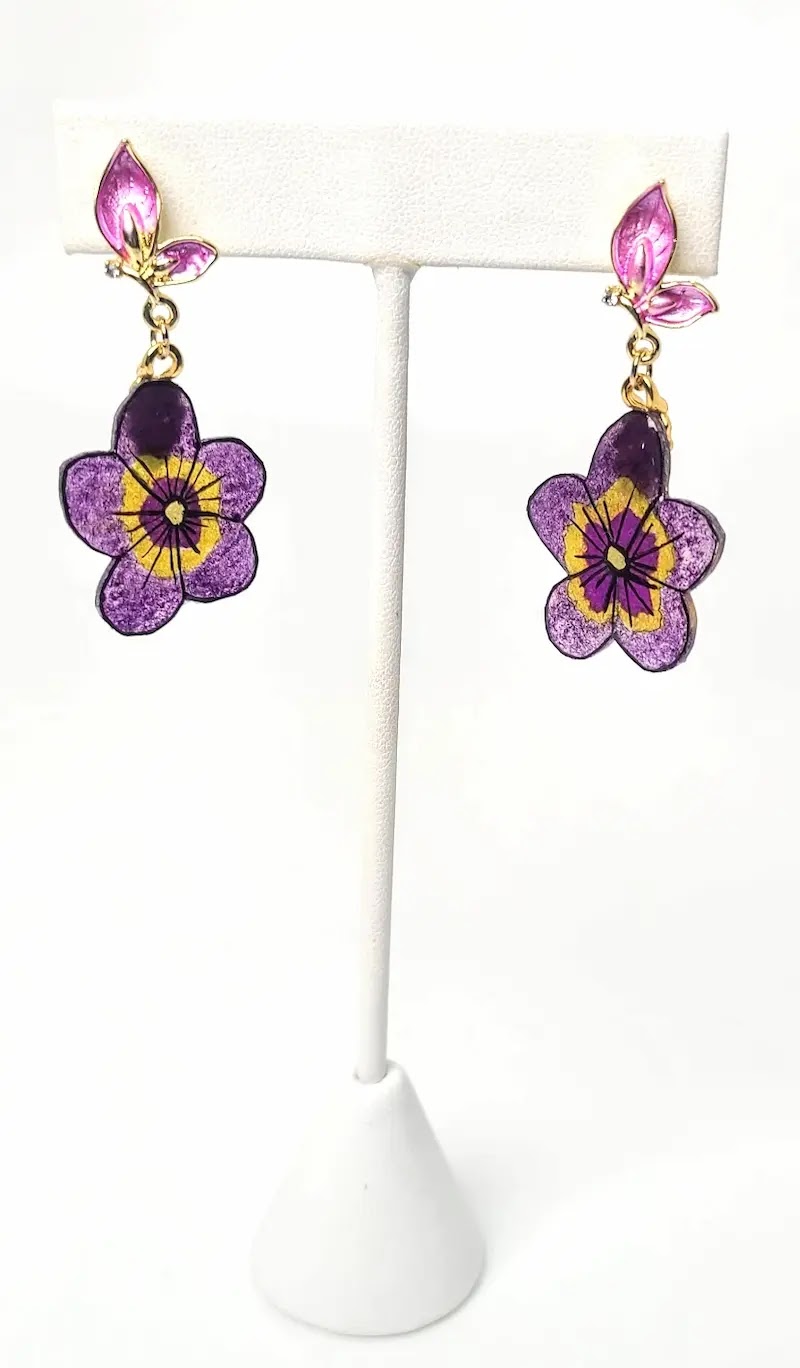
She so enjoyed the technique that she created dozens of designs, and not just of her little trailer! Some of her designs have been photographed for her website. The rest are quick photos she sent to me.


I haven't had much luck with alcohol inks on shrink plastic. Aims says she used these on her bee wings and dragonflies. Her advice is to go very slow using a straw to blow the ink around gently. A hair dryer on cool to dry each alcohol ink drop works well before layering with another ink drop.
She used her Cricut to cut out the trailer shapes but otherwise scissors should suffice. You can sand the edges of the shrunk plastic if you have too.

And one of my happiest moments was discovering I could make my own earring post findings. That was truly exciting for me. I'm only going to be limited by my own imagination when I make earrings going forward. I even had a good look at some of the findings I got which I thought I was going to use in making polymer clay earrings.
She is also intrigued with the possibility of molding shrink plastic after she went back to the post about ArtMaker58's shrink plastic molds.


Disclosure
Thanks Aims for letting me share your adventures with shrink plastic and your lovely designs. It's pretty clear that you are not yet done with this technique!


Before You Go :
- Artful Shrink Plastic Jewelry Classes, Kits and Tools by ArtMaker58
- DIY Shrink Plastic Tutorial | Pin and Charm Making the Easy Way
- 3 Beautiful Shrink Plastic Flower Earrings Tutorials Uses Different Colorants
This blog may contain affiliate links. I do receive a small fee for any products purchased through affiliate links. This goes towards the support of this blog and to provide resource information to readers. The opinions expressed are solely my own. They would be the same whether or not I receive any compensation.
______________________________
Original Post by THE BEADING GEM
Thanks so much for posting more of my work Pearl! I had to laugh at one of your statement saying I had them at my salon. I don't own a salon but I fortunate that the salon I go to wanted to showcase my work and I've had my work there for a year and do very well with sales there. They were so excited when I took most of these earrings in and I got orders from them within the first 24 hours! I offer clip on earring backs upon request and one lady order 2 different butterflies with clip ons. Instead of taking the ones that I had there and changing out the earrings backs I made her new ones. I was in there the other day and I see the ones she had chosen have already sold as well - so bonus all around!!
ReplyDeleteI have ordered and received everything I need to now try UV Dip Resin. I've been following SunDIYday Jewelry Tutorials and she shows how to use UV Dip Resin to make beautiful 3D flower earrings that I'm eager to try so that will be my next jewelry adventure!
I do love using the shrink plastic. Before I started I did a test piece with a bit of pencil colouring on it. Mine shrunk by almost 50% so it was easy for me to judge how big I needed to make them. They come out so thick which was a surprise to me after looking at the thickness of the shrink plastic before I started. I found that by covering them with the resin that no sanding was needed except for the holes if I mistakenly covered them with resin. I learned to stick a toothpick in those holes so they wouldn't fill with the resin.
I'd still be playing with the shrink plastic even now because I enjoyed it so much but I gave myself a list of to-do projects this year and I've moved on to my next one - but I can hear the shrink plastic calling me every day - even just one piece it's saying! LOL!!
For anyone who wants to try this - just enjoy yourself. It's truly a ton of fun to watch it curl up and then lay flat again in my studio toaster oven! To ensure the piece is really flat I suggest putting a weight on top as it cools. Enjoy!!
Thanks so much for inspiring us all. (Chuckle) I did add the word "local" in front of salon!!
Delete