
Lashes have always been my thing. I have spent many hours and many more dollars trying to figure out how to make them look the longest and most voluminous without breaking the bank (ie: extensions).
Yes, I’ve even tried fake lashes (ugh, aren’t they so uncomfortable?!)
I have several friends committing to extensions, but guys, I just can’t get myself to do it. It might be the fear of losing my lashes (I’ve heard this happens as time goes by and extension treatments continue).
But, in reality, it might just be that I am as cheap as they come? <— Probably that.
Sometimes I am frugal to a fault, but in this case … it worked out for the better. Read on to see how my lash lifting kit did for me.
I’m going to be reviewing everything in the most popular lash lift kit along with the at-home lash lift process, prices for an at-home lash lift, and how to do your own lash lift at home.

At Home Lash Lift Review
I can’t help but first sharing the steps for using your own lash lift kit at home:
- Gather and layout your supplies
- Clean your eye area
- Fit the eye pads to your eyelids
- Attach your lashes to the lift pad
- Apply the perming solution to your eyelashes
- Apply fixation solution to your eyelashes
- Apply nutrition serum to your eyelashes
- Remove eye pads
- Apply cleanser to your eyelashes
Next, let’s review some questions that I imagine you came here to get answered. Why keep you waiting, right??

How much does an eye lash lift cost in the salon?
A boatload to be frank. Eye lash lifts are in my opinion really expensive at home. Lash lift prices range from $80-$200 depending on the salon location and provider that you choose.
Whereas an at home eyelash lift kit that you can get online, for example, this lash lift Amazon sells retails anywhere from $14.99 to $30. This is the exact lash lift kit that I have.
Can you still wear mascara with a lash lift?
Yes! Your mascara will glide right on and stay curled all day and night after your lash lift, too.
Before doing a lash lift sometimes I felt like I needed to curl my lashes when the mascara was dry to give them more lift.
This always backfired because where the curler pinched my lashes the mascara would get clumped and it never ended up looking how it should.
Post-lash lift, no curler needed. No more tools every day! Love this!

How do lash lifts work?
A lash lift is a perm for your eyelashes. That’s the easiest and truest way to explain exactly what it is. If you consider yourself crafty, good at makeup and have good attention to detail you’re going to be able to master this process at home.
The supplies are small, and the product can be dangerous if it gets in your eyes though. With that being said, if you are not usually a do it yourself person I would recommend at least going to the salon for your first treatment just to see how it’s done, how it feels, etc.
The products will likely be the same (although note that some salons do a keratin lash lift, and some do a lash tint as well, costing more) but for the most part, the process is the same. The results will be the same, assuming everything goes as planned at home so you can see the results and see if you like it enough to try a lashlift at home.
Or, maybe you decide you love it, but you don’t think you can do it yourself so you continue at the salon.
The latter is definitely not me. I’ve never had a lash lift done in the salon, and as I mentioned, I’m way too frugal to pay for something like that, especially when I know I can do it on my own.

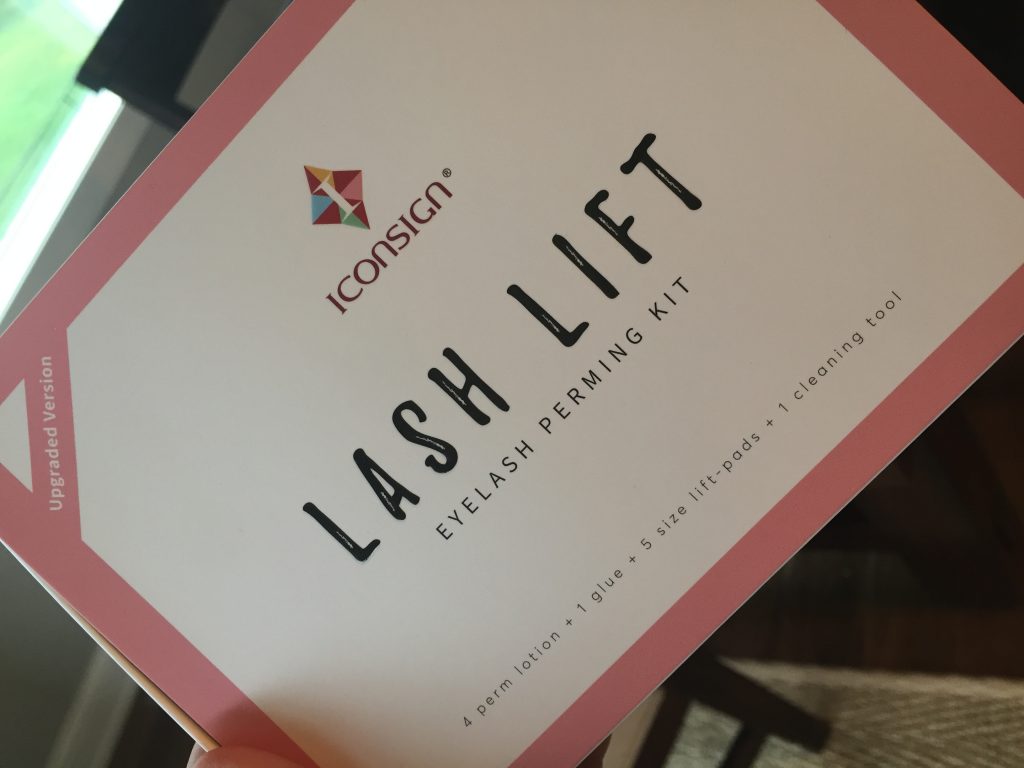
What is a lash lift kit?
An at home eyelash lift kit is a perm for your eyelashes. Yes, it’s just like the perms from the ’80s. I know – you’re probably just as mindblown as I am that you can finally ditch the eyelash curler and instead have perfectly curled eyelashes when you wake up in the morning.
And, not to mention the pool this summer, right?
How do lash lift kits work?
Lash lift kits include everything you need to do a lash lift at home. The process starts by wrapping your eyelashes around pads that are pre-shaped and attached to your eyelids. As the perming solution takes effect your eyelashes are shaped to the shape of the eyelid pads.
It’s really as easy as that!
Are Lash Lift kits safe?
I still have my eyesight, but I was very, very careful. Again, if you’re not handy and detail-oriented, I would opt for a lash lift in the salon instead of doing your own eye lash lift at home.
What’s the best professional at home eyelash lift kit?
If you’re after the best at home lash lift kit, I love the iconsign lash lift products HERE that I used for my at home lash lift. There are so many brands (see them all here). I do recommend swapping out the lash glue for the Kiss or Duo brands as the one that comes in the kit isn’t quite as tacky as you want it to be.
The lash glue is one of the key pieces to getting the right curl of your eyelashes so if your lashes aren’t sticking to the pads with the glue, then you won’t get a curl, no matter what you do.
What stores sell lash lift kits for doing a lash lift at home?
Lash Lift Kits on Amazon
Lash Lift Kit Walmart options
Lash Lift Kit Ulta options
I don’t think you need to get your lash lift kit in store. The options online at Amazon especially are awesome.
Do lash lift kits work?
Yes, at home lash lift kits work! Check out my before and after below. I have not had to use a lash curler (at all!) and my lashes feel great. They’re not brittle, mascara slides right on and comes off perfectly. When I wake up in the morning my lashes are curled and when I take my makeup off at night they’re still curled as well.
Is the iconsign lash lift kit a good do it yourself lash lift kit?
I love the iconsign lash lift kit and it’s SO affordable. I think I will get six to eight uses out of this one iconsign lash lift kit.
How long is lash lift good for?
The average person sheds 4-5 lashes a day, so at five weeks 30 to 40 percent of those lashes will have been shed with new ones growing in their place. This means that you’ll want to do your lash lift every four to six weeks, but not more often than every four weeks.
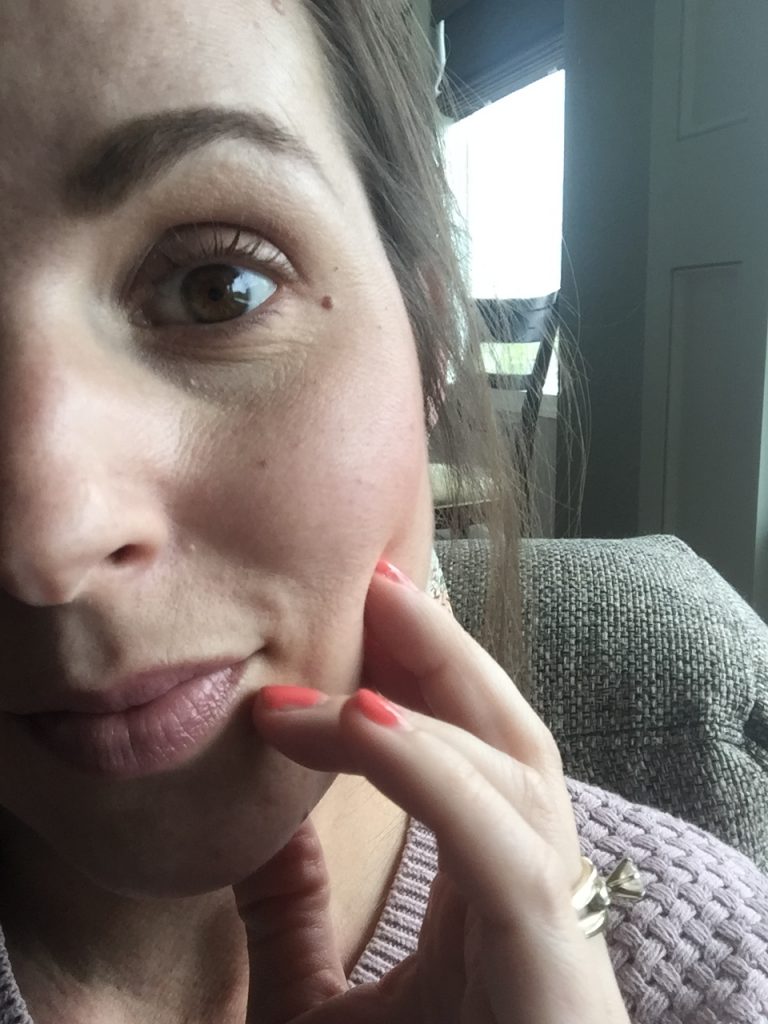
Before my lash lift (no mascara):
After my lash lift (no mascara):
Here’s my attempt at an online lash lift class:
Now that we’ve gotten the most popular lash lift questions out of the way, I’m going to tell you exactly how I did my lash lift at home.
How I did my own lash lift at home (my tips and trials):
1. I did my lash lift at night
Everyone was in bed. Yes, even my husband was in bed. I didn’t need anyone giving me a hard time. As you scroll down and see my pictures you’ll understand why. Ha!
I also didn’t want anyone to interrupt me.
One more reason I did the lash perming kit at night – I knew that the next day I wouldn’t need to get my eyelashes wet. You should not get your eyelashes wet for 24 hours after doing your eye lash. I started my lash lift at 8pm on a Tuesday night and I didn’t get my lashes wet with water until 730am Thursday morning so my eyelashes weren’t touched for about 36 hours.
2. I used ClingWrap instead of Saran Wrap.
And it worked! I didn’t have Saran Wrap, and I imagined that the point of it was to keep the solutions from drying out. Atleast that’s what I’m telling myself.
3. The process took one hour.
Well, an hour and a half if you count the 30 minutes going to and from the mirror staring at my handiwork before I went to bed. I was amazed and part waiting for my eyelashes to do something unexpected (spoiler alert: they didn’t, they just stayed curled!)
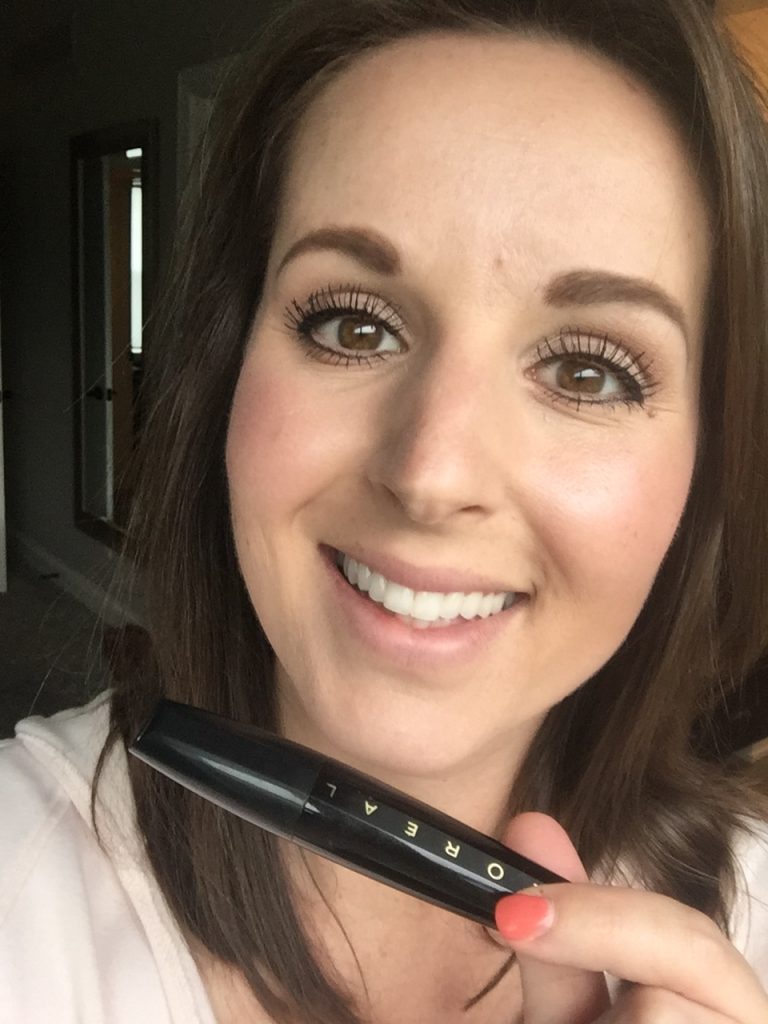
L’Oreal® Paris Voluminous Extra-Volume Collagen Mascara that I am currently using (and what I used when I took these pictures)
Onto the steps that I personally took (with great success!):
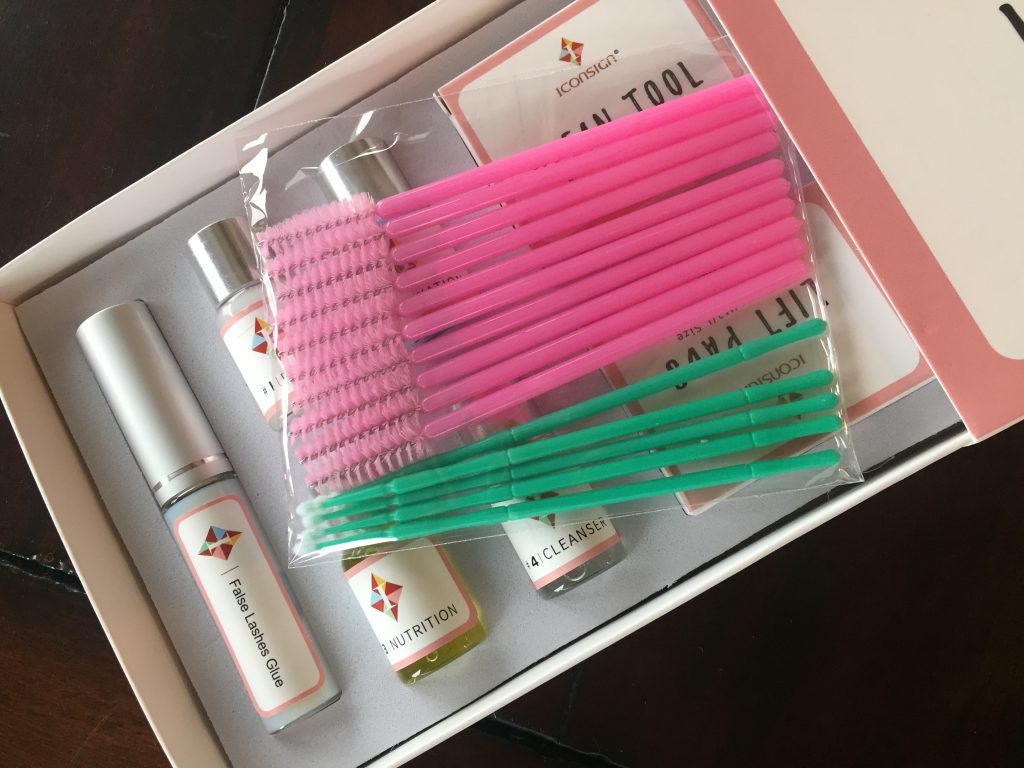
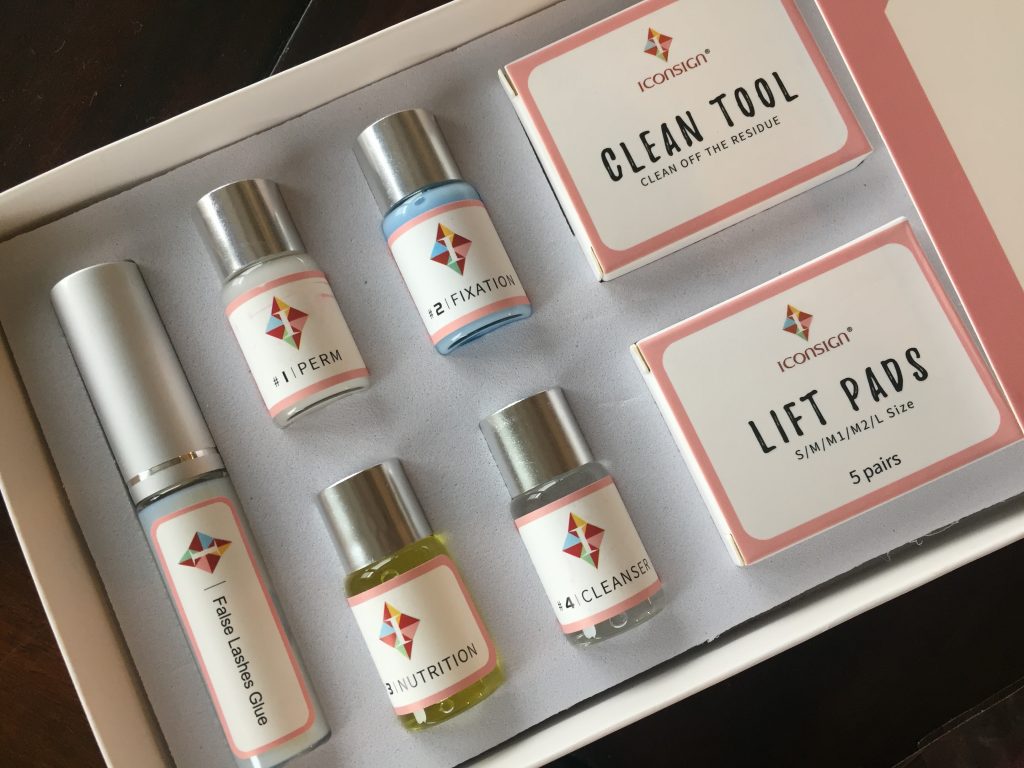
Gather your supplies:
- Lash Lift Kit
- Eyeshadow Brush (or other small brush you can use with this kit for good)
- Better quality eyelash glue
- Eye makeup remover cotton rounds
- Hair tie/wrap to keep your hair away from your eyes
- 3×3 squares of Cling Wrap or Saran Wrap
Clean your eyes
Use the cotton rounds and the cleanser solution to clean off not only your eyelashes but also the area around your eyelashes including your eyelids.
Cut the ends of the eyelash pads to fit your eyelids
Careful not to cut too much because you need your eyelashes to curl up over the silicone eyelash pad.
Attach the lift pads to your eyelid
Using eyelash glue cover the backside of the eyelid pads. Wait about 20 seconds for the glue to get tacky, close your eyelid and stick the pad to your eyelid with the bumped out part parallel to your eyelash line.
Put a layer of lash glue on the bump of the lift pad
Let the glue sit for 10-15 seconds. Sorry for the really fuzzy photo, I couldn’t really see what I was doing. 😀
Attach lashes to lift pad
Using the sticks with the pads on the ends, a Q-tip with the cotton tip removed or an eyeshadow brush (that you don’t need to use again for eyeshadow) brush the lashes up onto the silicone pad. Since the glue is still wet, but tacky, the lashes should stick right on.
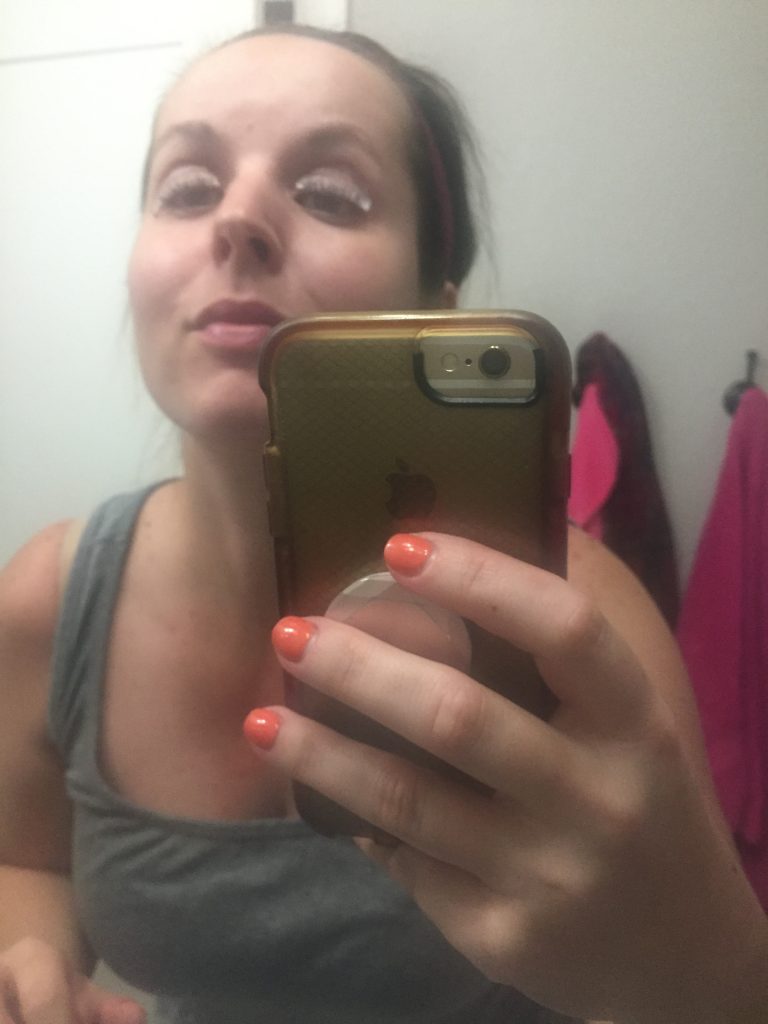
Apply perm solution to lashes
Being very careful, use a brush to apply the perm solution to the lashes evenly, making sure to get a layer on each of the lashes.
I used this brush that I bought separately:

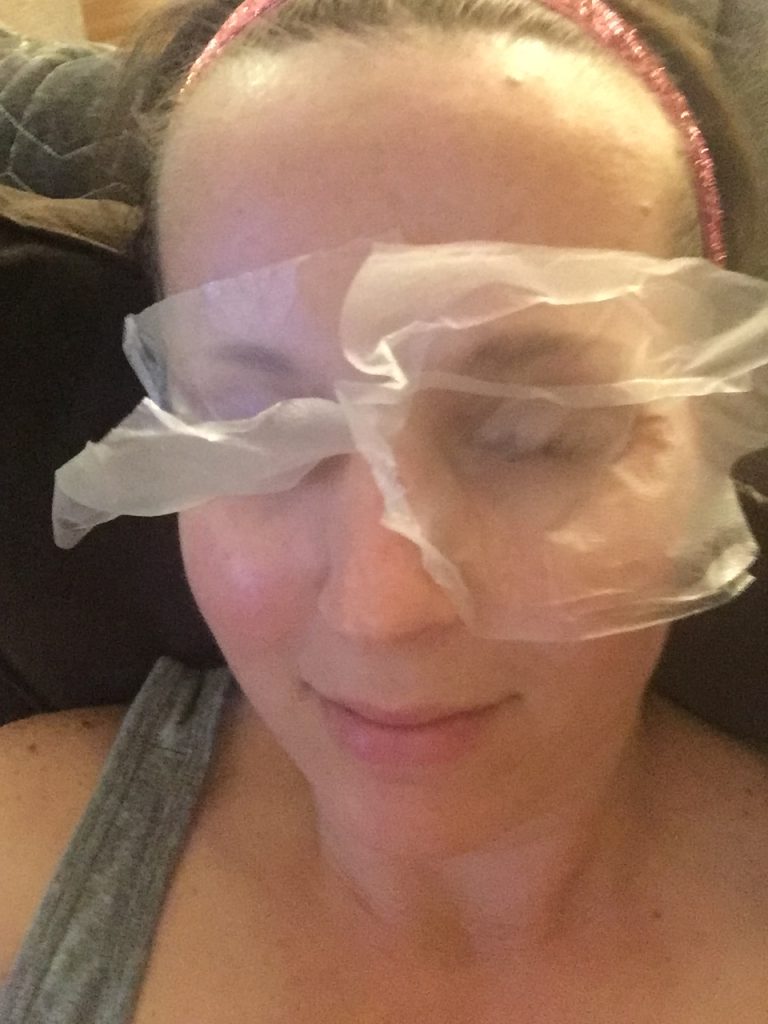
Sit or lay and cover eyes 8-12 minutes
If your hair curls easily, do 8, if your hair doesn’t hold a curl, do closer to 12. I did 12.
Apply fixation solution – wait 8-12 minutes
Using the brush, get a layer of fixation solution over each lash. Cover again and wait 8-12 minutes.
Clean Lashes
You’re almost done! Use the cleanser and a Q-tip to remove glue and perm solution from the lashes. You will need to spend a little time on this as you don’t want much glue left on your lashes.
Give your eyelashes some nutrition
Using the brushes that come with the lash lift kit, an eyeshadow brush or brush nutrition on the eyelashes.
Use the Q-tip with cleanser or brush to sneak under the eyelid pads and gently remove that as well.
After removing the eyelid pads you can brush nutrition on your eyelashes using the mascara wands as well. Too many nutrients never hurt.
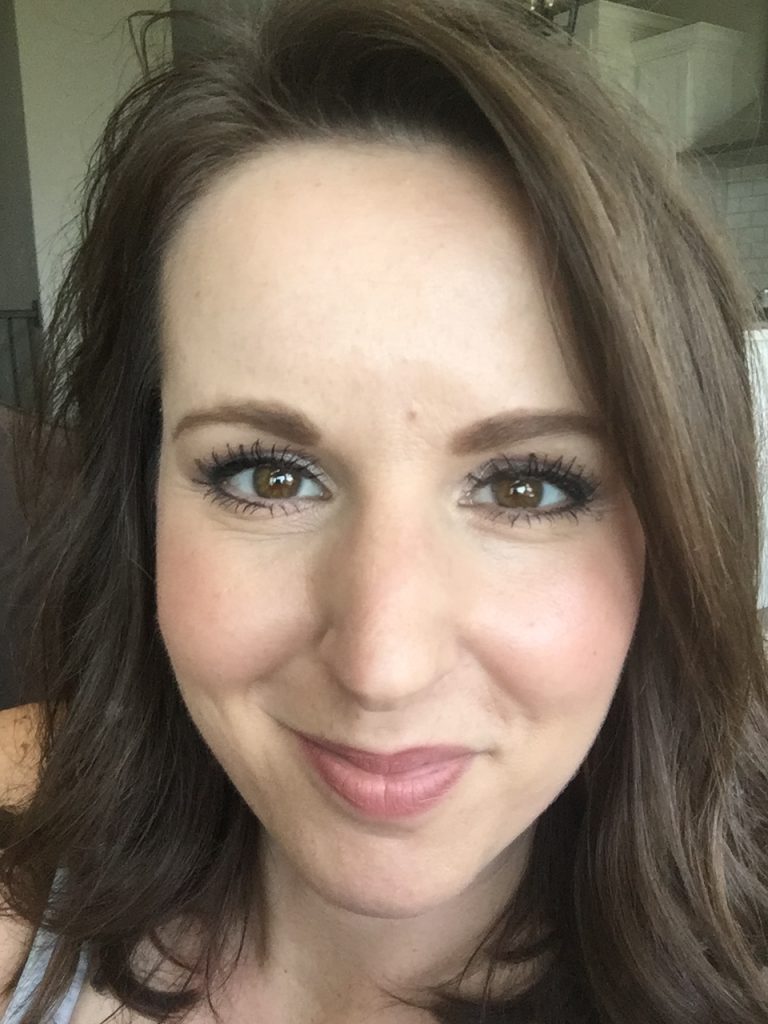
Me on Sunday after doing the lash lift kit at home (still using no eyelash curler before my mascara!) I LOVE the results!!!!!
Additional lash lift kit tips:
- ** I recommend using an eyelash serum every night to keep your lashes strong.
- ** Do NOT wash your eyelashes off with water, it will remove the perm solution. I did wash around my eyes with a washcloth, soap, and water (but very carefully!)
24-48 hours later wash your face, eyelashes, etc. and enjoy!
What do you think? Are you going to try doing your own lash lift at home? Have you tried it? Have you had it done? I’d love to hear!
P.S. To save money I also do my own shellac nails at home!
What a different 😀
You talks about a higher quality ‘eyelash glue’ will any eyelash glue from the drugstore work ?
Sure will! Mine is from Walgreens!
If I am going to tint my lashes as well do I do that after the fixing solution before the nutrition solution?
Hi Danielle, Sorry I am just seeing this. I am still trying to nail the tinting part. Let me know what works for you!
Kate
I just bought a kit and I am nervous! Did you use the same brush for the perm solution and the fixer? If so did you rinse the brush between?
You’ll do great! I just rinse and dry really well in between.
Good luck!
Kate
i am allergic to the glue when i used to do lash extensions, do you think there is a chance this will do the same to my eyelids?
I wouldn’t try it, unless you have a glue that you know that you’re not allergic to.
Wow! Your’s looks so great! I have a couple of questions:
1) Did you just put the glue on the pad or did you also brush the glue on your lashes?
2) Do you put the solutions on just the root of your lashes or from root to tip?