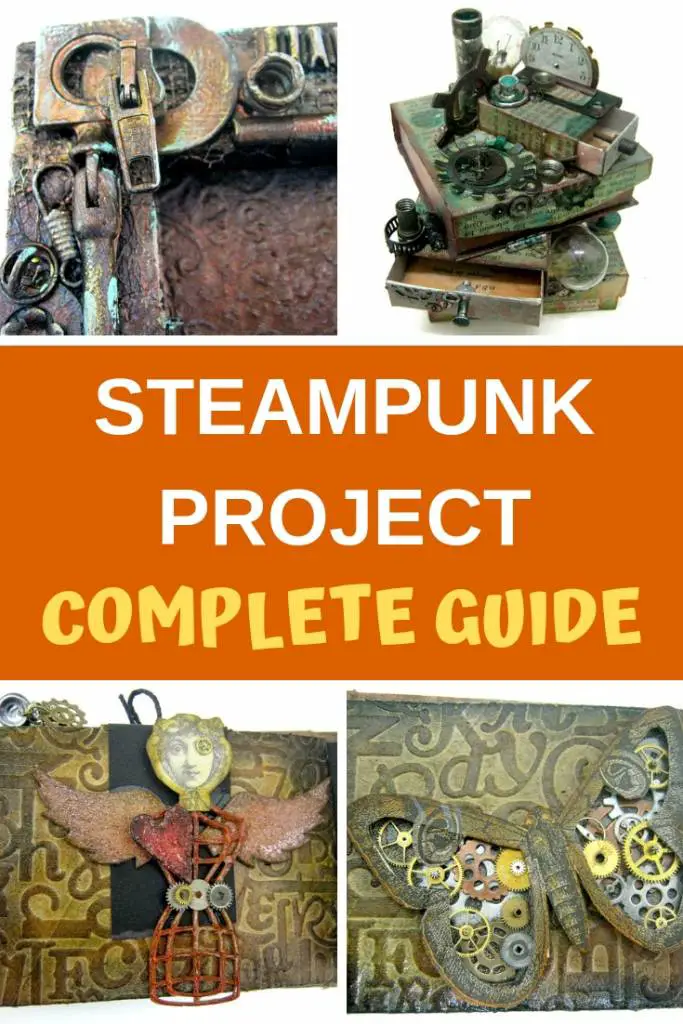
Inside: the ultimate guide to make a steampunk project including all the materials, steps and secrets you need to know.
I previously wrote a few blog posts and tutorials about steampunk projects but I feel I did you a disservice. All those posts were informative but lacking in information. So today I'm collecting all the scattered information into one ultimate guide and sharing everything I know about steampunk projects and how to make them!

WHAT IS STEAMPUNK?
Steampunk is a sub-genre of science fiction or science fantasy that incorporates technology and aesthetic designs inspired by 19th-century industrial steam-powered machinery. The steampunk style works are often set in an alternative history of the 19th century's British Victorian era or American "Wild West" and incorporate mechanical parts and fantasy alongside old futuristic and Victorian elements like hot air balloons, light bulbs, wings and pipes.
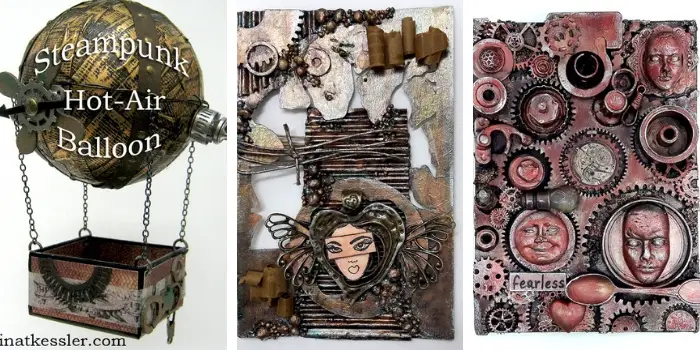
TYPES OF STEAMPUNK PROJECTS
Steampunk is a movement that extends beyond crafts and DIY to fashion, furniture, video games and music. For our purpose we will concentrate on mixed media projects like:
- Canvases and home decor
- Altered items that can range from boxes, brushes, tins and other craft supplies to household items such as glasses, clocks and cameras.
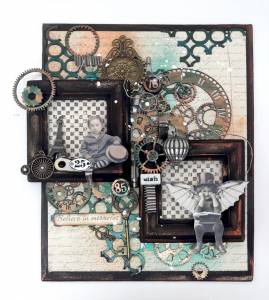
- Mini albums and scrapbook layouts
STEAMPUNK PROJECT MATERIALS
METAL PARTS
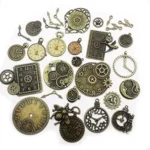
The important thing about steampunk projects is not necessarily the material of the items you add but their style and look. For example use cogwheels made of chipboard is better than using hearts made of metal because cogwheels are consistent with the steampunk style and hearts not so much. Steampunk is all about mechanical, industrial and grunge that means lots of cogwheels, screws, clock parts, mechanical parts etc.
Having said that metal parts are a key ingredient in any steampunk project for these reasons:
- UNIQUE: there are some items that you can only get in metal for example clock parts or hinges.
- TEXTURE: metal parts, especially found items, have sometimes a texture of rust and grunge you can only find on metal and that's the base of steampunk!
- SHAPE: some 3D parts like pipes, screws and mechanical parts are only made from metal.
- COLOR: metal has a distinct color of copper, gold or silver that you need for a steampunk project.
WHERE TO GET METAL PARTS FOR STEAMPUNK PROJECTS
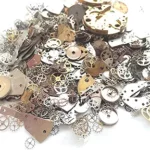
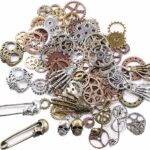
NEW METAL PIECES
You can get metal pieces in two main places: craft stores and Home Depot type of stores. Anything from cogwheels, nuts and bolts, washers, hinges and more. The color of metal can change from silver to copper and gold. They are usually shiny and have a new look but some are in a vintage look.
OLD METAL PIECES
These are my favorite parts! I have a stash full of them in all shapes and sizes from small screws to large hinges. These parts are usually not available in craft stores but here how you can get them:
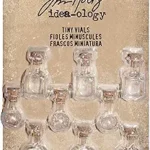
- Small light bulbs: ask the auto mechanic to keep used light bulbs.It's good for the environment and saves money.
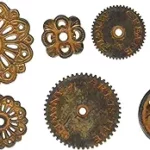
- Cogwheels and screws: find industrial workshops or factories that use them or go through your husband's tool box.
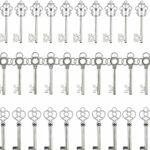
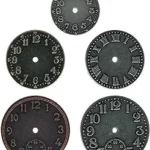
- Clock parts: go to your local watchmaker and ask him to keep old broken watches and parts.
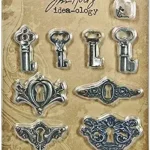
- Metal embellishments: you can find old jewelry pieces in garage sales an flea markets.
- Zippers: ask your seamstress to save you some of the broken zippers she replaces.
Scroll down to see where and how to get these materials...
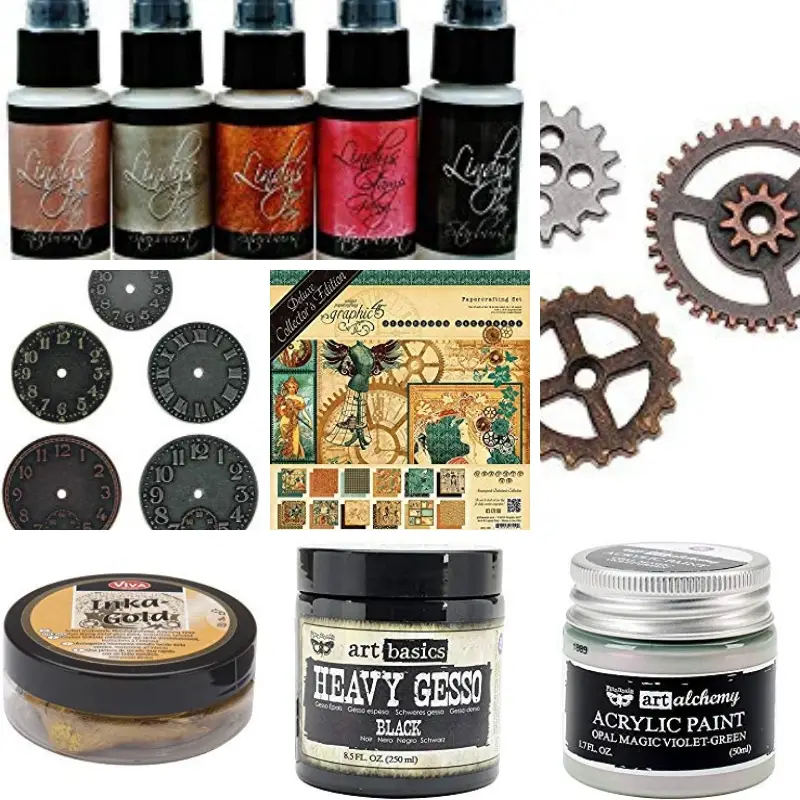
ACRYLIC MEDIUMS
To prep and assemble your steampunk project you'll need two main materials:
GESSO
Gesso is very similar to white acrylic paint, only thinner. It dries hard, making the surface more stiff. You'll need to use gesso for:
- Priming the surface for painting, making the surface slightly textured and ready to accept acrylic paint. Without gesso, the paint would soak into the weave of the canvas.
- Covering the project after attaching all the parts in order to paint over them with acrylic paints. The beauty of gesso is that you can apply it to nearly any surface, and then you can paint on that surface with acrylic paint.
Gesso is traditionally white, but nowadays you can also buy black, clear gesso and colored gesso ready made. I like using black gesso for my projects because it looks better as the background for the darker colors I use to paint over the project.
GEL MEDIUM
Gel Medium is essentially a binder without pigment. Without getting too technical, it was initially an acrylic substance used to build texture in paintings by mixing with acrylic paint. It increases the paint’s transparency and dries clear without diminishing its consistency or adhesive properties. Gel medium is inter-mixable with all types of acrylic paints. It is light, water-based, flexible, and permanent.
For our purpose the best gel to use is heavy gel. The heavy gel is the perfect glue to attach the heavy metal parts to the project. It's strong, thick and dries clear and even if you have a bit of leftover gel on your project after it dries you can paint over it.
PAINTS
Another important aspect of a steampunk project is the color of it. The color is what unifies everything and gives it the final touch. You'll need two types of paints:
- BASE PAINTS: use acrylic paints to paint your items and project. You can use regular acrylic paints or metal acrylic paints that have more shimmer and a metallic finish to match a steampunk creation.
- FINISH PAINTS: to finish your project add a metallic or rustic finish with waxes or rust paints. Waxes are oil based paste that will accent your elements with a metallic and shiny look. Rust paints are textured paints that will give your project that rusty and grainy look of an old rusted metal.
SPRAYS
Other than acrylic paints sprays are a great way to add color to your project. The spray can cover hard to reach areas around and under embellishments and can blend easily to create gradual effects and blended colors for a natural metal color.
TEXTURE MEDIUMS
Mediums like modeling paste, beads or sand paste will add texture to the project for a more realistic look of the grind and rust on the background and elements. This added texture will add to the decay and disintegration look you're looking for on a steampunk project.
PAPERS
Not all steampunk projects require paper but you can add it to your mixed media canvases, altered project and use it as abase for mini albums. Any paper with a steampunk look and images will do. One of my favorite brands is of course Graphic 45 which has the most amazing steampunk paper collections.
EMBELLISHMENTS
Other than the metal pieces we discussed basically almost all embellishments can be used it's just a matter of material and color. Consider what is the shape of the embellishment angels or flowers are less suitable for a steampunk project.However if you want to use a flower in your steampunk project you can create or alter a steampunk flower by adding themed shapes like a clock parts or a nut of a bolt. even the most delicate flower will get a steampunk makeover if you change its colors to more industrial colors like rust, brown and copper and add a little metal to it.
For example: if you're using flowers use dark colors or metal flowers. having said that the best embellishments to use are industrial looking items like cogwheels, pipes, light bulbs, nails etc. or Victorian looking items like clothes, wings and shoes. The best material to use is either chipboard or metal.
WHERE TO GET SUPPLIES FOR A PROJECT
Other than what I mentioned above, you can also find a lot of these parts and much more on Etsy. There are many sellers there that sell industrial parts in various sizes and shapes. Once you start looking for these parts you'll be surprised at how many you'll find.
Another source is to buy them:


ELEMENTS OF A STEAMPUNK PROJECT
When creating a steampunk project you need to have three main elements:
- THE RIGHT COLOR: a steampunk look is achieved by using industrial and metallic colors like brown, bronze, gold, black and all their combinations. Other colors that can be used are the colors of rust and oxidization like green and teal.
- FOCAL POINT: every project needs a focal point. It can be a photo of a person or an image but the most important thing is that the focal point will be in the right look and context. If you use a photo of a person it needs to be an old photo with a vintage look or a photo of someone that lived a long time ago. Any image will do as long as it has that steampunk look.
- LAYERS: layer your project with as many layers as possible. Start with the background and add your embellishments in layers one on top of the other.
HOW TO GIVE EMBELLISHMENTS A STEAMPUNK LOOK
If you're using non metal or steampunk embellishments on your project you need to make sure they match the theme and look of your creation.
- Color the embellishment: if you're using chipboard paint it with metallic or acrylic paints so it'll have the same color as the other items on your project.
- Add an item: add wings to a persons photo or a screw for a butterfly body to "steampunk" it.
- Add texture: add rust paste to embellishments to add a rusty effect to them.
CREATING A STEAMPUNK PROJECT
The process of creating your project is the same for all types of projects. They differ only in the different materials you're using. The projects you can make are endless it's just a matter of choosing a mini album, a mixed media canvas or a 3D project.
Scroll down to find some steampunk craft tutorials and a special access to a video tutorials list with step by step , detailed videos for each project.
MINI ALBUM
Build a mini album from scratch using tp rolls with a faux leather look. Add embellishments to the pages and create an amazing cover. This is a two part tutorial:
TAGS
Create tags for gifts or cards or even a little mini album bound with a ring.
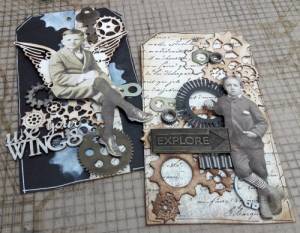
Do this:
- Create a background with papers and/or stamping and stenciling.
- Add texture with modeling paste and stencils.
- Choose your focal point and add to the tag.
- Add embellishments. If you're not planning to bind the tags into a mini album you can layer the embellishments as high as you want.
TIP: tags are usually light so don't use heavy embellishments on them. Instead add chipboard pieces that you color with metallic paints to give then the steampunk look.
HOME DECOR WALL HANGING
Make a "light" steampunk wall hanging without a lot of paints or mediums.
Here's how:
- Cover thin canvas with paper.
- Add texture to background with painted or sprayed chipboard pieces.
- Add focal point.
- Embellish with light weight metal embellishments.
MIXED MEDIA CANVAS
Create a mixed media canvas using different mediums and materials.
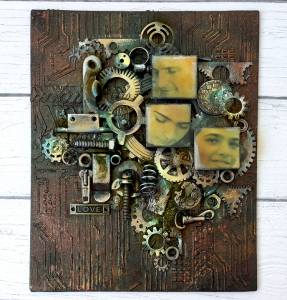
Do this:
- Create texture on background with modeling paste and stencils.
- Layer metal embellishments.
- Paint the entire project with gesso.
- Cover canvas with metallic acrylic paints.
- Add accents with wax and rust paste.
- Add photos as focal point.
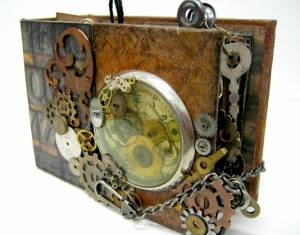
ALTERED BOX
Transform a box into a steampunk creation.
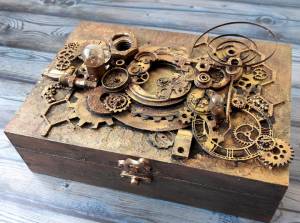
Here's how:
- Paint box with black acrylic paint.
- Arrange embellishments on top.
- Cover box and embellishments with gesso.
- Spray or paint project with metal colors like copper.
GET ACCESS TO THE STEAMPUNK VIDEOS PLAYLIST
Click the link or the image below to get access to more than 15 steampunk project video tutorials.
All videos are easy to follow and all projects are easy to make! If you haven't tried steampunk before and you are looking for guidance or if you are a steampunk fan looking for inspiration this is the video list for you!

SAVE it for later - PIN IT!
Have fun creating!


24 comments on “THE ULTIMATE GUIDE TO MAKE A STEAMPUNK PROJECT”
Thank you for the great tutorial! I fell like I finally understand the purpose of heavy gel, gesso and sand paste and can finally start a project.
Thinking of creating a steampunk meets antique auto lamp..have you done anything like this or can you refer me to a site?
Great article too.
Thanks
Andy
No, but you can cover it with steampunk parts including the stand
You explained things so well and understandable. You broke it down into categories and lists. First one to really know what STEAMPUNK look is and how to do it. You also gave great tips.
Thanks so much!
Hello
Thanks for all info. One thing I can’t suss out is where to get the background pipe work I often see, which is raised up, usually has a tap or two included and looks as if it’s embossed onto the background rather than actual pipes. Where is this obtainable from? It seems to be widely used…..but I seem to be missing out!
I think it’s by Tim Holtz or Prima marketing
I believe you are talking about the raised textures (i.e., letters, lines, patterns, etc.). This look can be achieved by using modeling paste passed over the top of stencils using an art spatula. You can get the modeling paste at your local craft store like Hobby Lobby or Michaels. Liquitex and Master’s Touch are common brands.
Great information! Do you know any good books in building steampunk furniture?
Thanks
No, sorry.
I’ve been watching endless YouTube videos trying to get my head around mixed media and I think this is the first time I’ve understood the process. I think I might be ready to pick up my brush and crack open the Gesso finally. I’ve been irrationally terrified of even starting!
I’m so happy to hear this. Good luck!
Awesome information and thank you for sharing. I am also just starting, but have wanted to do this style of art forever. Now that I have some great ideas and again thank you for being an inspiration. I am looking forward to trying my hand at some projects.
What adhesive works best when adding metal to canvas for example? Thank you
The best glue is thick gel medium it’s strong and dries clear
Thankyou so much. Information very helpful. I’m just starting out.
You have given me the best info yet! Thank you so much for informing us of all this. So helpful!!
I’m so glad!!
Thank you so much Einat for sharing your knowledge and giving guidance on this fascinating craft, which I love. I shall look forward to reading more of your posts
Excellent reading as I am still learning about all of the products
Cheers Lorraine
Thank you for all the information on steampunk projects.
Einat,
Thanks for the information that you published regarding steampunk projects.
I am new to the steampunk approach, even though I have been an art teacher and craftsman for years, repurposing items and materials. I work with many different materials, and I am adding welding to my creative repertoire this year.
Thanks again!
You’re welcome!
This is some awesome information. Thanks for sharing!
Thanks Robin!