In part one of this blog series, I discussed what phishing attacks are and how to detect them, and how-to set up the Microsoft Report Message Add-in. For part two of this blog series, I will be providing a detailed how-to guide on deploying Microsoft Report Message Add-in via Centralized Deployment in your Office 365 tenant.
Deploying Microsoft Report Message Add-in via Centralized Deployment in your Office 365 tenant
Important: you must be a Global Administrator or Exchange Online Administrator to perform the below steps. Requirements for Centralized Deployment from Office 365 tenant can be found here however, I will list some details below. You must have active Exchange Online Mailboxes and Office 365 ProPlus implemented. If you decide to deploy the Report Message Add-in to Everyone and the Report Message Add-in is not showing up to your users, please ensure the below requirements are met.
Office 365 ProPlus users must be installed on the below or later versions:
- Windows: Office Build 16.0.8067
- Mac: Office Build 15.34.17051500
Outlook Versions or later:
- 2013 Click to Run version: 15.0.4819.1000
- 2013 MSI Version: 15.0.4937.1000
- 2016 Click to Run Version: 16.0.7726.5702
- 2016 MSI Version: 16.0.4494.1000
You must be federated to Azure Active Directory, users Exchange mailboxes must be OAuth enabled and users must sign into Office 2016 with their organization ID.
If your requirements are met, gather 5-10 IT Staff for a small pilot group. Testing within your IT department should always be a first step before rolling out new technology features to production users. Next, I will show you how to execute the Office 365 Centralized Deployment method:
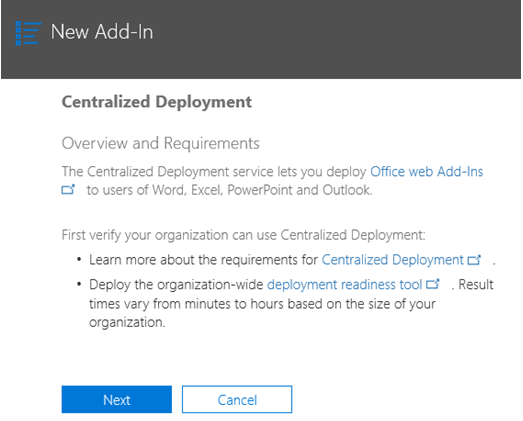
- Login to the Office 365 admin portal. Go to Settings. Then click on Services & add-ins and click + Deploy Add-in.
- In the new add-in screen review the information and click Next.
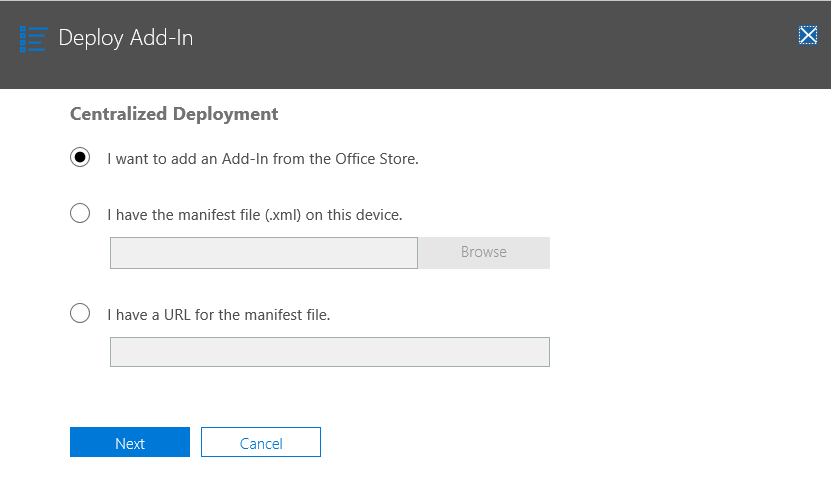
- Select the I want to add an Add-in from the Office Store option and click Next.
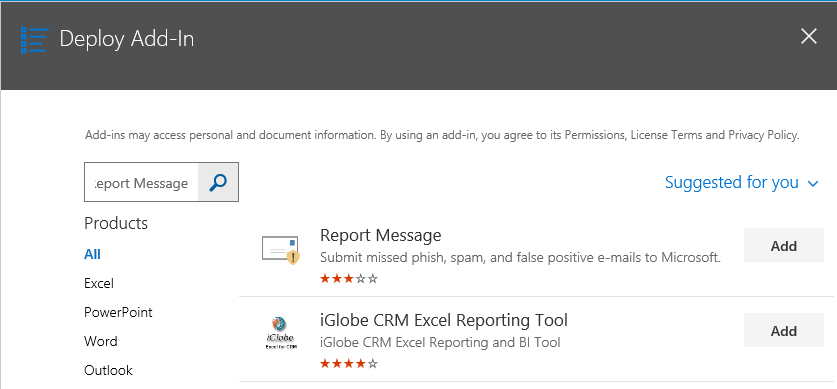
- Search for Report Message in the search window and click Add.
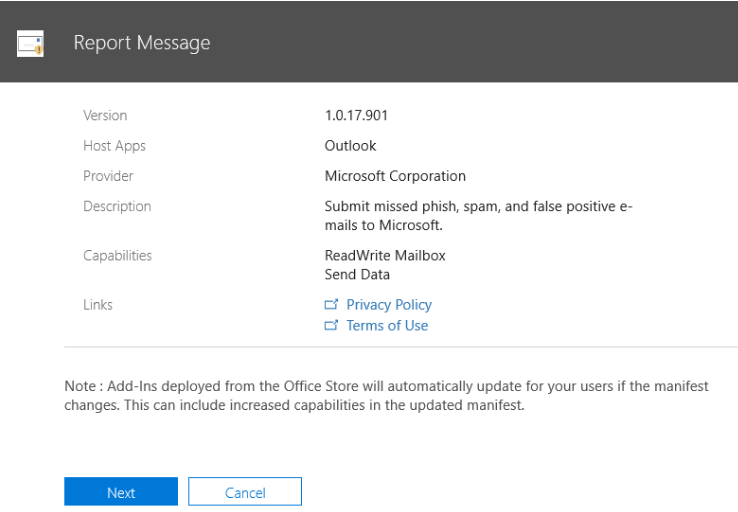
- On the Report Message screen, review the details and click Next.
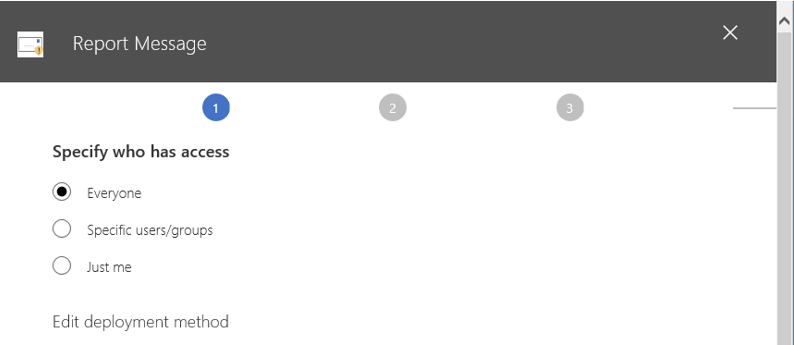
- Specify who to deploy the
Report Message Add-in to:
- Here, you will select either accounts manually such as the 5-10 IT staff or you can create a group for the IT Staff. Once testing is complete you can modify the deployment groups or to all users later.
- Select the View Options because by default users will not be able to remove
the add-in once it is deployed.
- Fixed – The add-in will be automatically deployed to the assigned users and they will not be able to remove it.
- Optional – The add-in will be automatically deployed to the assigned users, but they can choose to remove it from their ribbon.
- Available – The add-in will not be deployed but will be available for assigned users to install even if the Store is disabled. Users may install this add-in by clicking the Get More add-ins button on the home ribbon in Outlook.
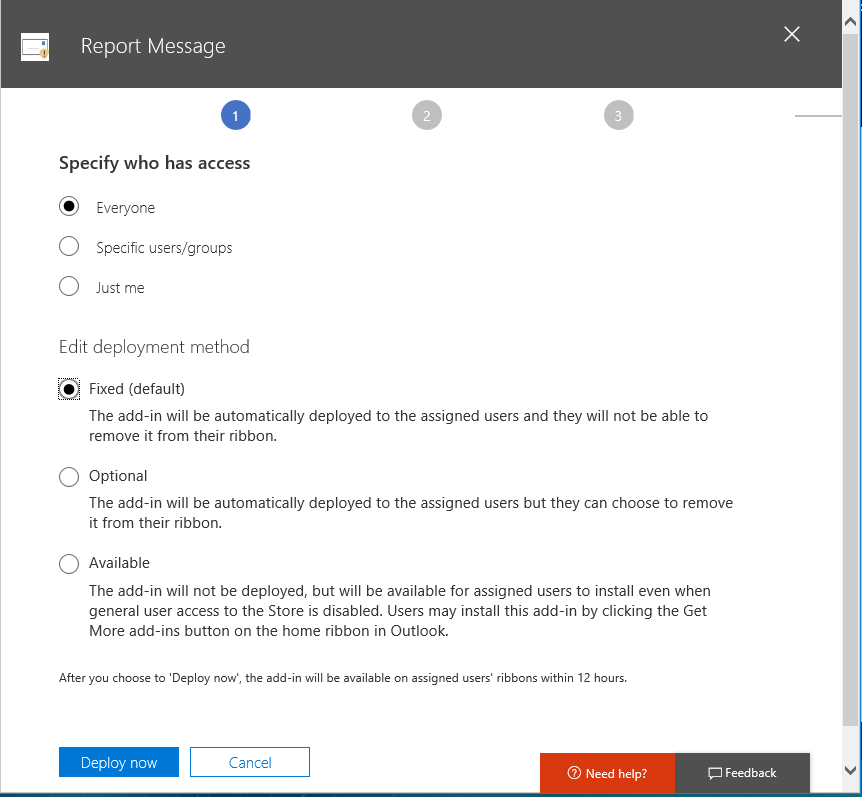
The recommended option is to select Fixed as the purpose of this tool is to assist users in reporting these types of emails and helping to update Microsoft’s Spam databases for all Office 365 customers.
- Clickthe Deploy Now button.
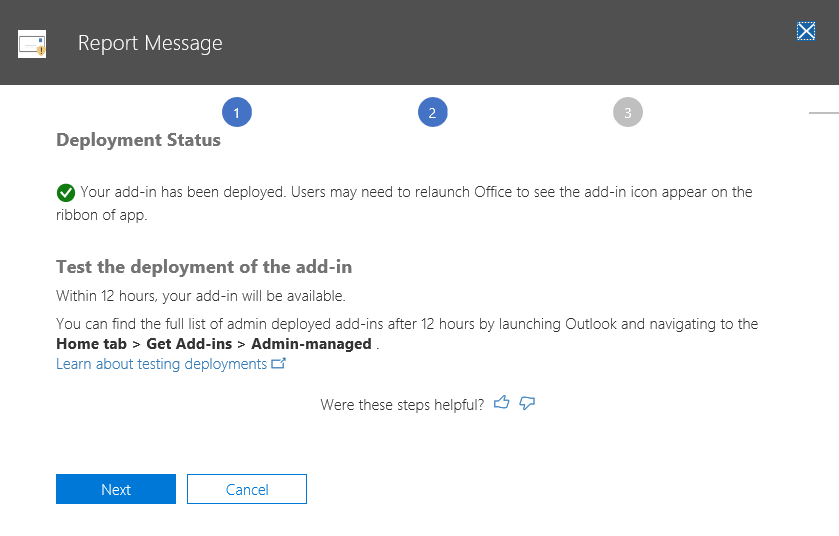
- You will now see a Deployment Status message stating that the add-in will show up within 12 hours. You can find the full list of admin deployed add-ins after 12 hours by launching Outlook and navigating to Home > Get Add-ins > Admin managed. Clickthe Next button.
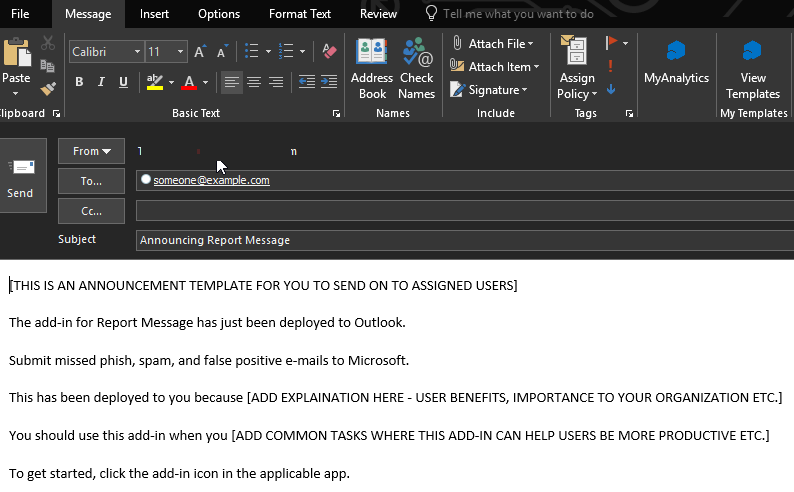
- Finally, you have the option to
Announce the Report Message Add-in to users and download a sample email
regarding the deployment which includes:
- How the add-in can make their work easier and quicker
- Where they can find the add-in
- Who the add-in will be useful for
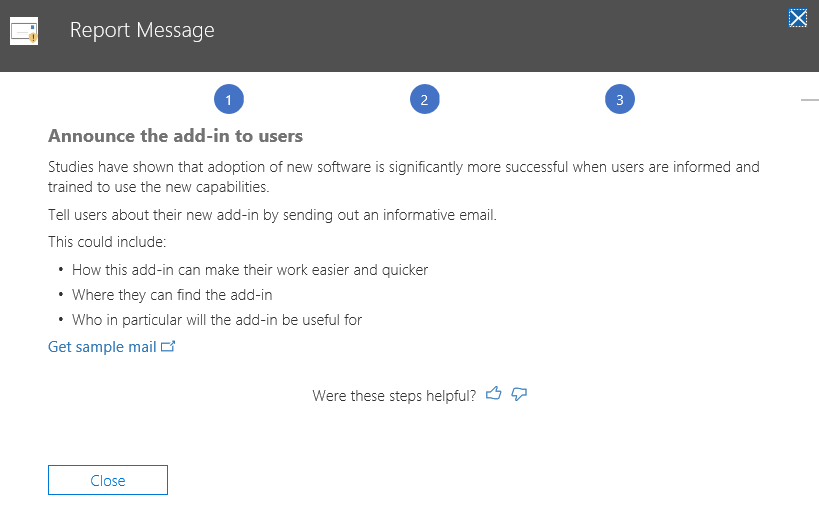
- Selectthe Get Sample Mail option and a sample email will be downloaded for you to use as a template to send to your users and select Close.
Once deployment is complete the Report Message Add-in will now be visible in the Office 365 Admin Center under Home, Settings then Services & add-ins. Look for Report Message Add-in and you can select to review details. Here you can modify the Who has access? Setting to further deploy to more users for pilot or your entire tenant.

Creating a Transport Rule in Exchange Online to receive a copy of user submitted messages
We have covered the process of when users report a message a copy is submitted to the Microsoft Spam Team in part one of this blog. You can also create a transport rule so that a copy of the submitted email is sent to your Global Administrator, Exchange Administrator or Security Team for review. Your Security team may want to collect, and review reported phishing and spam messages to Microsoft to better improve spam and phishing policies in Office 365. If there is a phishing email report your security team will want to know so they can block internet access to the URL in the phishing email to prevent other users who may have received the phishing email from accessing the URL via the internet. So, it is important to make sure your security teams get these submitted emails to action blocking the website address.
Let’s create a Transport rule in Office 365 in the Exchange Online Admin Center. You must be an Exchange Online Administrator to perform this task. For instructions on how to login to the admin center please follow our article here.
- Login to your Office 365 tenant via portal.office.com
- Under Admin Center select Exchange
- In the Microsoft Exchange Online Admin Center,choose Mail Flow, then Rules
- Click the + and select Create a New Rule
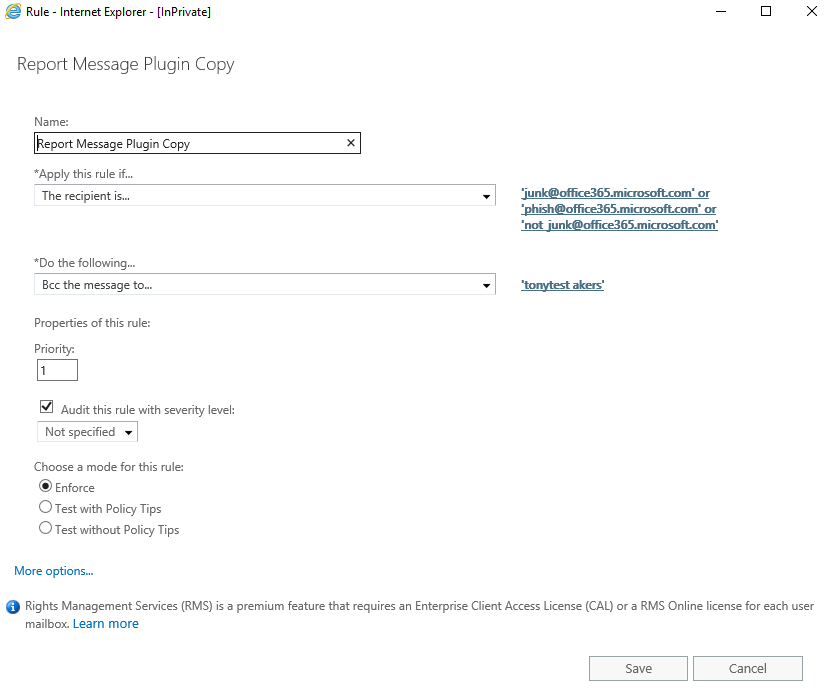
- In the Name windows give it the name Report Message Plugin Copy
- Under Apply this rule if… select The recipient is
- In the Check Names field type the following:
- Junk@office365.microsoft.com (email address for reported Junk emails)
- Not_Junk@office365.microsoft.com (email address for reported Not Junk emails)
- Phish@office365.microsoft.com (email address for reported Phishing emails)
- Click Check Names and then OK
Please only report on which emails you want and need. If you do not want to know about users submitting Not Junk, then leave this email address out.
- In the Do the following… select Bcc
the message to
- Enter your mail address or security team group email and click OK
- Ensure the Check box to Audit this rule with severity is enabled so it shows up in reports or message traces.
- Click Save on the new rule.
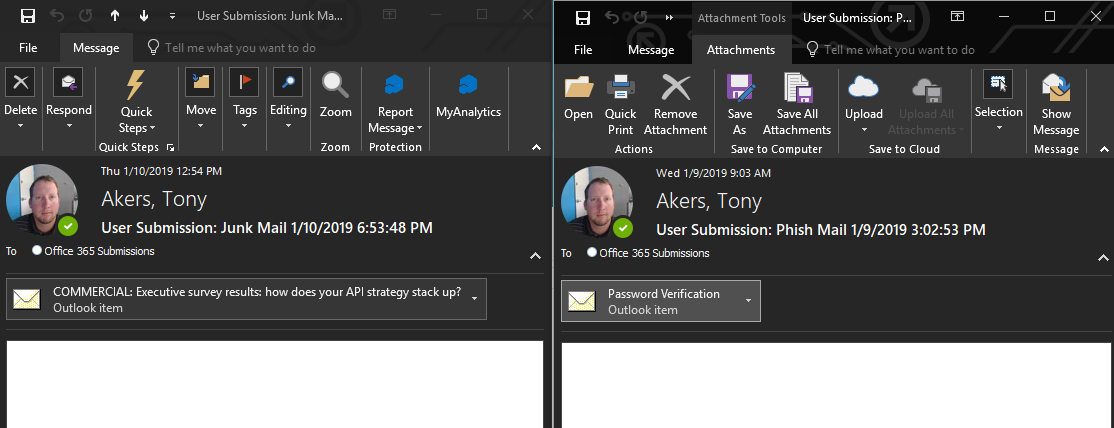
Now that the Transport Rule is in place you can confirm this works by going to a spam or phish message in your inbox and using the Report Message Add-in to report Junk, Not Junk or Phishing. I have provided examples of the messages that were Bcc’d for review to our security team. You can see in the Subject a junk mail and phish mail was reported.
If you do not want to receive Junk or Not Junk submissions, you can remove those email addresses out of the Transport Rule. I would suggest keeping the phishing submissions, so your security team can block all your users from accessing the internet to the phishing URL. A suggestive implementation measure is to create the Transport Rule for phishing emails to be sent to your help desk and security team, so an incident is logged by your help desk team as soon as a user reports receiving a phishing email with the Report Message Add-in. This cuts down in troubleshooting time as normally you must email or call the user in question to get a copy of the phishing email for analysis.
Advanced Reporting in Security and Compliance Center
In the Security & Compliance Center you can gain access to further reporting on these messages. You will need the following permissions to review these reports:
For Security & Compliance Center you must have one of the following roles:
- Organization Management
- Security Administrator
- Security Reader
For Exchange Online, one of the following roles:
- Organization Management
- View-Only Organization Management
- View-Only Recipient Role
- Compliance Management
You will also need to ensure auditing is enabled for your Office 365 tenant. You can verify or set this up by reviewing the following article here.
These reports can help you as a global administrator adjust any anti-spam or anti-phishing policies you have in place if you are seeing a lot of submitted messages from users.
- Login to your Office 365 tenant via portal.office.com
- Under Admin Centers select Security & Compliance
- Under Threat Management select Dashboard
- Find and click on User-Reported
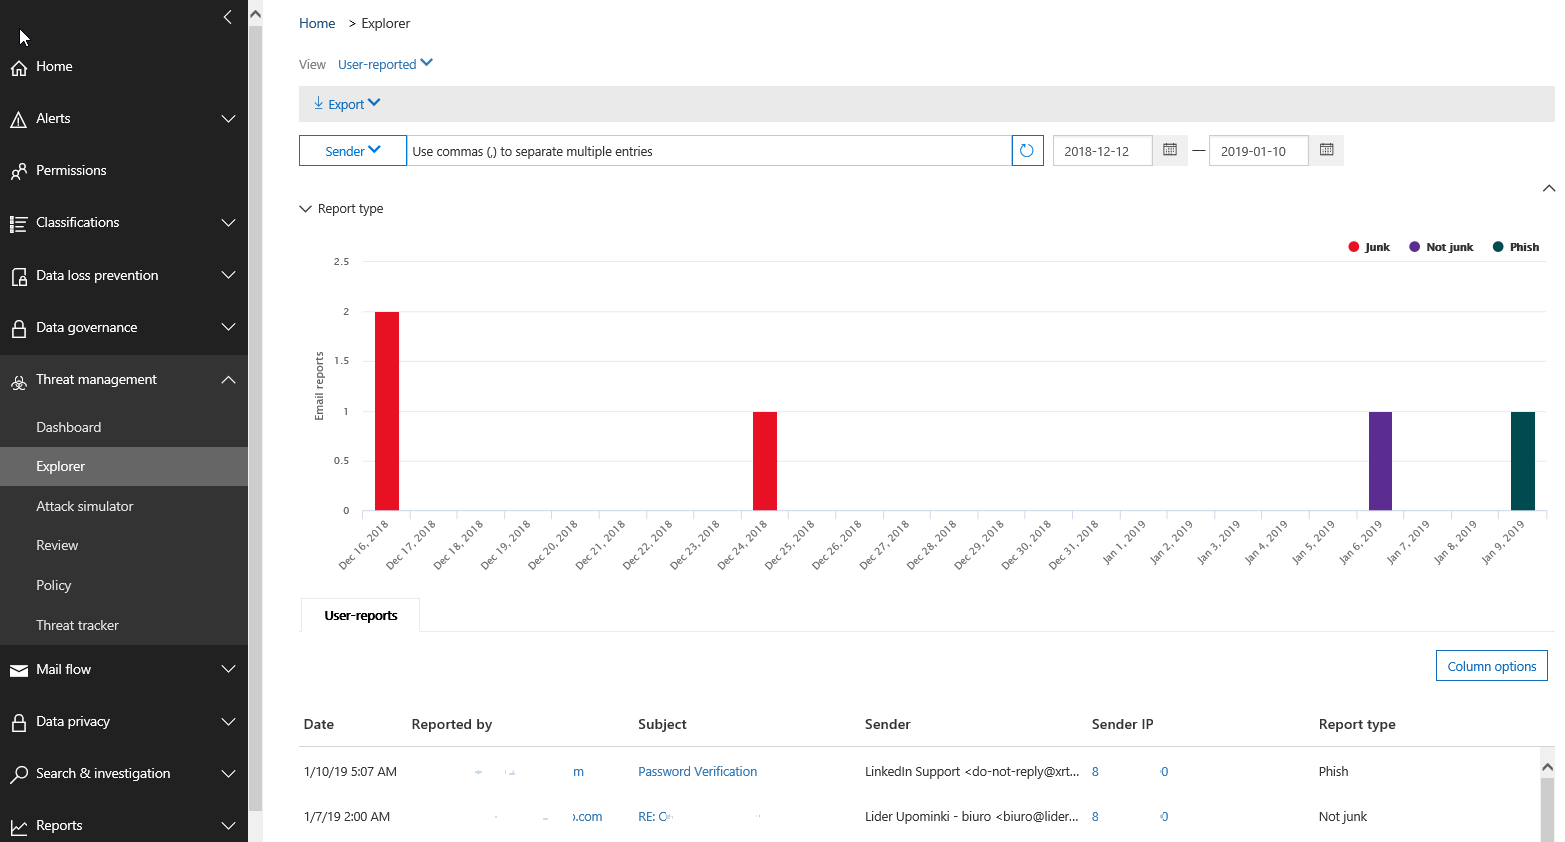
A graph will appear with detailed information over the last 7 days. You can change the reporting date for the last 30 days in the calendar portion. Below the graph will be a detailed table showing the date and time, who reported the message, subject, sender, sender IP and type of submission. This is also beneficial for your security team as they can permanently block the sending IP address if deemed to be a phishing email to prevent further emails coming into your organization.
Summary
Training users on how to identify spam and phishing attacks is key to protecting your assets. Your users will be the weakest link in your environment, therefore meaning user education is essential in identifying potentially malicious emails. A way of avoiding this is by deploying the Microsoft Report Message Add-in to a small IT pilot group and gain feedback from the pilot to determine the health of your environment. It is essential to work with your Security Officer to create an end-user training plan and present to management to ensure delivery of training to end-users. To get started I would initiate your implementation to small user groups until gaining full approval for a global rollout. I hope this has been a great learning experience for you. If you have any questions or would like to discuss, please comment.


Hi Tony,
Thanks for posting this details about how to send reported email to SOC mailbox.
I have another question regarding that. Is it mandatory to send all emails reported through “Report Message” add-in to Microsoft. Is there any way where add-in is configured with option “Never Send Report” but still the reported email/copy of reported email will be send to SOC (defined) mailbox.
I have observed that if Report Message add-in is configured for option “Never Send Report” and then email is reported it don’t show in Security Portal under User Reported message.
Once a user submits a phishing email to Microsoft will they receive any notification back from Microsoft? Or would that require a tenant mailbox, and either a manual response from an admin, or an automated “canned” response?
They do not receive a communication back. There are probably several options to automate it but I created a Flow that does an automated reply to the user when it does come to our Security Team mailbox.
Example below:
A message from Security Team
Thank you for your submission to the Security Team.
Your email has now been logged in our system.
We will investigate your submission and reply to you as soon as possible.
Thank you for helping to keep Company Name and our colleagues secure.
Hi Tony,
Greetings, We checked that the Users with MSI Version of Outlook 2016 are not able to submit the Message , There are able to see the Report Phishing Button but not able to submit the Email, Whereas the Same User with when he logins to Webmail , He is able to , Its working for O365 Proplus Users without issues, Any leads ?
Please help with this !
There’s definitely something wrong with the add-in. I’ve had multiple people report messages and maybe 1 in 10 actually report to Microsoft and show up in the ATP Explorer console. We have a case open with Microsoft. They are seeing the same thing.
Once you’ve enabled Report Message – for everyone – is there a process to track or find out who has and who has not gotten the add-in in their Outlook client? Are there any additional troubleshooting tips to figure out why some users would not get the add-in?
From your experience how long does it usually take for the user reported emails to show within the Sec + Compliance report view? I have tested with 3 emails and none have show up in the report as of yet. Thanks
Hi Dan, to be honest I have not checked the reporting time frame feature. The report message add-in feature when configured with a transport rule is pretty quick being sent off to MS and to the Security Mailbox if specified. I have submitted a test phish mail to MS and will see how long it takes before showing up in the report and let you know.
Dan, I tested this on an email earlier this week and nothing is in the logs still. I tested a definite spam mail yesterday and submitted and it is already showing up this morning in the log.