Pane Bianco with Tomato, Basil, and Garlic
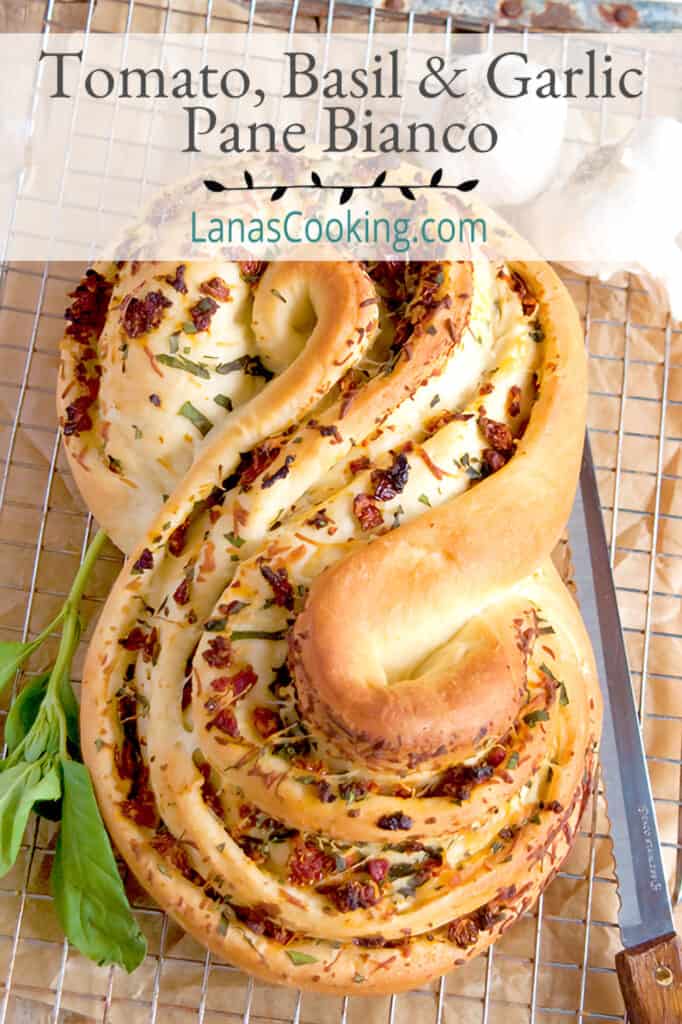

This beautiful Italian Pane Bianco (Italian for “white bread”) is a soft bread filled with sundried tomatoes, cheese, fresh basil, and garlic which is shaped into a figure-8. And even though it looks a little complicated, it’s really easy as pie! Great to serve alongside your favorite Italian dinner or as a fun party appetizer with an olive oil dip.
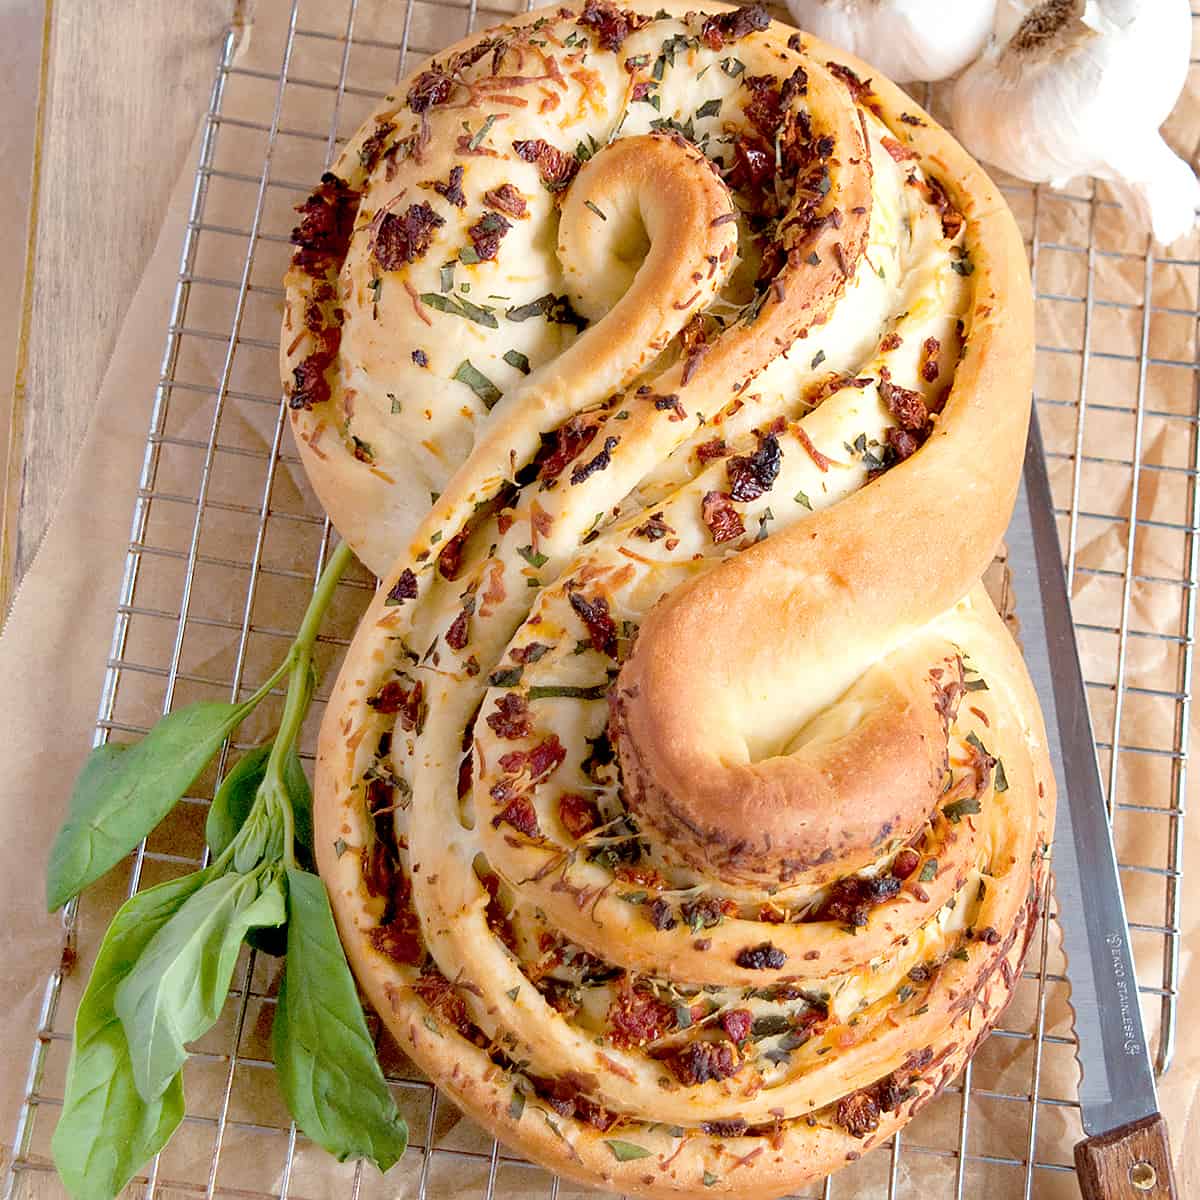
Please allow me to introduce you to a true gem of Italian breadmaking – Pane Bianco. This soft, white bread filled with the flavor of sun-dried tomatoes, basil, cheese, and garlic, combines both simplicity and sophistication.
At first glance, you might think that this is a complicated bread to create, but I can assure you that it’s nowhere near as daunting as it looks. If you’ve ever made a loaf of homemade bread, this will be a breeze!
And besides being beautiful, Pane Bianco is easily tailored to make it your own. Whether you’re hosting a dinner party or cooking a cozy family meal, this bread will be a great addition to your menu.
Rest assured, there are no exotic items in the ingredients – just pantry staples you probably already have at your fingertips.
❤️ Why You’ll Love This Recipe
- You can change the filling to suit your own tastes.
- Very nice for a casual party or family dinner.
- Uses simple ingredients readily available at any grocery store.
- Makes a great neighbor or friend gift!
🛒 Essential Ingredients
This post contains affiliate links. Lana’s Cooking is reader-supported and earns a tiny commission at no extra cost to you when you shop from our links.
- Bread flour – has a higher protein content that helps the dough strengthen and rise properly. My favored brand is King Arthur bread flour.
- Egg – binds the dough together and helps form the outer crust.
- Instant yeast – yeast is essential to all bread making as it is the component that makes the bread rise.
- Sugar – feeds the yeast while it activates.
- Warm water and milk – hydrates the flour and makes the dough tender and pliable.
- Extra virgin olive oil – used to oil the bowl so that the dough rises without sticking.
- Sun-dried tomatoes – lends a zesty flavor to the bread.
- Shredded Italian cheese – I use a five-cheese “blend” which turns this bread into a real treat!
- Chopped fresh basil – adds a bright, fresh taste that pairs well with the other flavors.
You’ll find detailed measurements for all ingredients in the printable version of the recipe at the bottom of this post.

🍽️ What to Serve With Pane Bianco
This bread is absolutely delicious with an olive oil dip! And, of course, it’s great with any pasta meal. Pair it with my Baked Spaghetti, Egg Noodle Lasagna, or Jumbo Meatballs and you’ll have a dinner time feast.
❗ Recipe Tips
- When making any recipe with yeast, it’s best to let the dough rise to the point stated in the recipe (i.e. “until doubled in bulk”) rather than watching the clock.
- Let the bread cool to room temperature before cutting and serving. The interior of a loaf of bread continues to cook as it cools, and it’s important to allow that to take place.
- Don’t try to substitute fresh tomatoes for the sun-dried in this recipe. That would cause the dough to be too wet.
- It is important to use bread flour for this recipe. Its gluten structure gives strength to the dough.
🔀 Variations
- Add a tablespoon of mixed dried Italian seasoning to the dough for a flavor boost.
- Add sliced pepperoni or salami to the filling.
- A half teaspoon of crushed red pepper flakes in the filling makes for a spicy addition.
🥖 How to Store Homemade Bread
Store homemade bread in an airtight plastic bag at room temperature for 2 to 3 days. This bread may also be frozen if wrapped properly (wrap with a layer of plastic wrap, then add a layer of foil on the outside) and kept for about 2 months in the freezer.
❓ Questions About Pane Bianco
Of course, the filling ingredients give this bread an Italian flair. However, Italian breads typically contain both milk and olive oil, and sometimes a small amount of sugar, giving the dough a richer quality. They’re also usually shorter and plumper than other breads.
Pane Bianco literally means “white bread” in Italian.
You can leave the dough unstuffed and brush it with a beautiful garlic butter or spread and sprinkle the top with fresh parsley if you’d like a plain loaf of bread.

More Questions? I’m happy to help!
If you have more questions about the recipe, or if you’ve made it and would like to leave a comment, scroll down to the comments section and leave your questions, comments, and/or rating!
Thanks so much for stopping by!
📖 Recipe
Want to save this recipe?
Enter your email below and get it sent straight to your inbox.
Pane Bianco with Tomato, Basil, and Garlic
Ingredients
- ¼ cup warm water
- 2 tablespoons sugar
- 2 teaspoons instant yeast
- ½ cup low-fat milk warmed
- 3 tablespoons extra virgin olive oil
- 1 egg
- 2 teaspoons salt
- 3 cups bread flour
- 4 ounces oil-packed sundried tomatoes
- ½ teaspoon garlic powder
- ¾ cup shredded Italian cheese blend
- ⅓ cup chopped fresh basil
Instructions
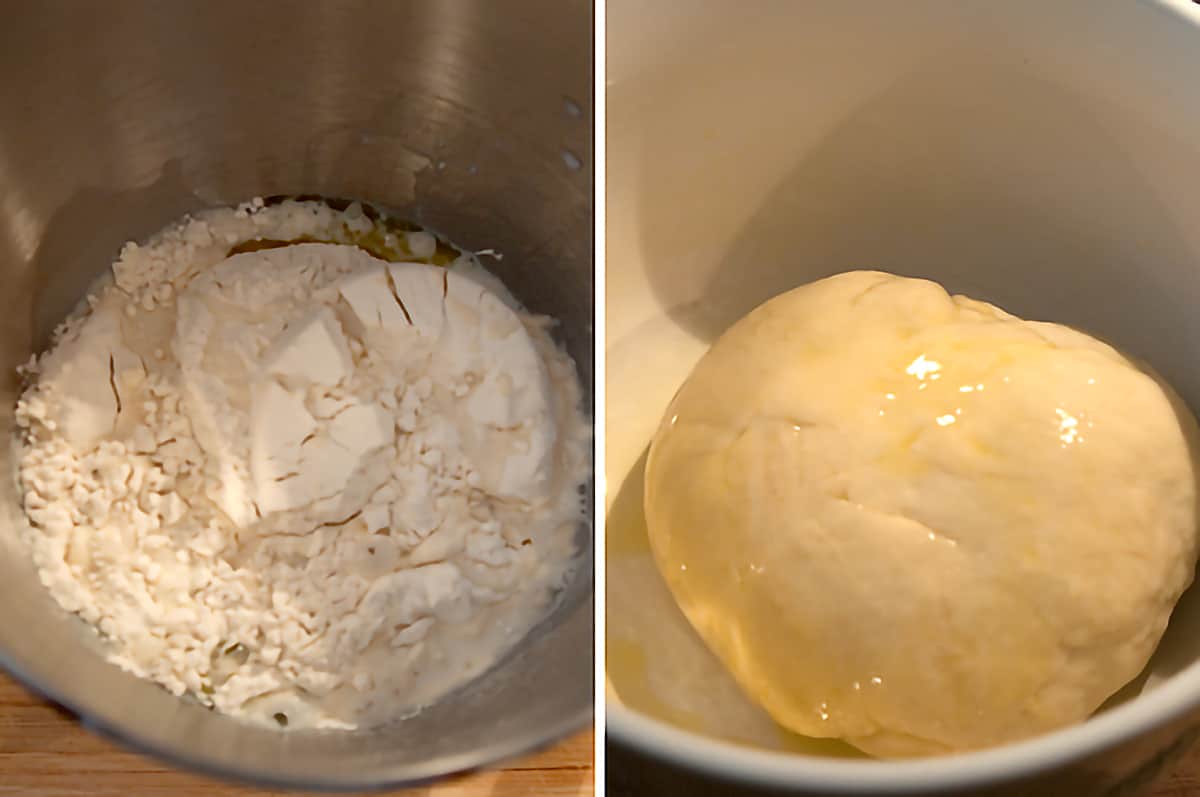
- Place the first 8 ingredients (water through flour) in the bowl of a stand mixer fitted with a dough hook (or large mixing bowl if working by hand). Mix on lowest speed (or stir with a wooden spoon) until a soft dough begins to form.
- Increase the speed slightly and knead for 5 to 7 minutes or until the dough cleans the sides of the bowl. Hand kneading time should be approximately the same and should produce a smooth ball of dough.
- Grease a large, clean bowl. Place the dough in the bowl, turning so that the top is greased.
- Cover and let rise until doubled in volume, about 45 minutes to 1 hour.
- While the dough is rising, thoroughly drain the sundried tomatoes and finely dice them. Chop the fresh basil.
- Gently deflate the dough. Roll it into a rectangle about 22” x 8.5”. Evenly distribute the garlic powder, cheese, tomatoes, and basil over the rectangle of dough.
- Starting with a long edge, roll the dough into a log as you would for making cinnamon rolls. Pinch the edge to seal.
- Place the rolled dough on a parchment paper lined baking sheet with the seam side down. Using kitchen shears or a very sharp knife, start about 1 inch from an end and slice the roll about 1” deep to within 1 inch of the opposite end (see photos for help).
- Form the sliced roll into an “S” shape. Bring the two ends together under the roll and pinch them together.
- Cover and let rise again until doubled in size for 45 minutes to 1 hour. During the last part of the rising, preheat the oven to 350 degrees.
- Bake for 35 to 40 minutes. Tent the loaf with foil after 15 minutes of baking if it seems to be browning too quickly. Remove from the oven and cool completely on a wire rack.
Notes
- When making yeast breads, it’s best to let the dough rise to the point stated in the recipe (i.e. “until doubled in bulk”) rather than watching the clock.
- Let the bread cool to room temperature before cutting and serving. The interior of a loaf of bread continues to cook as it cools and it’s important to allow that to take place.
- Don’t try to substitute fresh tomatoes for the sun-dried in this recipe. That would cause the dough to be too wet.
- It is important to use bread flour for this recipe. It’s gluten structure gives strength to the dough.
- Store the bread in an airtight plastic bag at room temperature for 2 to 3 days. Freeze, well-wrapped, for up to two months.
Nutrition Information
Nutrition information is calculated by software based on the ingredients in each recipe. It is an estimate only and is provided for informational purposes. You should consult your healthcare provider or a registered dietitian if precise nutrition calculations are needed for health reasons.
🥄 How to Make Pane Bianco – Step by Step Photos and Instructions
Mix the Dough
- Place the first 8 ingredients (water through flour) in the bowl of a stand mixer fitted with a dough hook (or large mixing bowl if working by hand). Mix on lowest speed (or stir with a wooden spoon) until a soft dough begins to form.
- Increase the speed slightly and knead for 5 to 7 minutes or until the dough cleans the sides of the bowl. Hand kneading time should be approximately the same and should produce a smooth ball of dough.
- Grease a large, clean bowl. Place the dough in the bowl, turning so that the top is greased.
First Rise
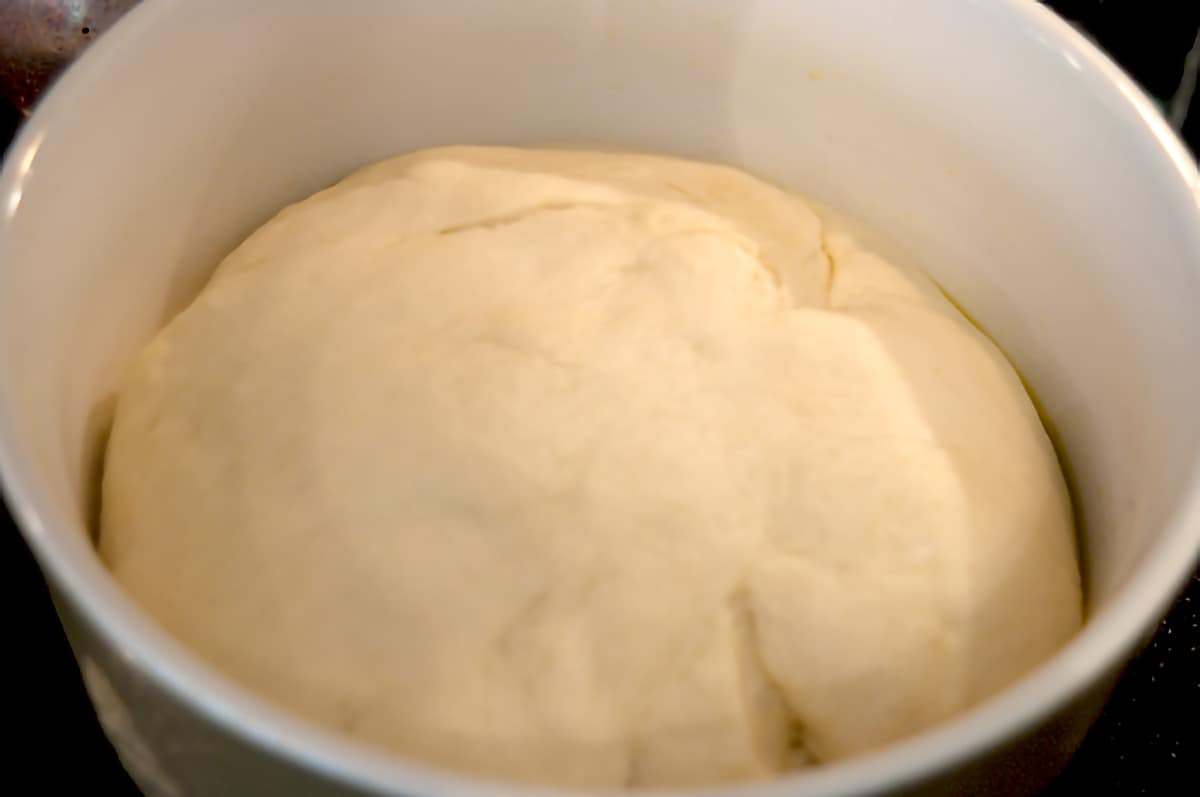
- Cover and let rise until doubled in volume, about 45 minutes to 1 hour.
- While the dough is rising, thoroughly drain the sundried tomatoes and finely dice them. Chop the fresh basil.
Roll and Fill the Dough
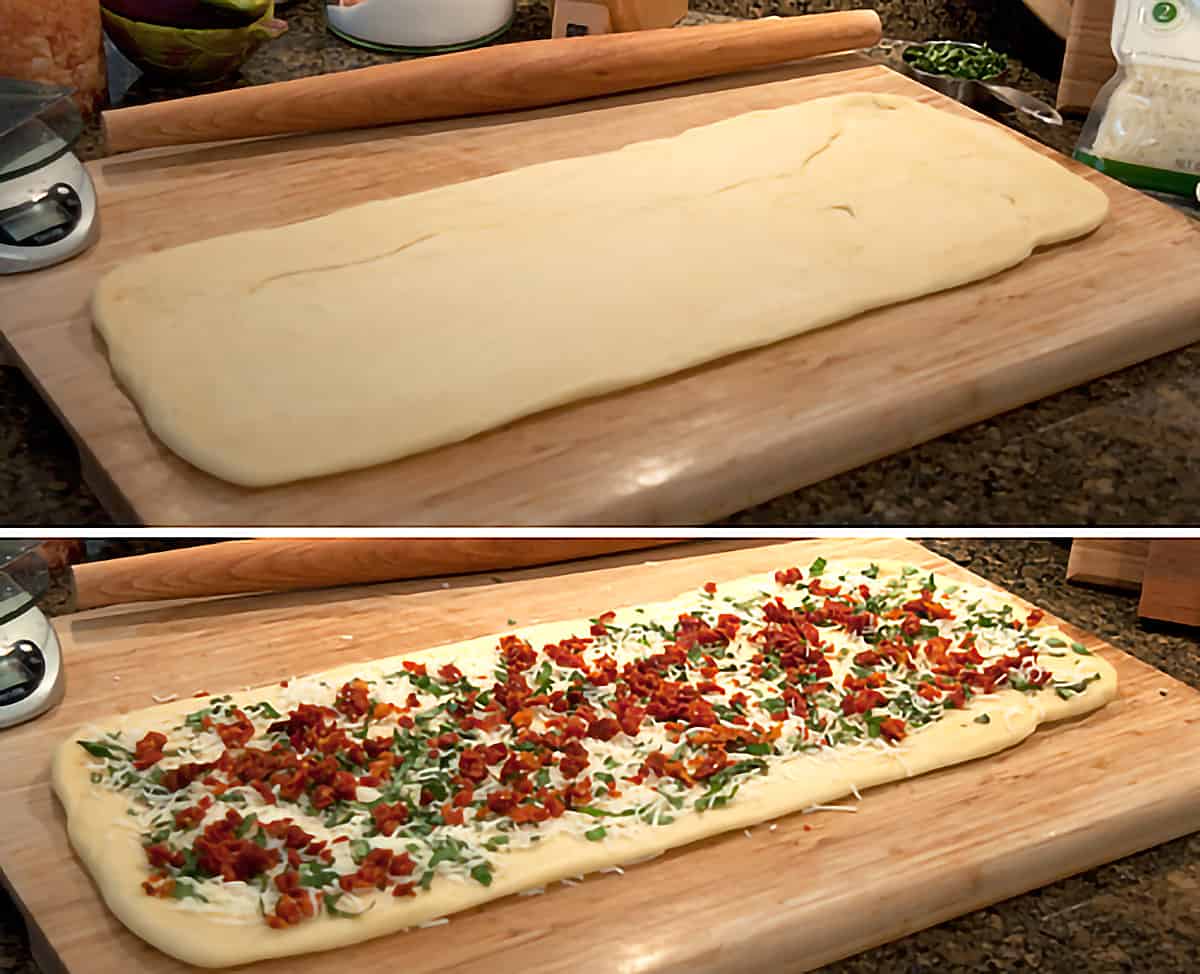
- Gently deflate the dough. Roll it into a rectangle about 22” x 8.5”. Evenly distribute the garlic powder, cheese, tomatoes, and basil over the rectangle of dough.
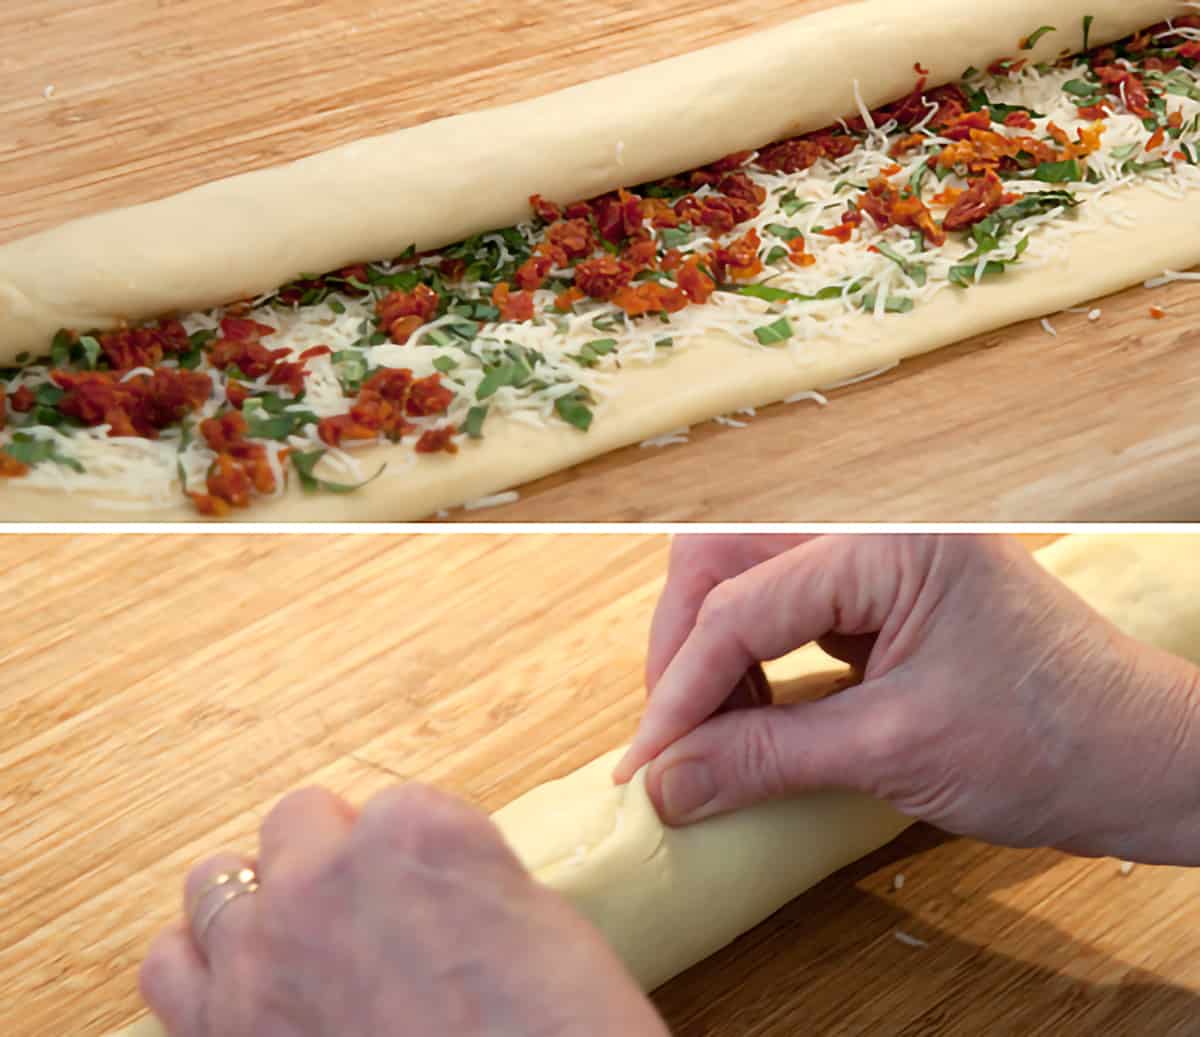
- Starting with a long edge, roll the dough into a log as you would do for making cinnamon rolls. Pinch the edge to seal.
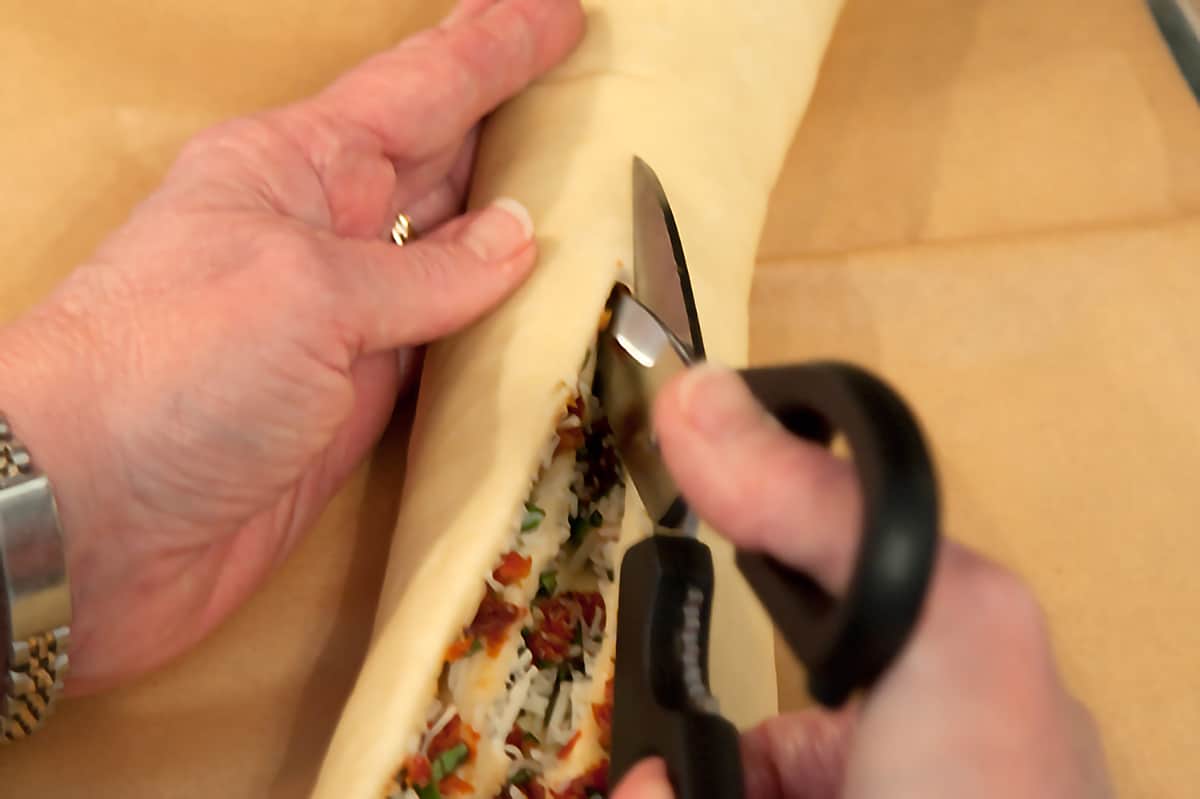
- Place the rolled dough on a parchment paper lined baking sheet with the seam side down. Using kitchen shears or a very sharp knife, start about 1 inch from an end and slice the roll about 1” deep to within 1 inch of the opposite end.
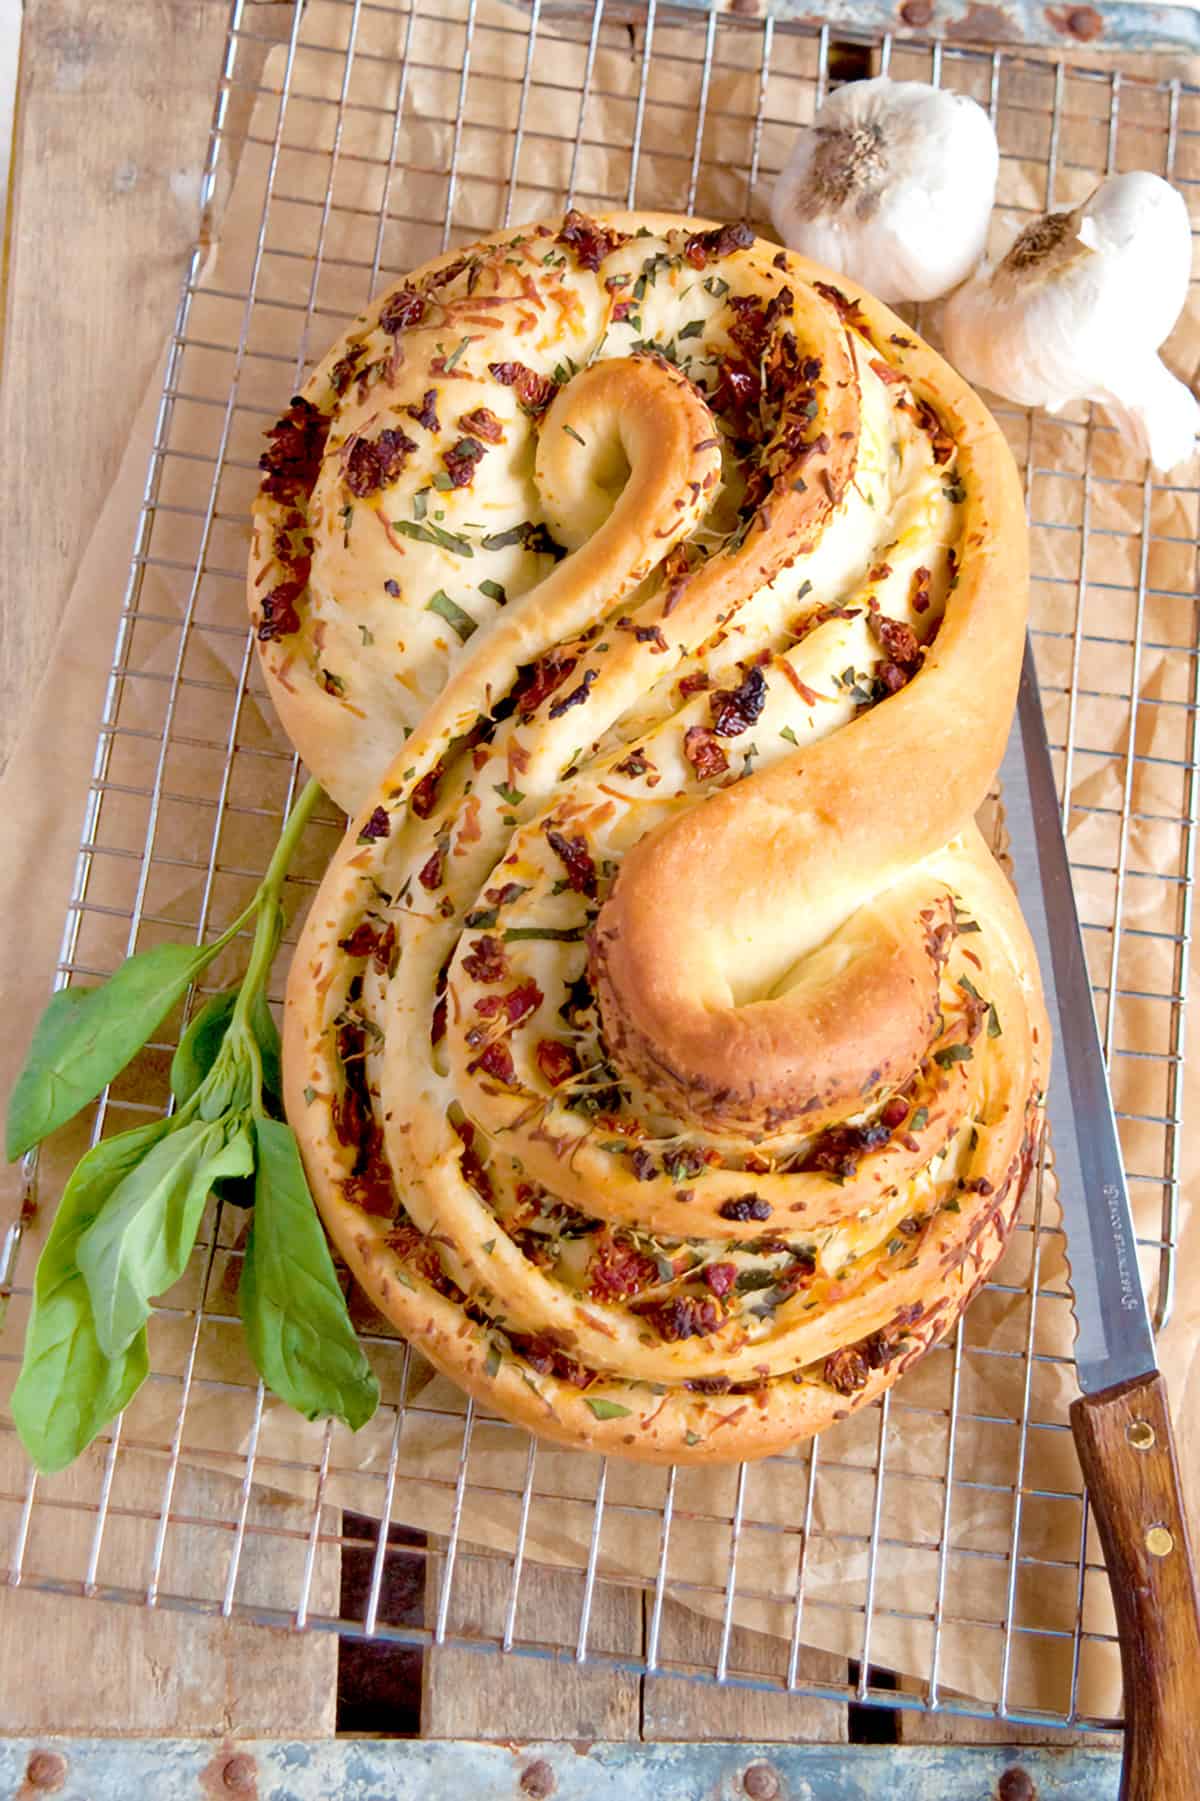
Shaping the Pane Bianco
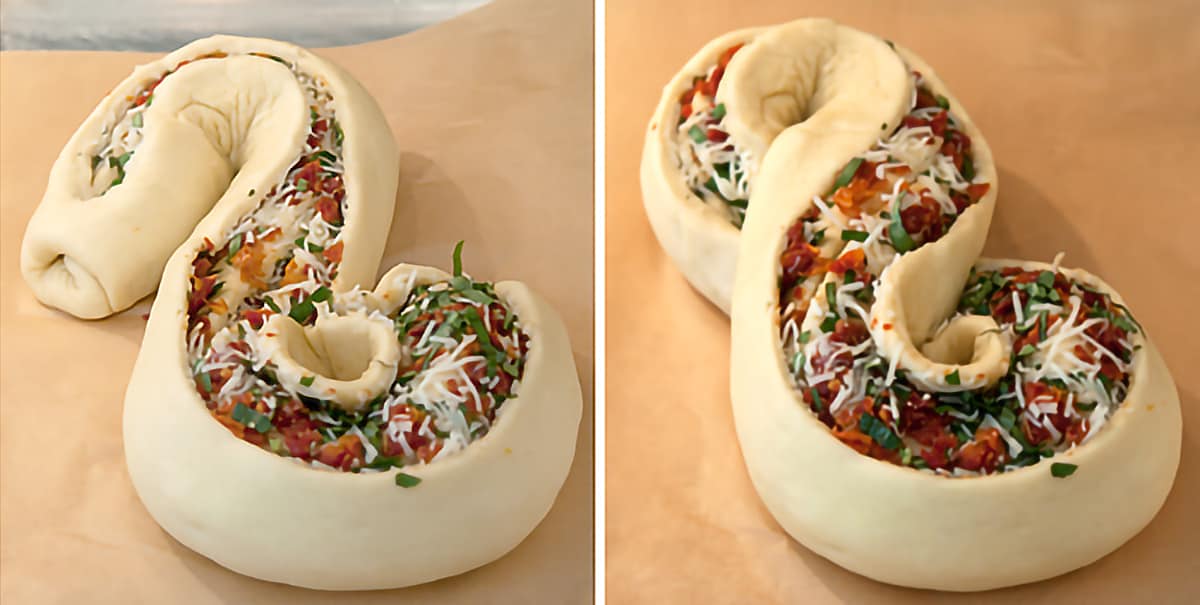
- Form the sliced roll into an “S” shape. Bring the two ends together under the roll and pinch them together.
Second Rise
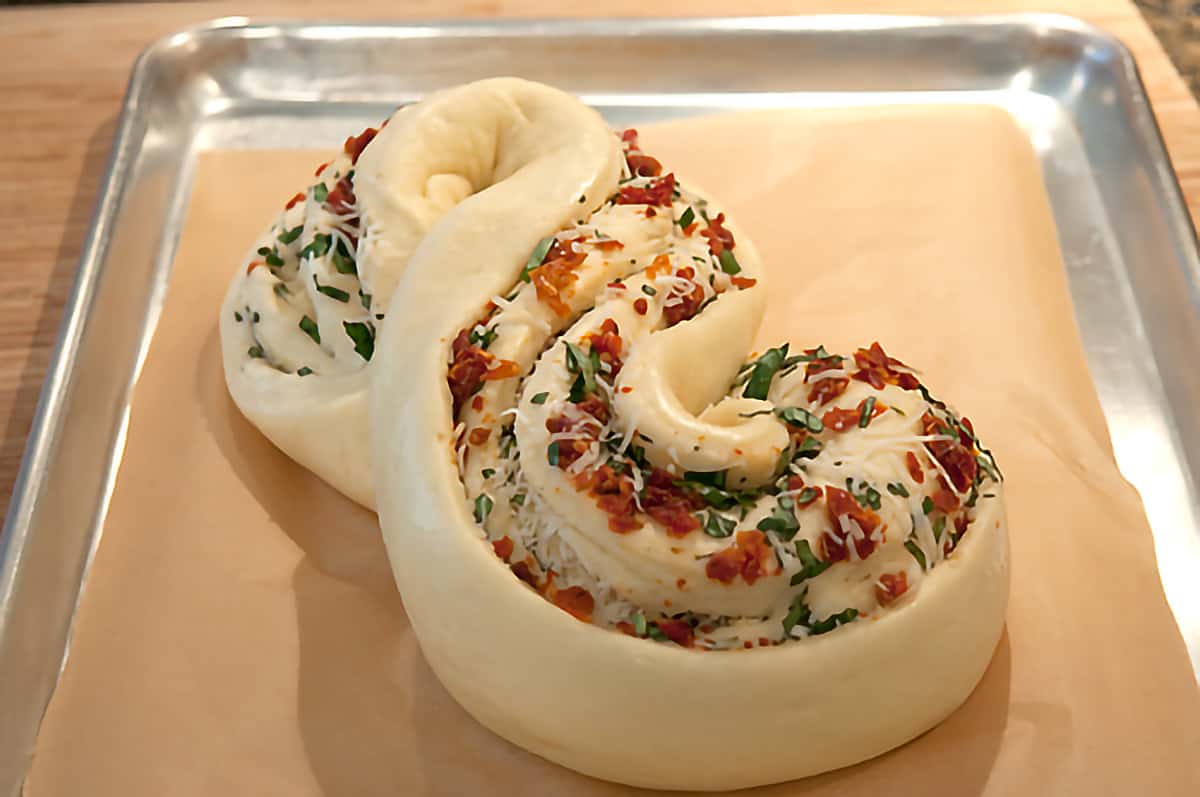
- Cover and let rise again until doubled in size for 45 minutes to 1 hour. During the last part of the rising, preheat the oven to 350 degrees.
Bake the Loaf
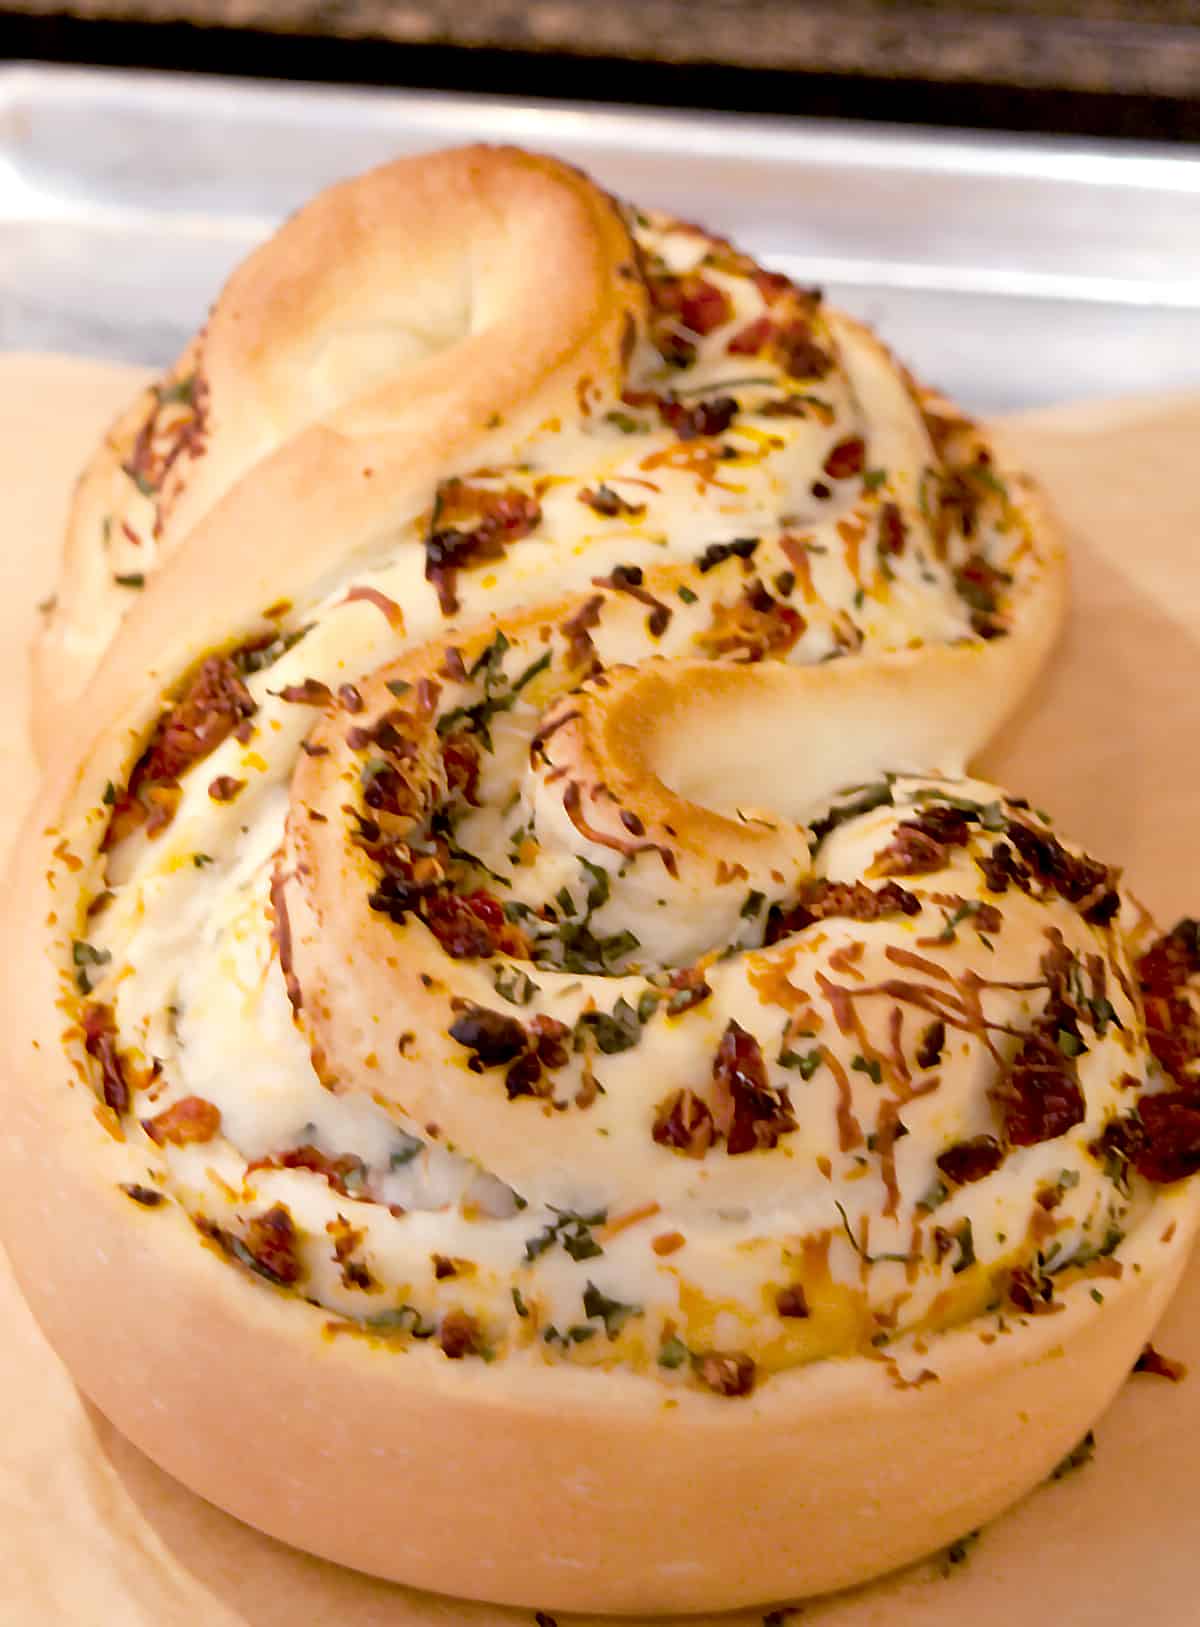
- Bake for 35 to 40 minutes. Tent the loaf with foil after 15 minutes of baking if it seems to be browning too quickly. Remove from the oven and cool completely on a wire rack.
🧾 More Bread Recipes You’ll Like

— This post was originally published on March 3, 2015. It has been updated with additional information.
I have tried this recipe 2 times and it won’t ever rise. Any advice?
Without being in the kitchen with you, it’s really difficult to pinpoint what may be wrong. Bread dough can be finicky. The very first thing is to make sure you’re using fresh yeast and to proof it to make certain it’s active. Another problem could be ambient temperature. Dough likes a nice warm place to rest in while it rises. Room temperature that is too cool or drafts can affect rising. The water used to proof the yeast could have been too warm or too cool – it should be between 105 and 115ºF. The yeast could have come in contact with the salt. Never pour yeast and salt on top of each other in the mixing bowl. You could have mixed in too much flour while kneading. That will affect rising.
Easy and delicious!
I am out of milk. Would it turn out the same if I use half and half?
Hi Lisa. I haven’t tested this recipe with half and half but it should work fine. The bread may turn out just a tiny bit richer than the original recipe.
My husband loved this bread. I felt it was not very airy. But this is the first bread I have made. Would you suggest I need to knead it more or let it prove longer?
Thanks
Hi Lori – yes, most Italian breads are a bit dense as is this bread. It’s because of the milk and olive oil in the dough. Additional kneading and proofing would still not make this an “airy” loaf. If you’re looking for a lighter loaf, try a standard white bread recipe. The King Arthur Flour web site is a great resource for all sorts of bread recipes.
Beautiful bread. I made it and it turned out as pictured. The flavor didn’t strike my family as all that interesting, even though I added more herbs and more cheese than called for. We all agreed it would be good sliced and topped with melty cheeses though.
Lana, beautiful bread. Can I make it one day ahead of time, say up to step 7, and then leave it in the fridge and bake on the next day?
I wouldn’t recommend it. It would most likely over-rise and then fall. I’d do it all the same day.
Congratulations Lana! That’s a pretty achievement!
Just found your blog through Pinterest- love it!! Your recipes are so creative! This bread is GENIUS. Love the #twelveloaves party! Now I have to go check out everyone else’s breads. I looove making bread!
I’m afraid to ask this, but I don’t make bread from scratch using yeast. Do you think it would be possible to use frozen dough that I just fill and shape? This is gorgeous!
You could surely give it a try, Pamela. Let me know how it works out!
Lana, just FYI, I posted in December about making a sourdough starter. Everyone does it a little differently, and I always enjoy reading about the different methods.
I posted my method last year, too, Jean. You can read it in this post: http://www.lanascooking.com/2014/06/03/whole-wheat-sourdough-bread/
Lana, that is a gorgeous loaf of bread! I’m on a true (no added yeast) sourdough kick right now, but next time I make a non-sourdough I might make one of these!
I love sourdough, Jean, but I don’t have a starter right now. I need to get one going soon! I do hope you’ll give this one a try sometime and hope you enjoy it.
Lana, this is such a stunning loaf!!! I actually made an Italian bread but it didn’t keep it’s shape at all—it tasted wonderful, but not very pretty. Yours is on the opposite end of the spectrum. Truly a masterpiece!!!
So sorry you had problems with your bread, Liz. Looking forward to seeing what you make next month, though :-)
There is no way I would make this. But Boy Howdy I love to eat it.
VERY impressive. What a beautiful bread entry.
Sure you could make this, Carol! It just looks difficult, but it’s quite easy, really.
This is ridiculously beautiful!! I’m so glad you included some how-to pictures because I couldn’t wrap my mind around how you did this! Creative AND beautiful! Your bread club sounds like so much fun!!
Thank you, Rose! I am so enjoying being part of Twelve Loaves. It inspires me every month to try something new that I might otherwise have never tackled.
My goodness, this is one of the most stunning loaves I’ve seen! I really must try this for myself – you make it look so easy!
It really is easy, Liren. Hope you’ll give it a try for yourself.
This bread looks absolutely amazing! Pinned! Definitely making this over the weekend!!! ♡ cheers♡
I’d love to know how it works out for you, Cheyanne!
I could never make that. So impressive!
Miss P
You could so make this. It was really easy.
Lana…you are right. This bread is visually stunning! Even before it goes in the oven to bake! And I can only imagine the aromas in your kitchen. I’ve yet to make a shaped loaf….but you have inspired me! Beautiful! : )
The whole house smelled delicious for a day! Do try shaping a loaf. It was so very much easier than I thought it would be.
I believe it (the likes) – I posted this bread on my blog 2 years ago, and it is STILL one of my most-viewed breads! It looks absolutley gorgeous, I am completely craving some now.
I can believe that! It’s a really pretty bread.
Beautiful, Lana. I made one a few years ago and was thrilled with the results. I love your selection of filling ingredients.
Thank you, Renee. We really enjoyed this loaf.
Beautiful bread! Pinned!
Thanks, Maria!
Holy cow!!!!!! I can see why this was so popular on Instagram! I have literally never seen a bread look this awesome before. I need to try this and impress my family!
If your family enjoys homemade bread, they’ll love this loaf, Ashley! I hope you’ll give it a try.
omg … this is absolutely gorgeous! I cannot wait to make a loaf of this for my family … they will love me!
I think I was one of those “likes” on Instagram! I have made this bread and can testify that it is delicious. However, your shaping is far better than mine ever was! Beautiful!
The shaping was so much easier than I thought it would be! Thanks so much, Karen.
Mmmm soft bread with sundered tomatoes? Yes, please, Lana! P.s. Looking forward to seeing you on Instagram =)
Look at you making this fancy and gorgeous pane bianco…bravissima, Lana! I saw a peak of this on FB the other day and I couldn’t wait to get a closer look. Great detailed photos. Wonderful job, my friend!
Thank you so much for the lovely compliment, Lora. I so enjoyed creating this loaf!
Lana this is gorgeous – and you are right, it doesn’t seem as complicated as it looks!!!
It’s really quite easy, Nancy. You should make one!
This looks amazing…you make it seem so easy
What a quality post! This bread looks like it is something I would want every day. Looks beautiful too.
Thank you, Ginny!
Ridiculously gorgeous bread! I have to try your shaping technique. Thank you for explaining it so well. Lovely baking with you this month for #TwelveLoaves!
Yes, please — and thank you! This looks and sounds delicious. xo
This is a show stopper for sure! Thanks for the step by step photos, especially helpful to see how that shape is formed. Wow!!
You’re welcome, Holly. The shaping only sounds difficult – it’s very easy to do.
What a beautiful loaf. It almost looks to pretty to eat.
But eat it we did! I actually sliced it, drizzled with olive oil and broiled it for a few minutes. Really, really good.
This is so beautiful and looks ridiculously delicious!!
Thanks, Sues! I really enjoyed making it.