Now that we have our offline Windows Server 2019 certificate authority configured in Part 1, and our online subordinate setup in Part 2, now we should setup auto-enrollment and secure the subordinate’s web certificate services with SSL.
Auto-enrollment is where domain joined Windows computers are automatically issued a computer certificate. Services such as IIS and Microsoft SCCM can take advantage of these certificates. This is a short series, at just three installments. But this should point you in the right direction for thinking about how to deploy your two-tier Certificate Authority on Windows Server 2019.
Blog Series
Auto-Enrollment Configuration
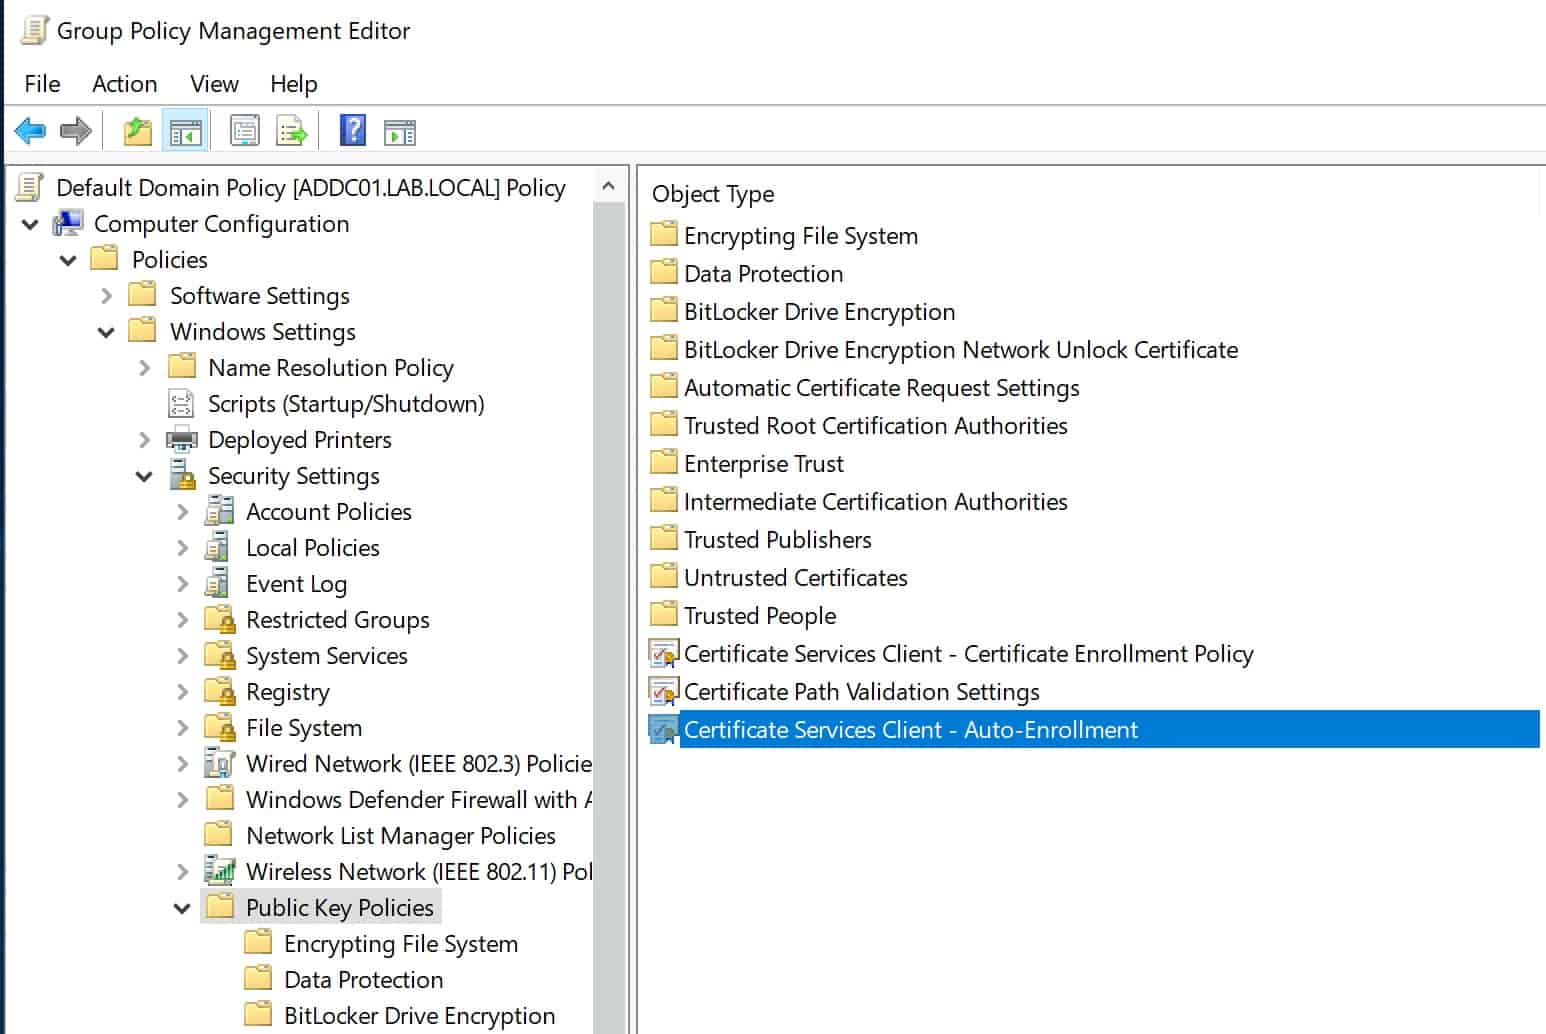
1. Open your domain level GPO (Default Domain Policy in my case) and navigate to Public Key Policies as shown in the figure below. Double click on the highlighted policy.
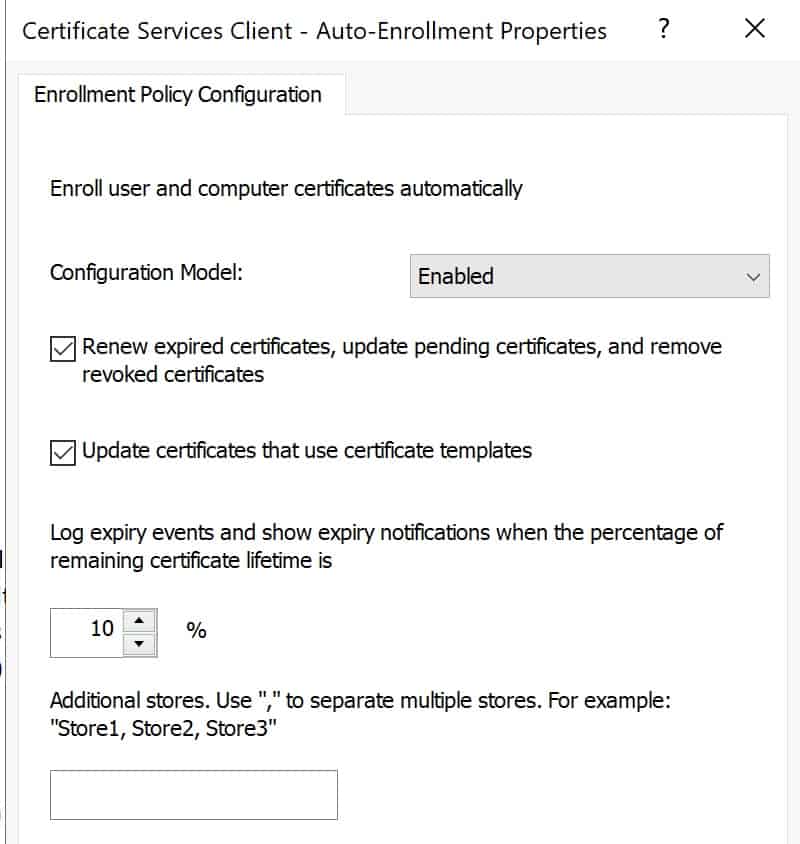
2. Enable the policy and check the two options below.
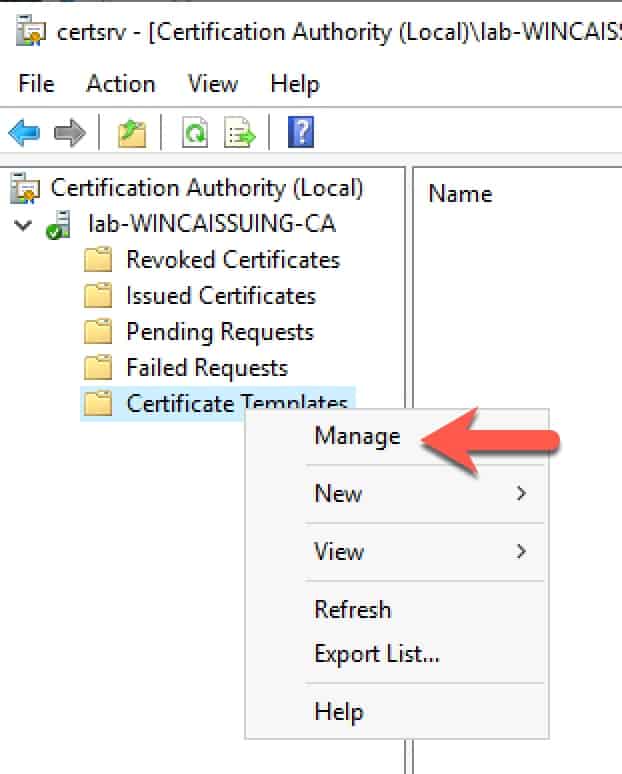
3. On your subordinate CA, open the CA snap-in and manage the Certificate Templates as shown below.
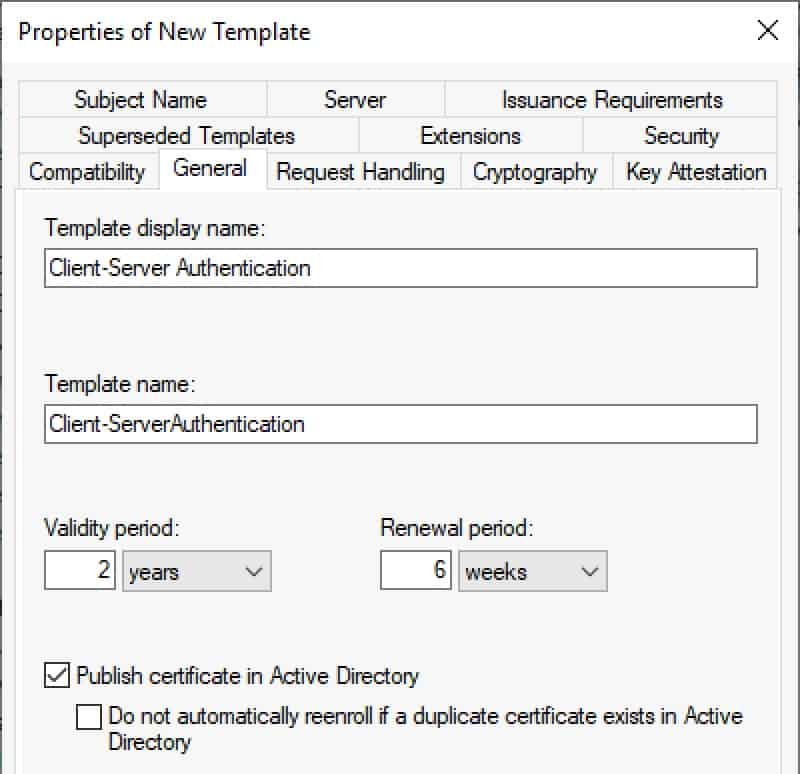
4. Scroll down and locate Workstation Authentication. Right click and Duplicate the template.
5. Click on the General tab and enter a template name (any name). I’ll use Client-Server Authentication. I also changed the validity period to 2 years and published the certs in AD.
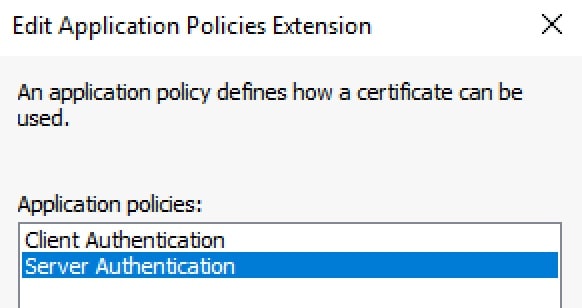
6. Click on the Extensions tab. Highlight Application Policies and click Edit. Add Server Authentication.
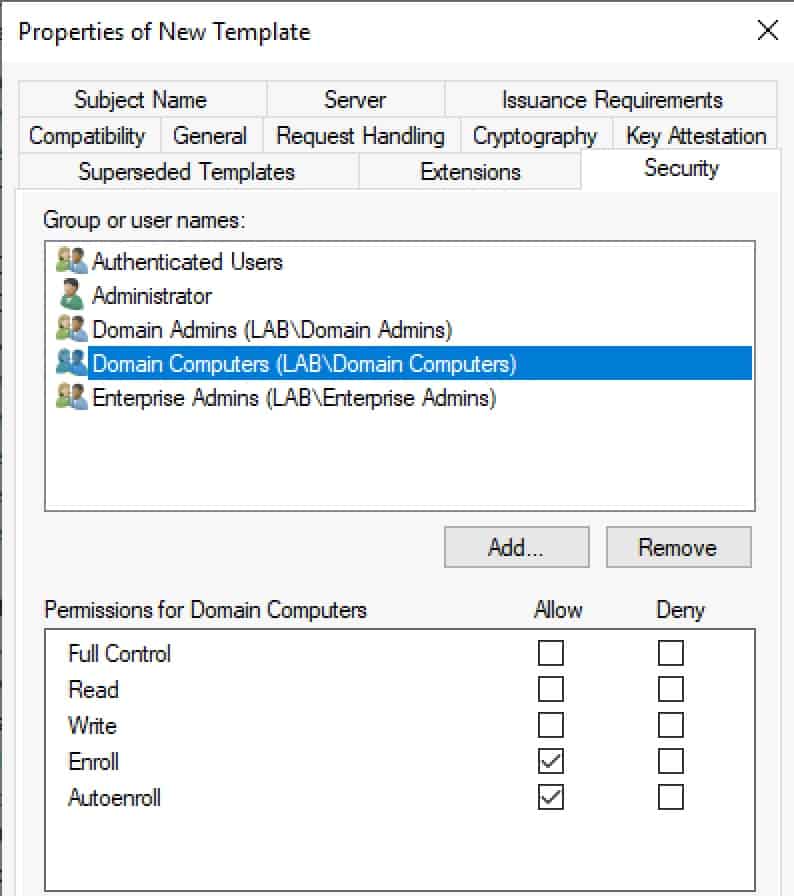
7. Click on the Security tab and modify the Domain Computers group to enable Autoenroll. Close out the template and template window.
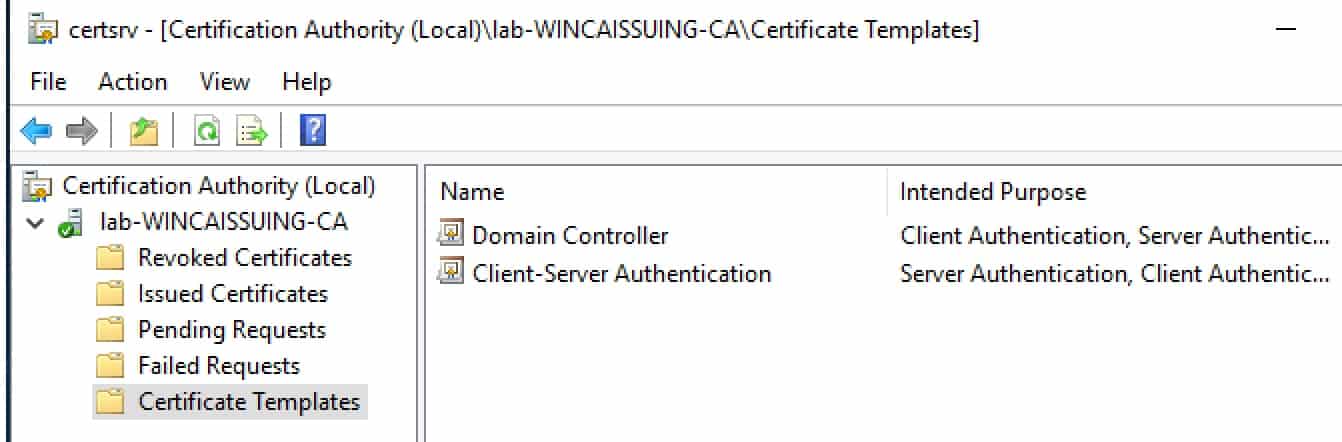
8. Back in the issuing CA console right click on Certificate Templates, select New, then Certificate Template to Issue. Select the template name you just created. Wait a few minutes for the settings to simmer a bit. If you want you could also publish the Domain Controller template. This will enable the DCs to offer LDAPS services. If the template you just created is not listed, you can simply wait a bit or restart the CA services and that should kick it in the pants.
Auto-Enrollment Validation
1. On your Subordinate CA, open an elevated command prompt or Powershell and type gpupdate /force. Wait a couple of minutes, as certificate enrollment is not always instant.
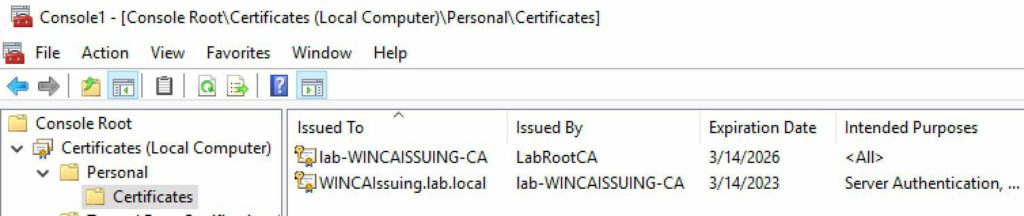
2. Open a blank MMC console and add the Certificates snap-in. Manage the Computer account.
3. On your subordinate CA you should now see two certificates. In my case the bottom certificate was the one issued by the auto-enrollment policy.
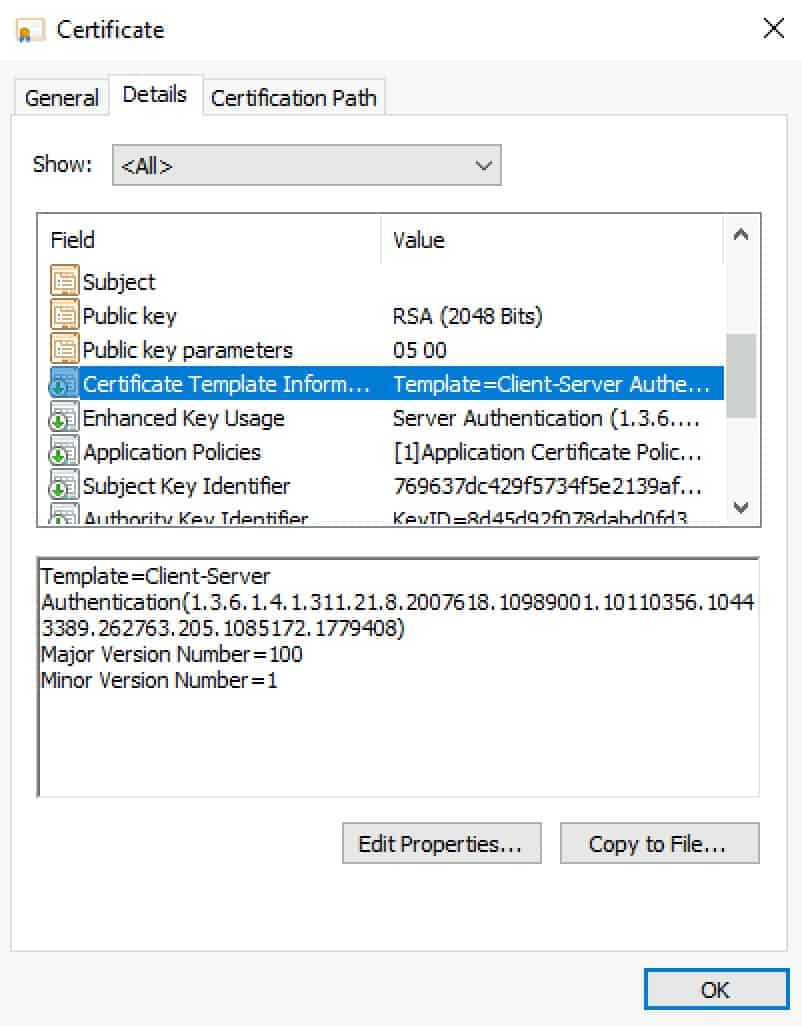
4. You can verify the certificate was issued from the proper template by opening the properties then on the Details tab look for the Certificate Template Information property. It will clearly state the template name used to create the certificate.
5. As the GPO refreshes on other computers in the domain, they should also be issued a certificate as well. Auto-enrollment can run into snags, so I have seen cases where everything has been configured properly but for some reason a certificate is not issued.
Configure CA Web Services for SSL
1. After the auto-enrollment certificate has been validated on the subordinate CA, open the IIS Manager on your subordinate CA.
2. In the left pane select Default Web Site. In the right pane select Bindings.
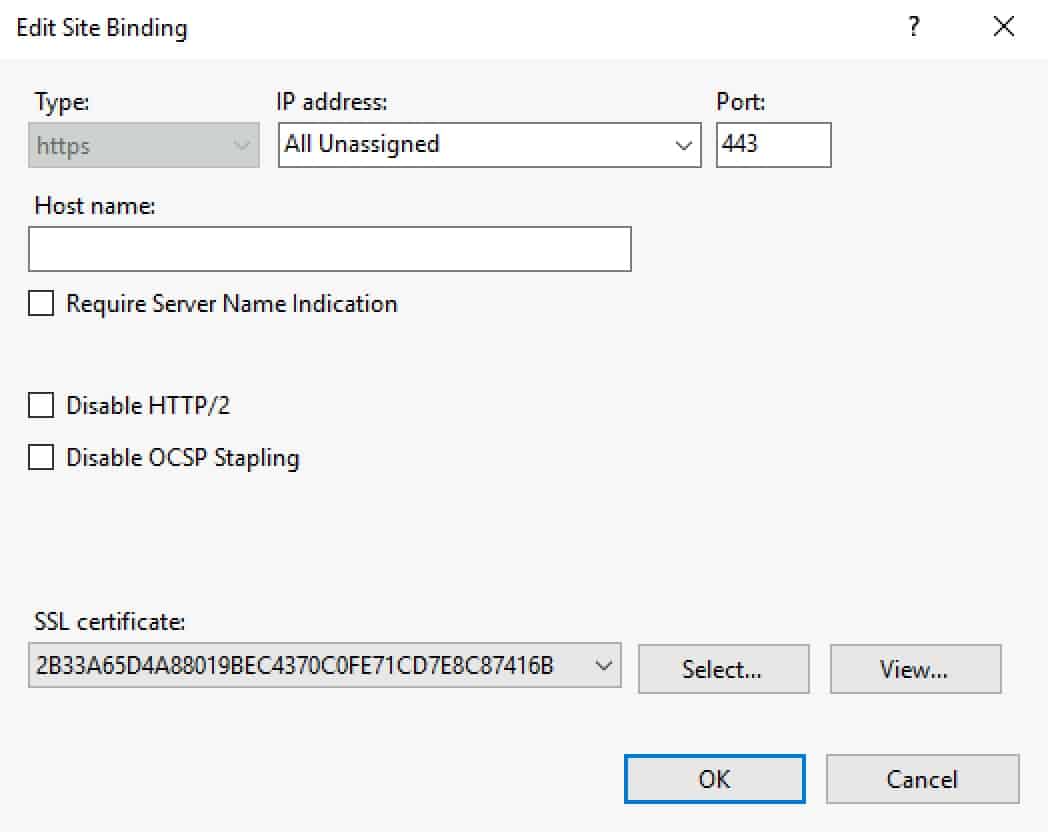
3. Click on https then click Edit.
4. Select the SSL certificate that was created from the client-server template. You can view the certificate in the GUI if you aren’t sure which one to pick.
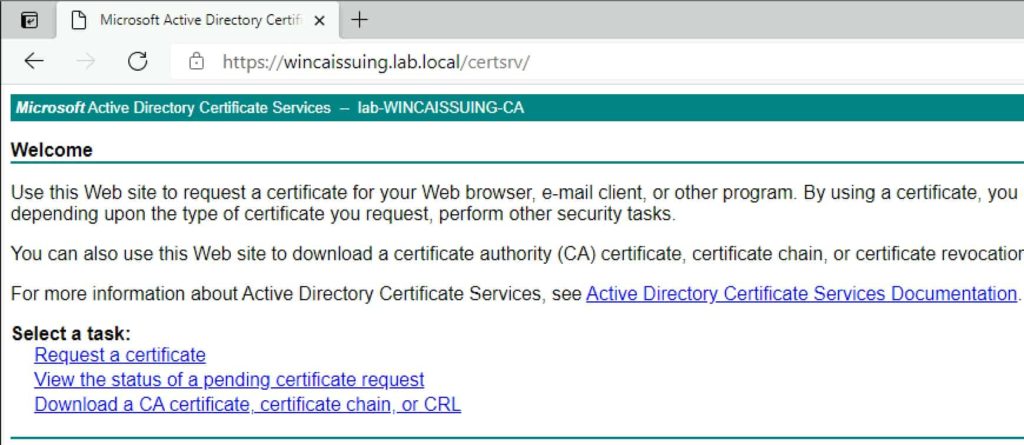
5. Open your favorite browser and navigate to the FQDN of your subordinate CA and to the certsrv site (e.g. https://WinCAIssuing.lab.local/certsrv). You will likely be prompted for credentials, then presented with the standard ADCS home page. You should not have any SSL errors or warnings.
Summary
Whew! As you can see, setting up a two-tiered Certificate Authority with Windows Server 2019 is a bit tedious. However, it’s not rocket science (at least for a lab environment). Now you are ready to issue a variety of certificate types for things such SQL, web servers, hypervisor hosts, etc. The steps are surprisingly similar to that of Windows Server 2012 R2.
Remember this configuration example is just for a lab environment. In a high-steaks production environment you want to engage a security professional to stand up a bullet-proof PKI.
Stay tuned for a possible series on Windows Server 2022 PKI, some time after Microsoft GA’s that version.


Nice write-up. Thank you!
Thanks, great job. One question with regards to ongoing maintenance, what would be the process for renewing the RootCA CRL on the SubCA, when it expires?
Thanks for taking the time to detail these steps, it’s an excellent and thorough article and much appreciated
Hi Derek, Thanks for this write up. This doesn’t seem to cover the cert revocation list server set up. The reason I ask is that I have seen such things set up in environments that I have had the opportunity work in.
Also are you based in the UK?
Thanks.