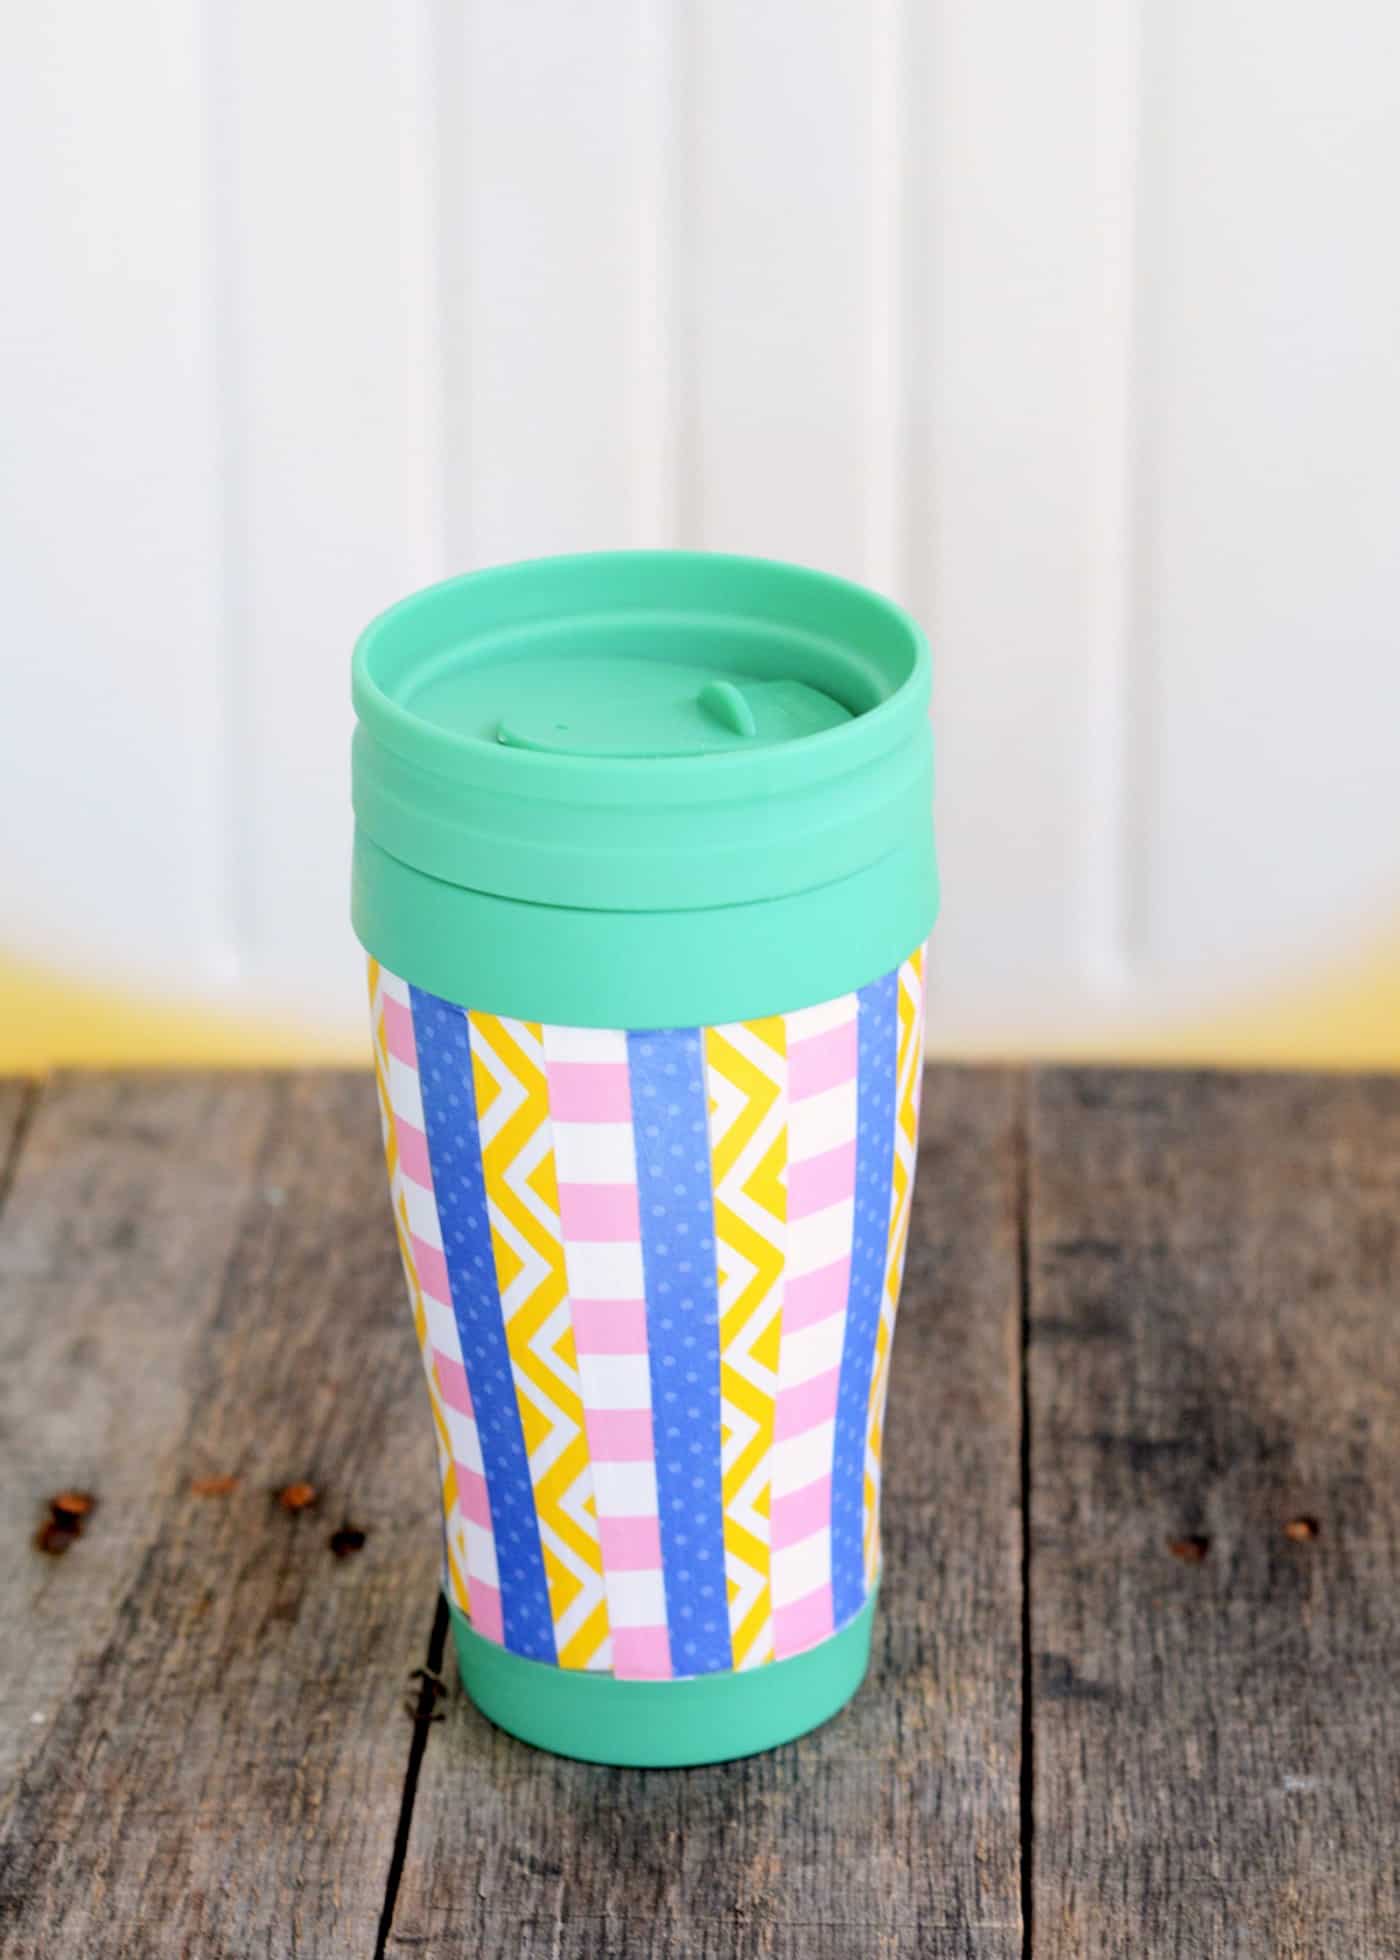
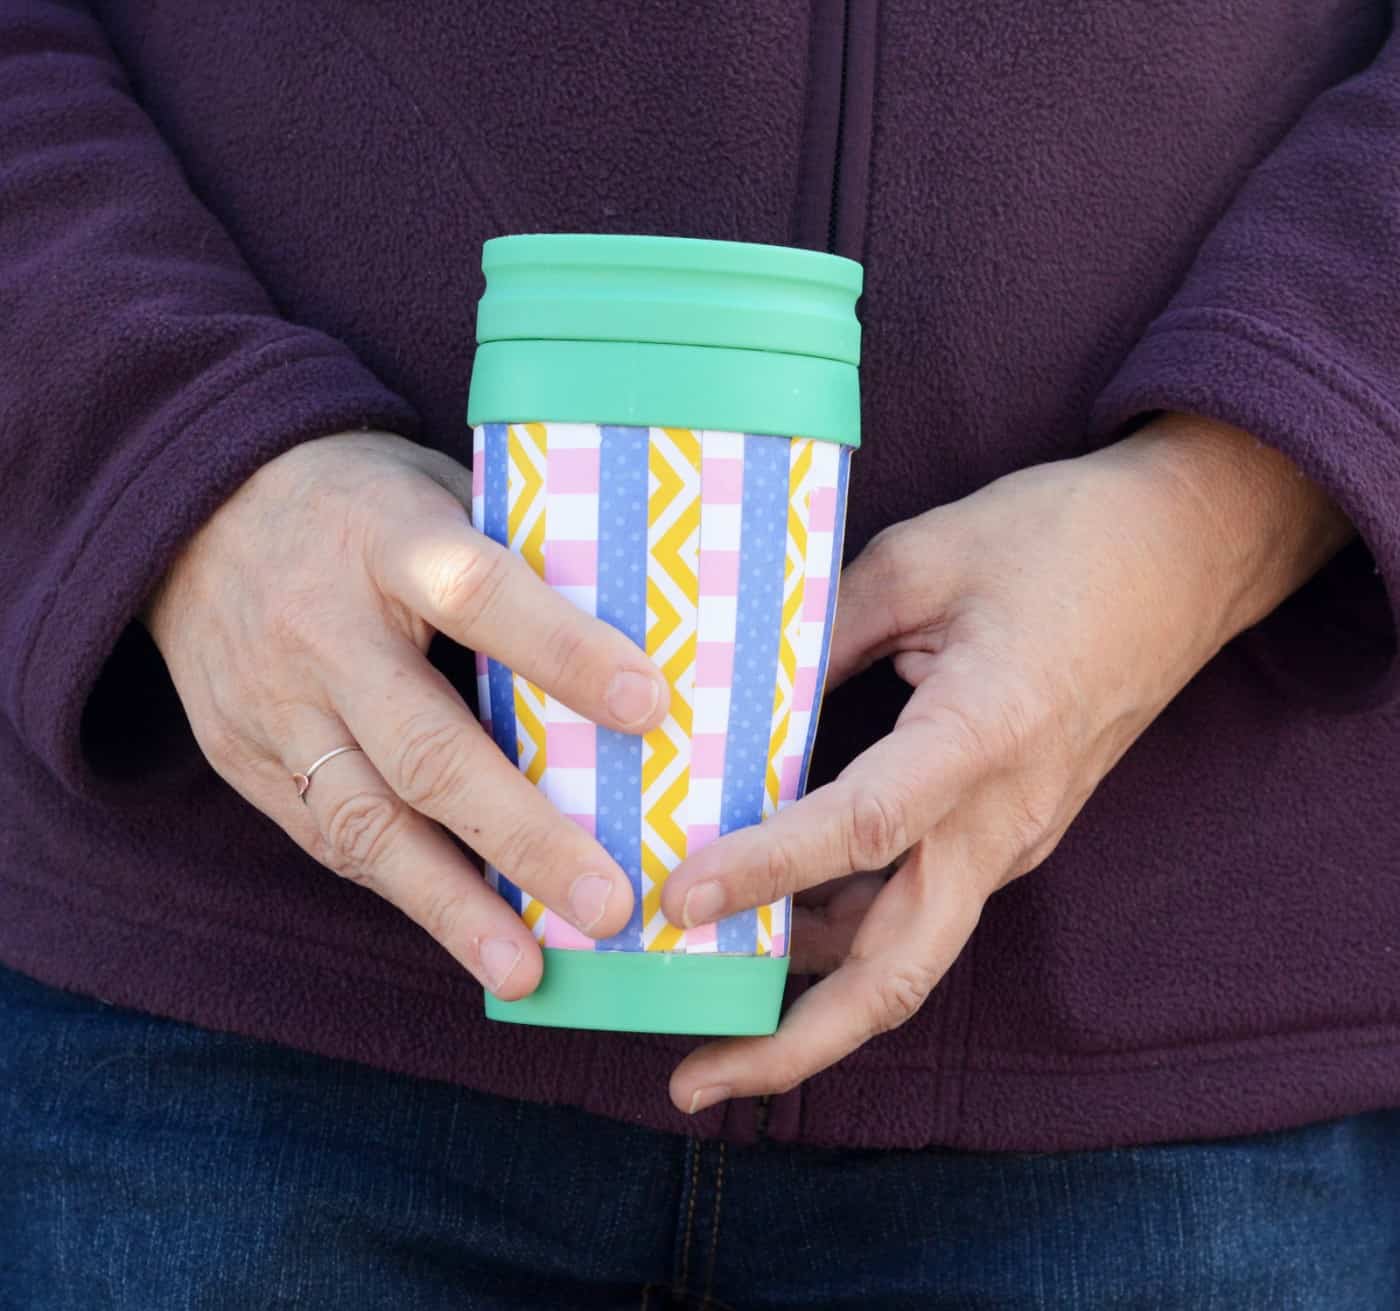
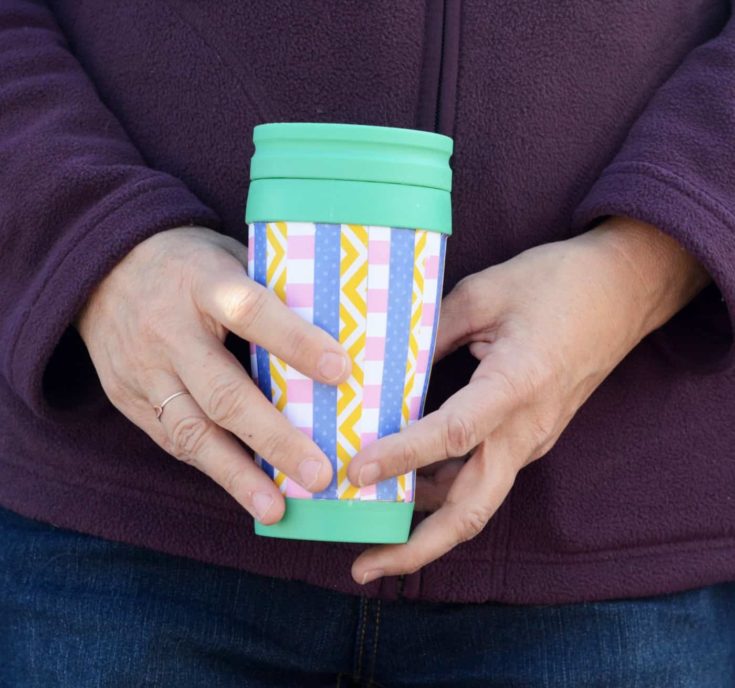
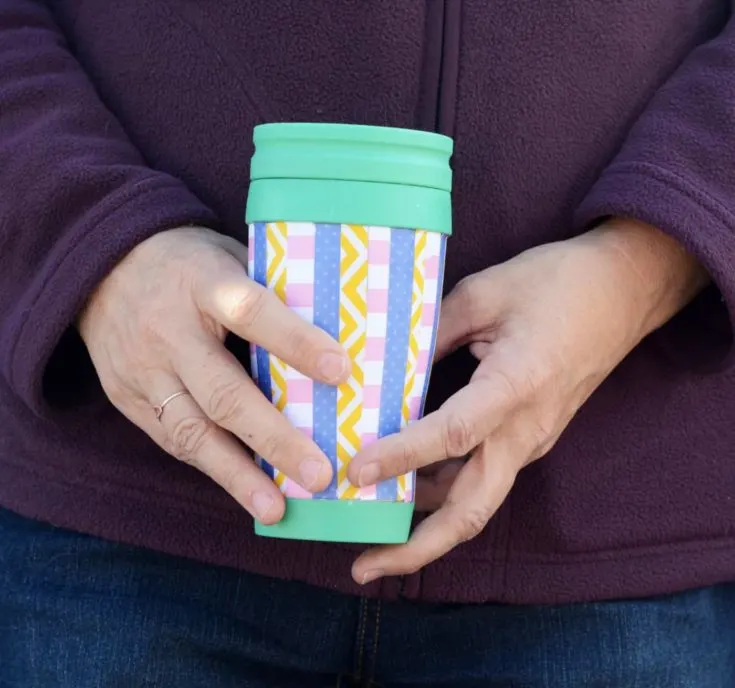
This DIY travel mug was assembled with a dollar store item, paper scraps, and Dishwasher Safe Mod Podge. It’s so easy and inexpensive to make!
Skills Required: Beginner. It helps to have experience with Mod Podge so you can apply the paper without wrinkles. Besides that, it’s relatively easy. Don’t forget to observe the required 28-day dry time!

Hi guys! It’s Ashlee from My So Called Crafty Life, and I am back to share a fun and easy DIY travel mug craft with you all today! A couple of weeks ago I saw these cute stainless mugs at Target in their “dollar” section.
You can often find these at Dollar Tree too, making these the perfect dollar store craft or inexpensive back to school or teacher appreciation gift.
I thought they would be really fun to decoupage. I have been itching to try out the Mod Podge Dishwasher Safe formula for a while now, so I thought this was a perfect project to try it out on!

DIY Travel Mug
Here’s What You Need:
- Travel Mug
- Dishwasher Safe Mod Podge
- Rubbing Alcohol
- Scrapbook Paper
- Scissors or Paper Cutter
- Ruler
- Paintbrush
- Craft Knife
Instructions:

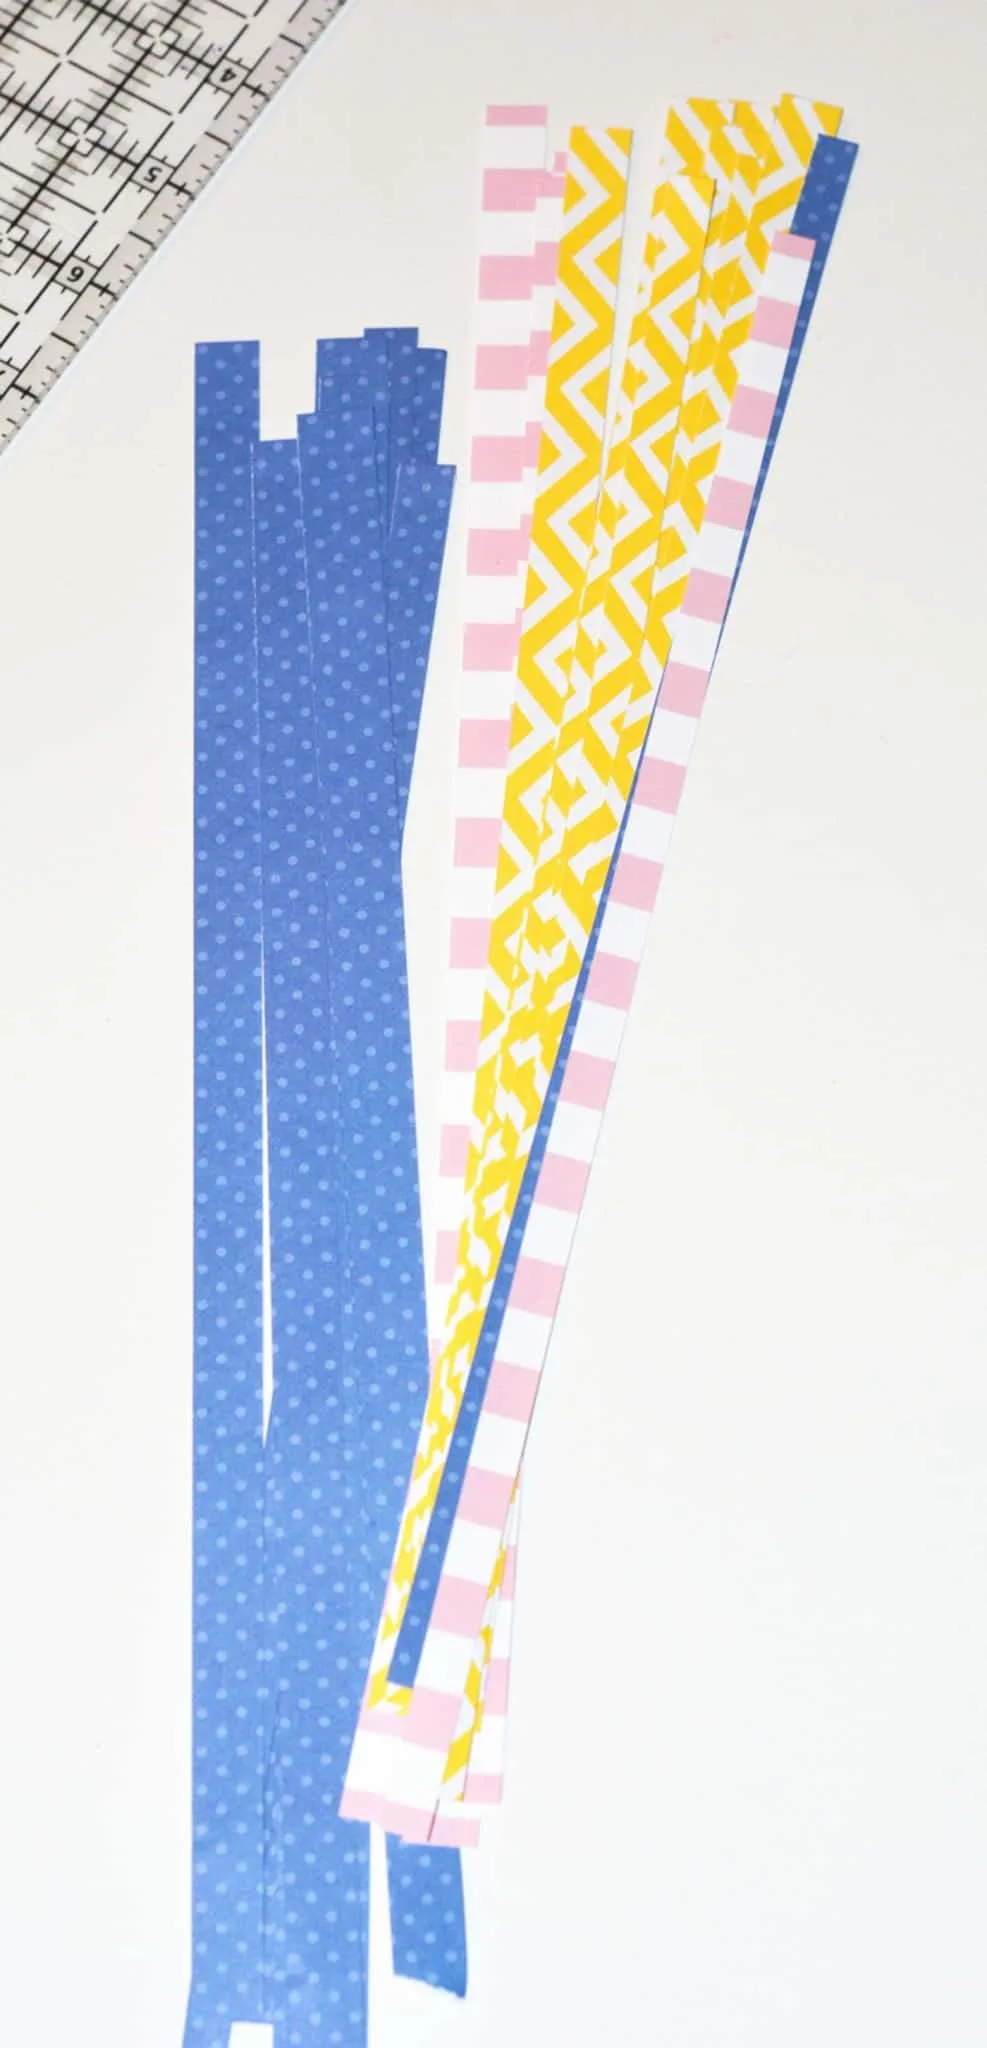
The first thing you need to do is measure the space between the top and bottom plastic lips of your mug. Now, cut strips of your scrapbook paper with either scissors or a paper cutter.
Cut them to be about 1/4″ wide. Mine were not all uniform, cause my paper cutter is a little off, so don’t worry if they are not all perfect. Then cut all the pieces to the length you measured on your mug.

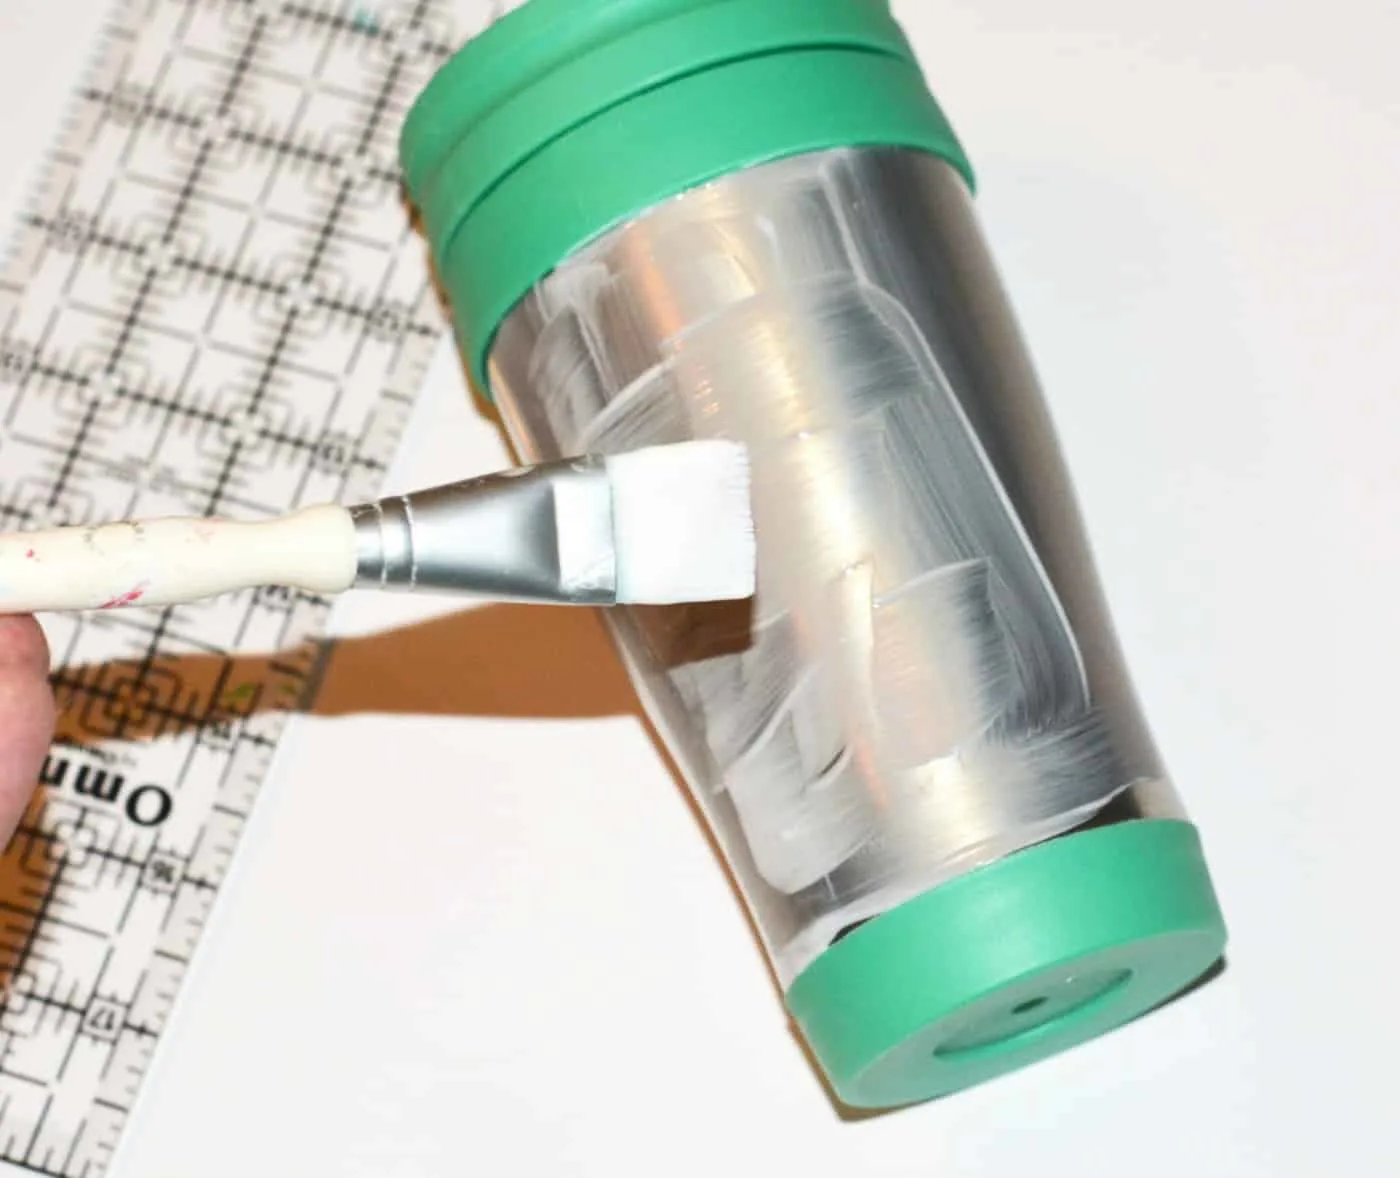
Clean your mug with the rubbing alcohol and dry. Grab a little of the Mod Podge Dishwasher Safe medium onto your paint brush and brush a little on your mug down the length of the mug.

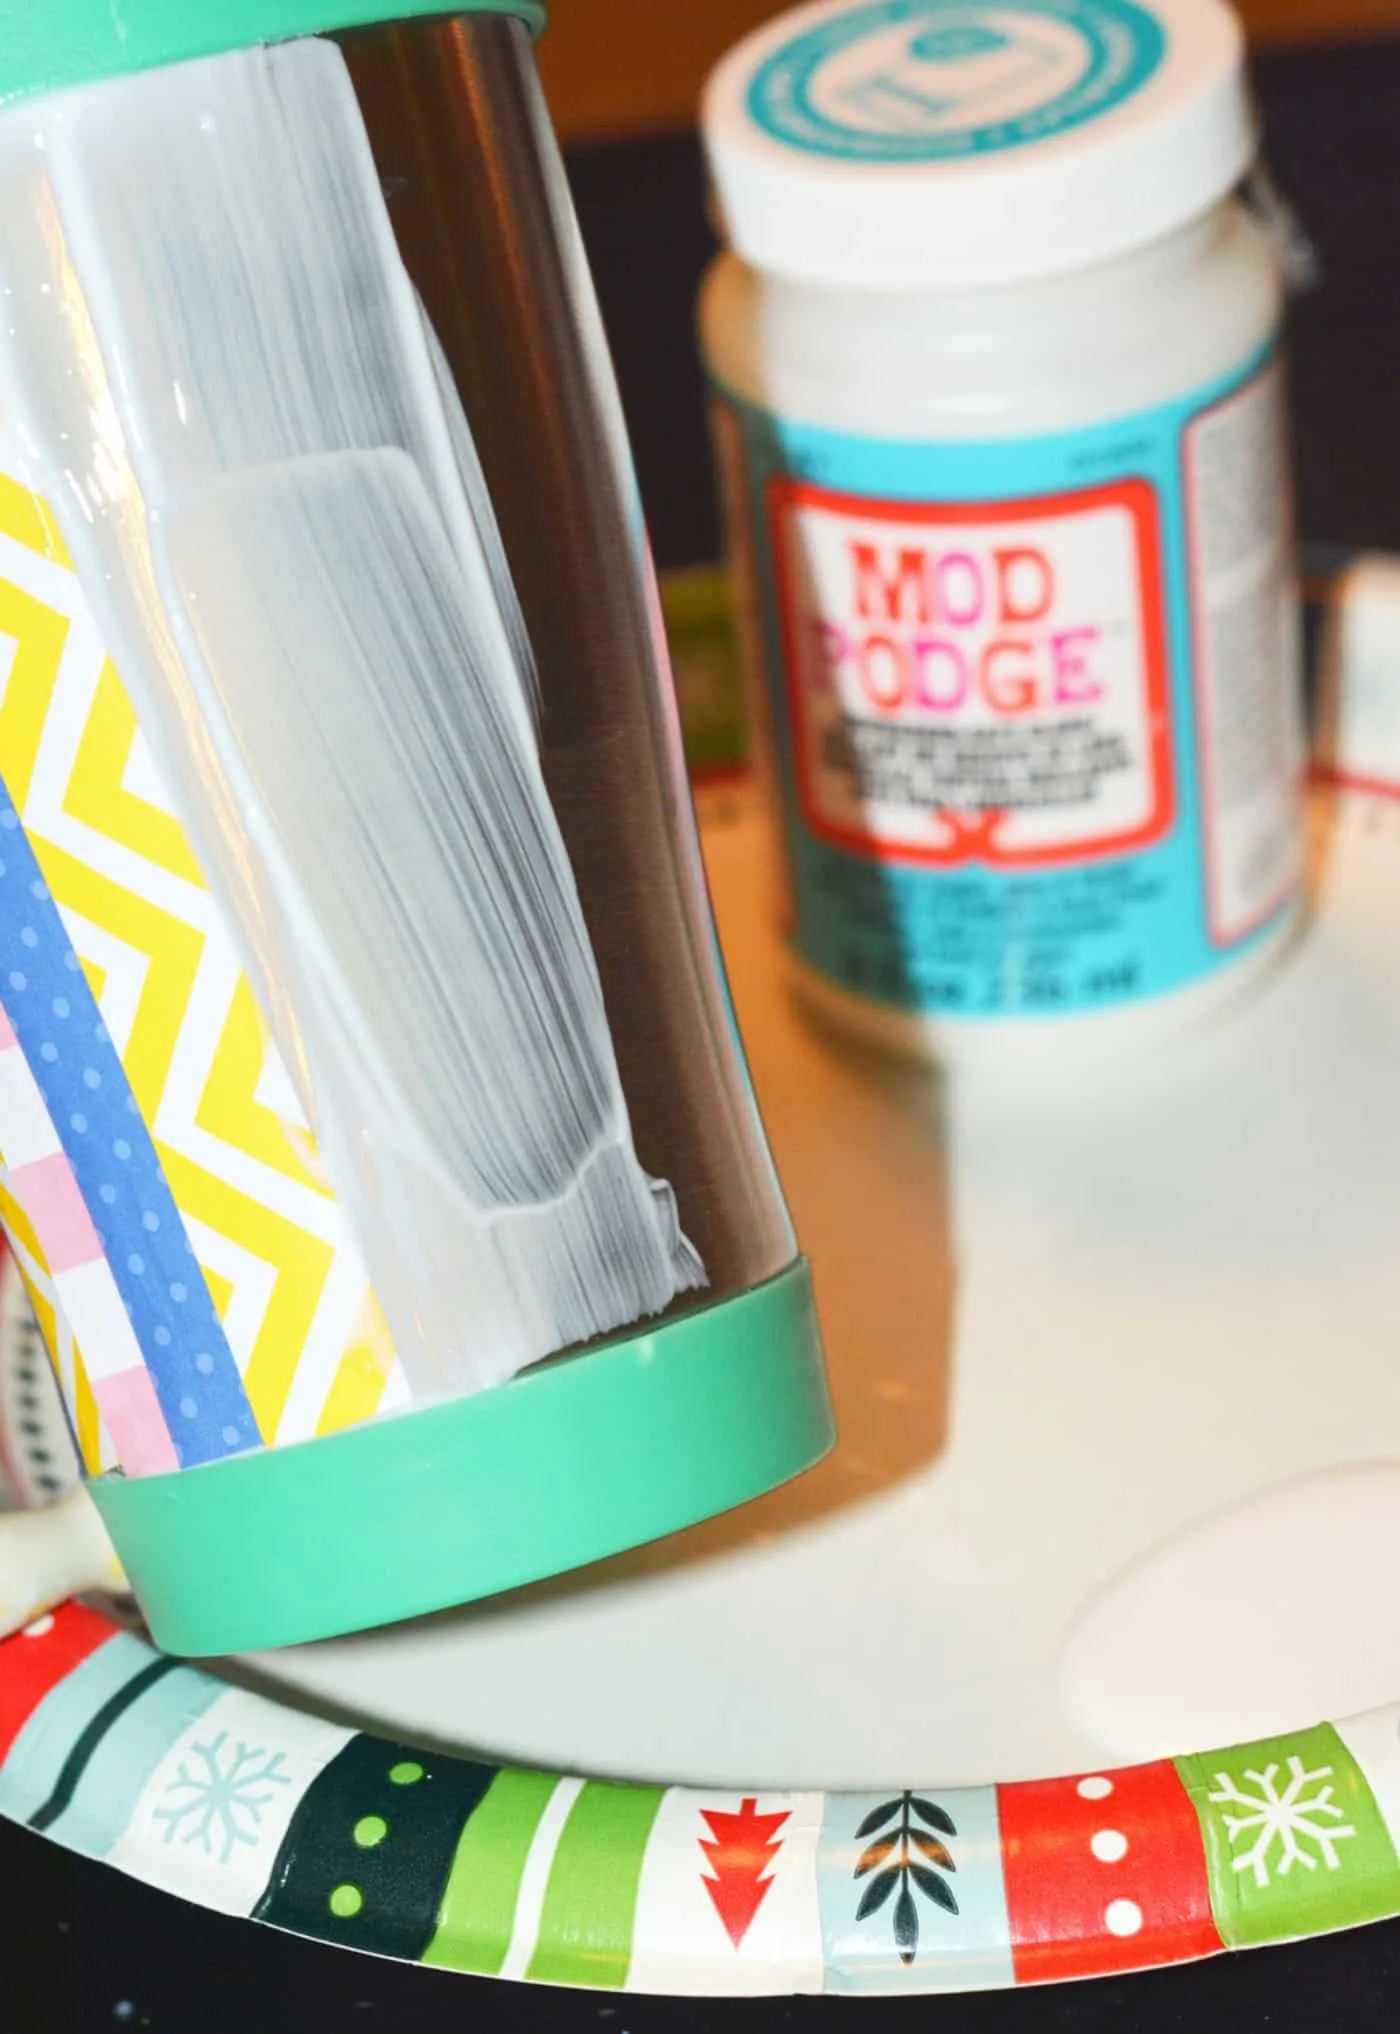
Now take a strip and lay it on the mug in the medium painted area. Lay it as straight as you can and smooth it out so that there are no wrinkles or bubbles.
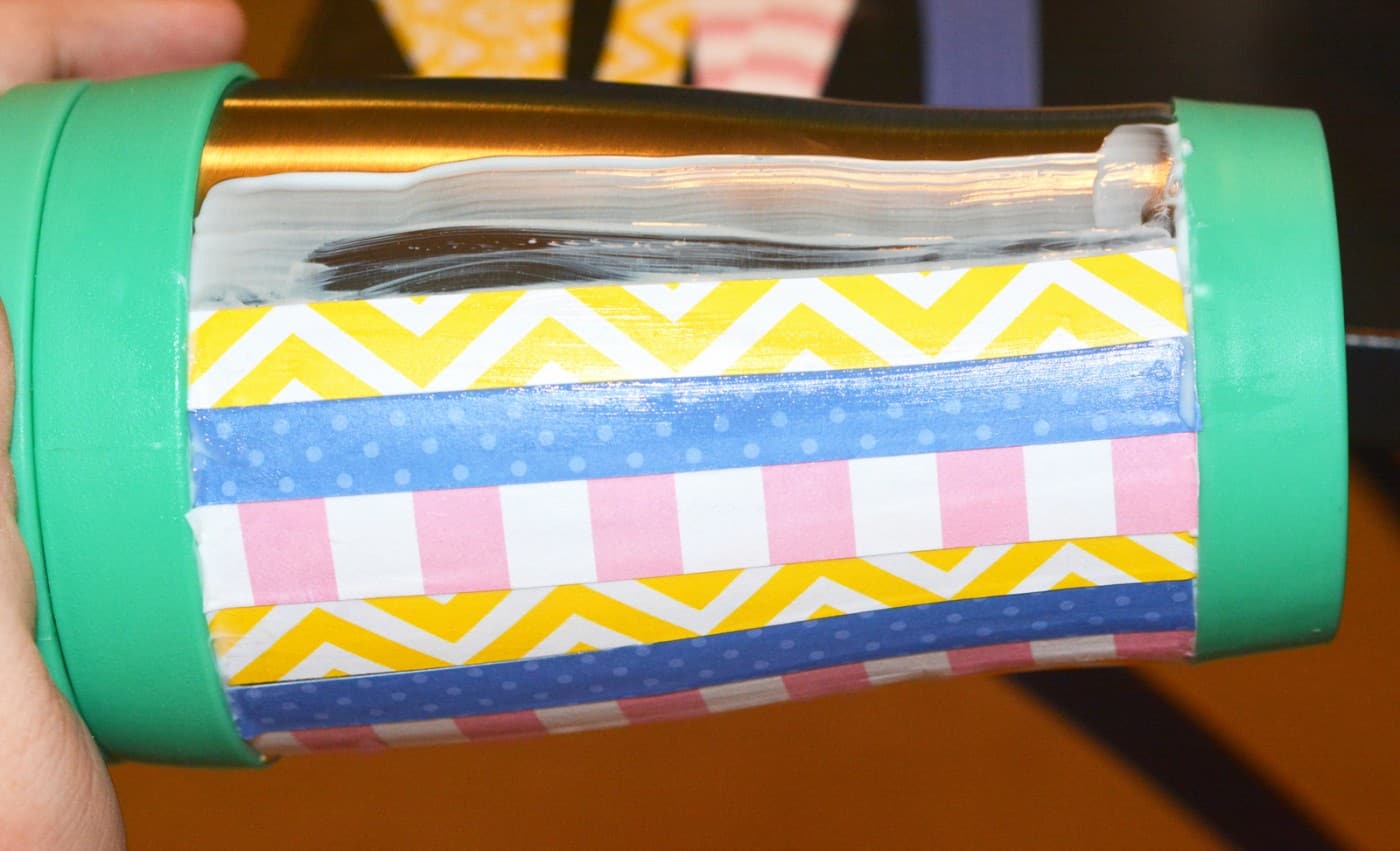
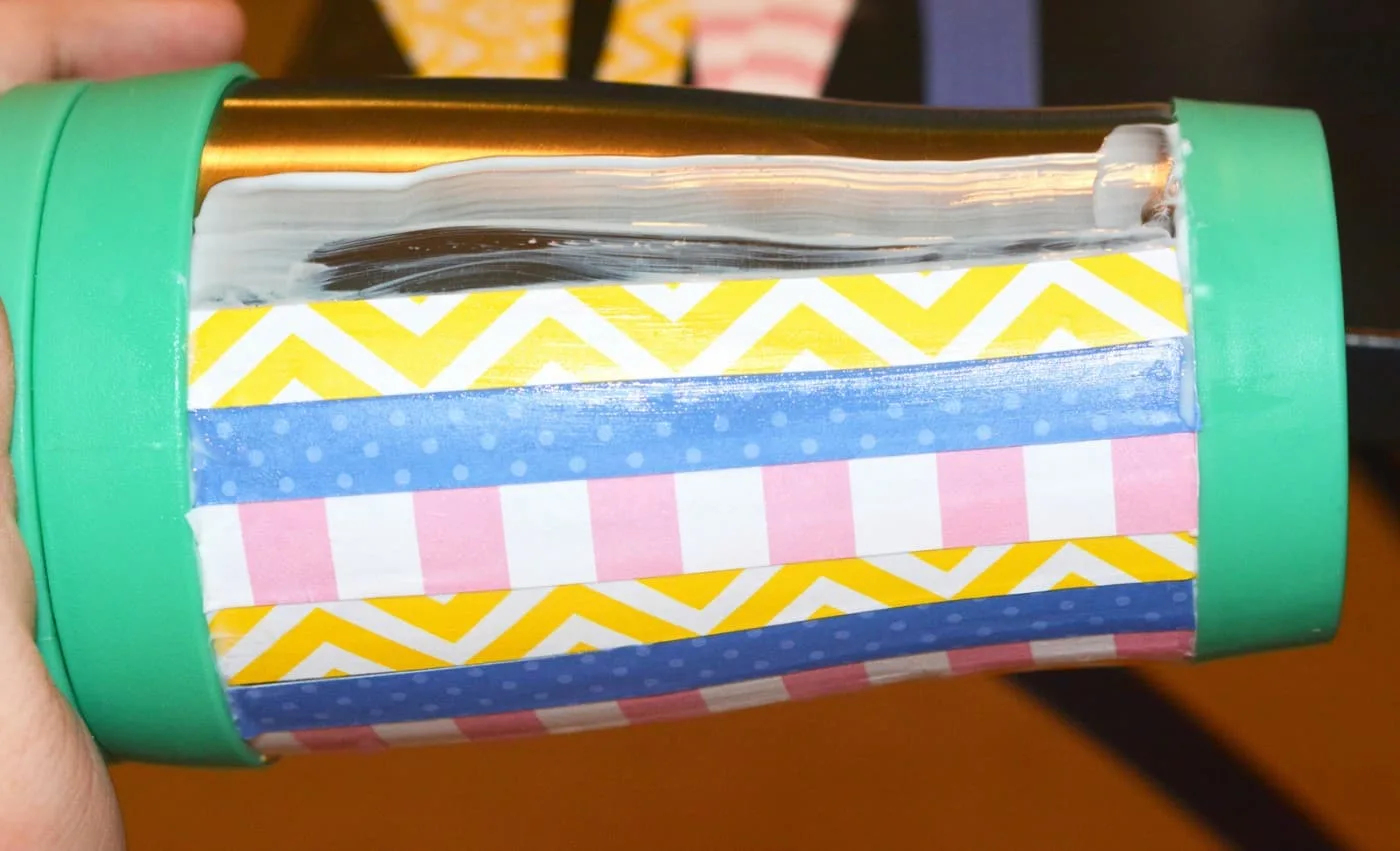
Repeat with another strip, then another and so on until you have covered the space with the medium you had brushed on.
Then brush on some more medium and keep smoothing on strips of your paper. Do this all the way around your mug. Set aside to dry.
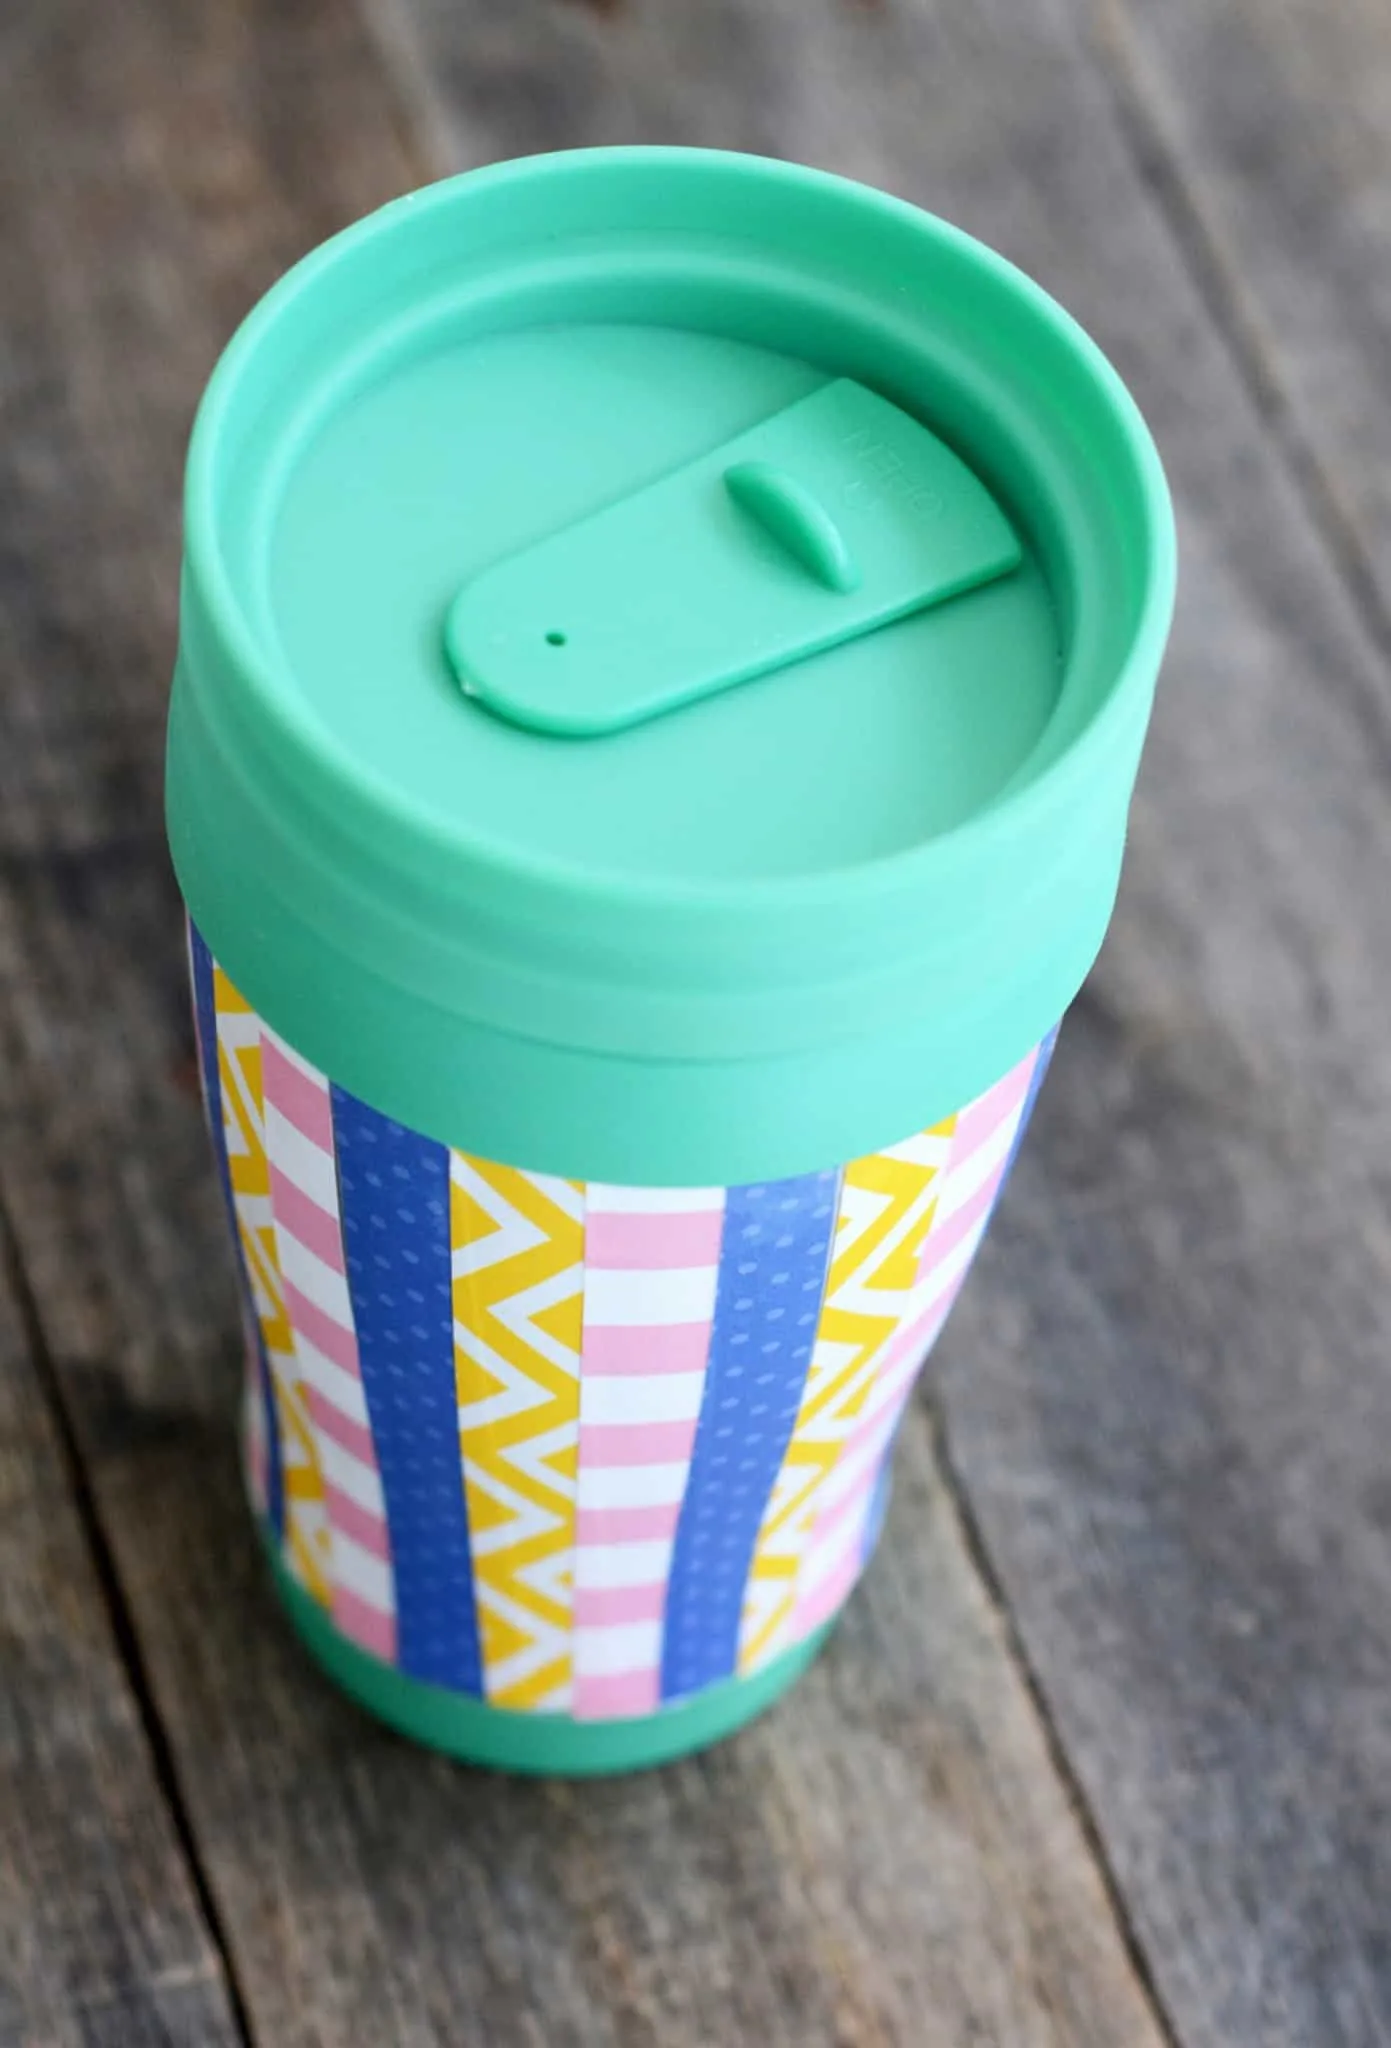
If you have any funky edges on the top or bottom of any of your strips you can cut them off with a sharp craft knife.

Once your mug is dry, you will need to seal it. Brush on a layer of the dishwasher safe medium. Let it dry. Add another one to two coats letting the mug dry one hour in between coats. Make sure to paint every inch of the paper so it is truly dishwasher safe.
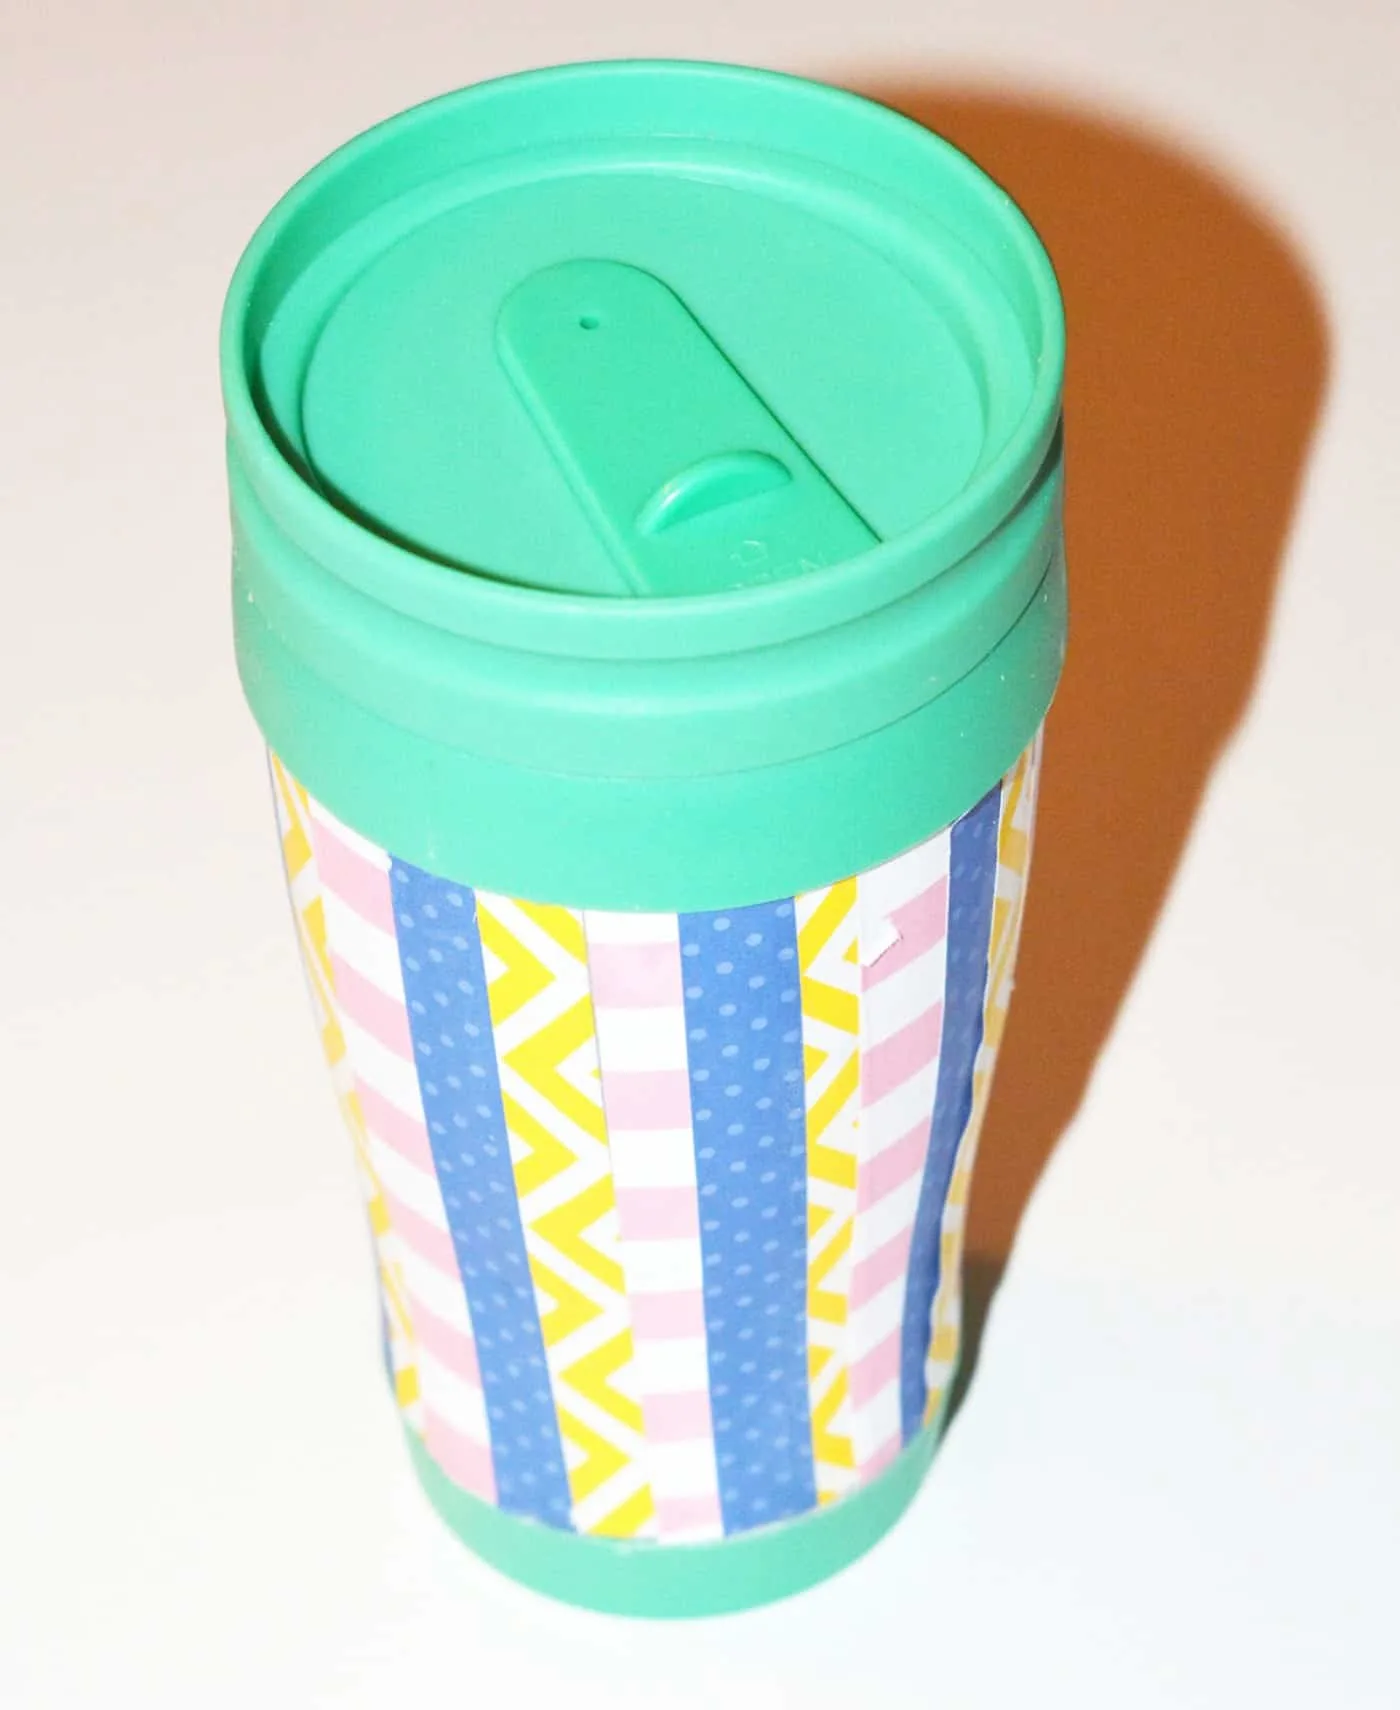
Let cure for 28 days before washing. I love my DIY travel mug!

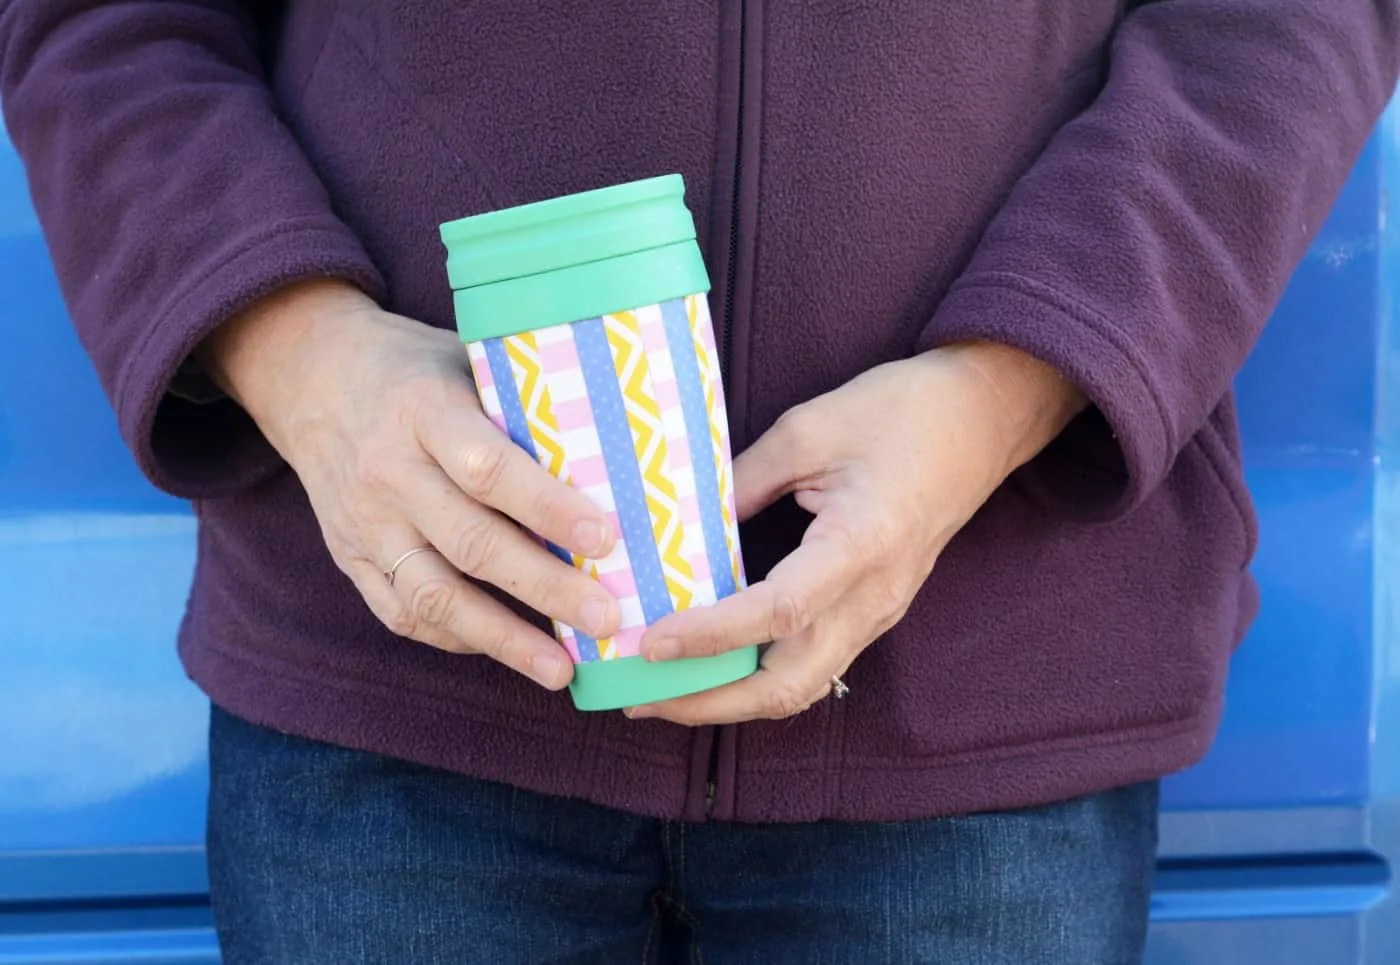

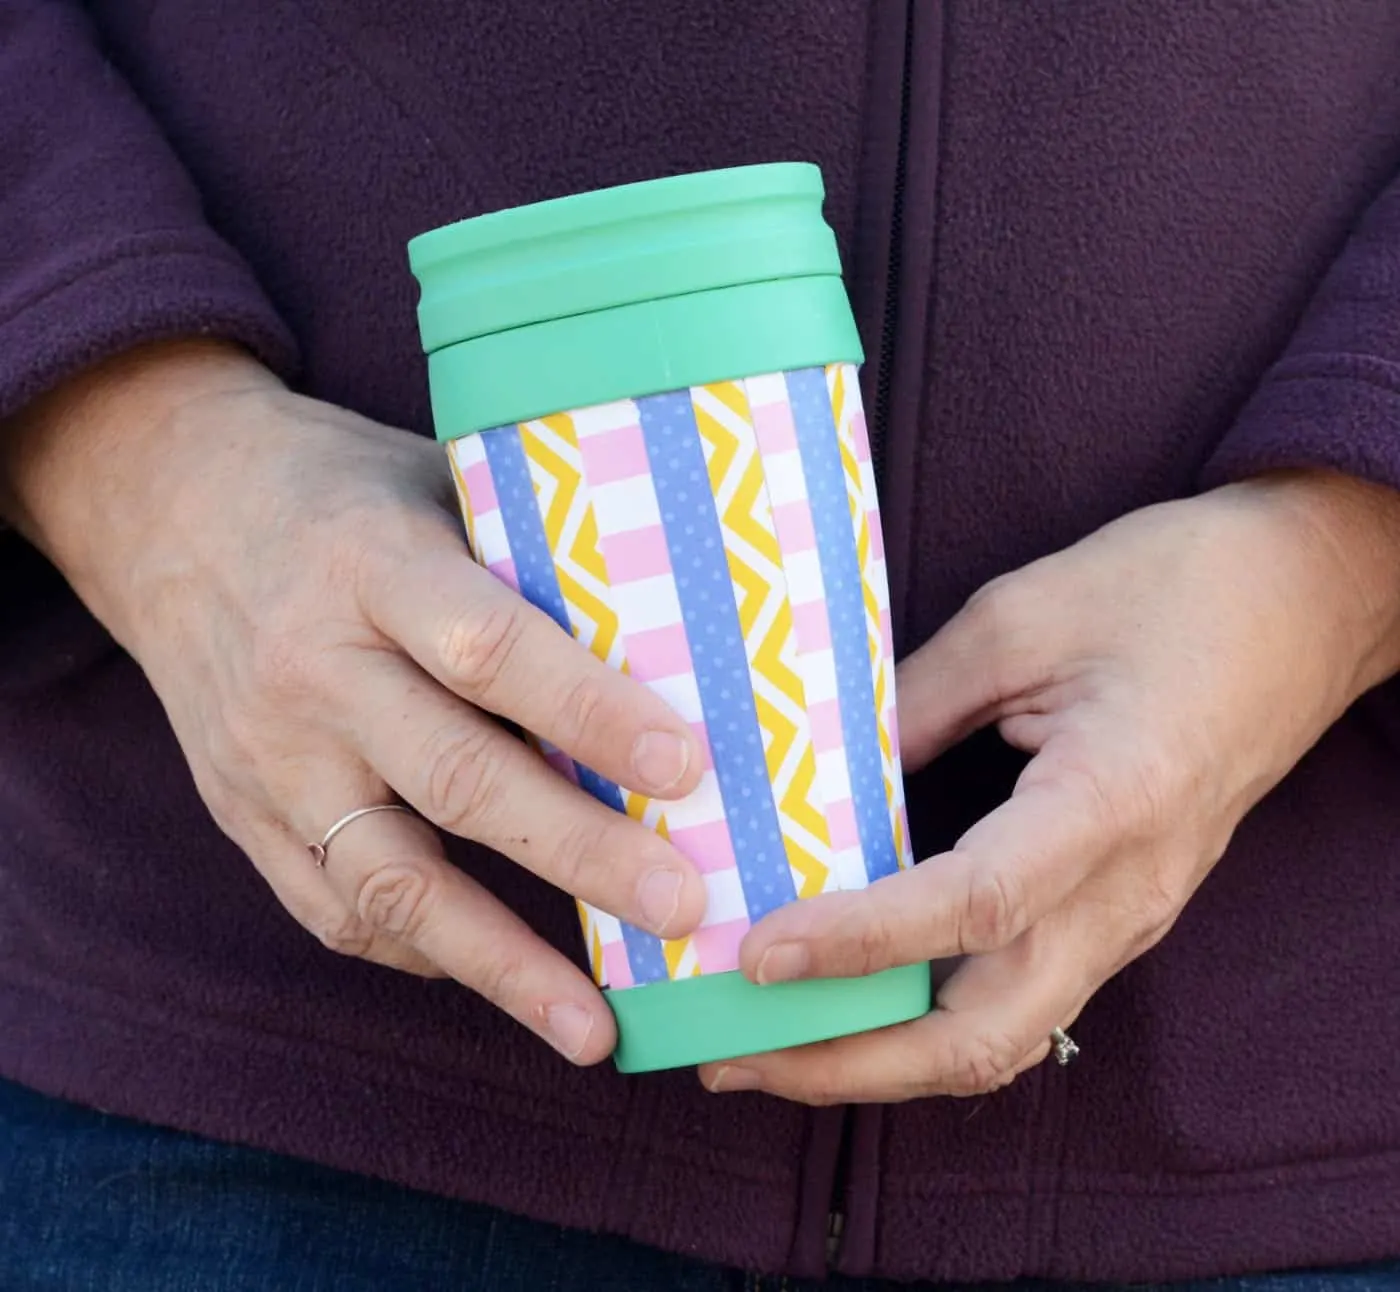
I think my DIY travel mug turned out super cute and I can’t wait to use it! This would make a fun handmade gift for anyone you know that loves taking their favorite drinks on the go.

This craft was really easy, fun, and took me less than an hour to whip up! I love how versatile it is too as you can easily make it your own just by the paper you use. I hope you all will give it a try sometime!
DIY Travel Mug
Learn how to make a DIY travel mug using a Dollar Tree find, scrapbook paper, and Mod Podge Dishwasher Safe.
Materials
- Travel mug
- Dishwasher Safe Mod Podge
- Rubbing alcohol
- Scrapbook paper
Tools
- Scissors or paper cutter
- Ruler
- Paintbrush
- Craft knife
Instructions
- Measure the distance between the top and bottom lips of the mug. Cut 1/4" wide strips of the scrapbook paper to length with scissors or a paper cutter.
- Clean the mug with rubbing alcohol and dry.
- Add a bit of the Mod Podge Dishwasher Safe to the brush and paint a little down the length of the mug.
- Take a strip and lay it on the mug in the medium painted area. Lay it as straight as you can and smooth it out so that there are no wrinkles or bubbles.
- Repeat with another strip and so on until you have covered the space with the medium you brushed on.
- Brush on additional medium and keep smoothing on strips of the paper. Do this all the way around the mug. Set aside to dry.
- If there are any funky edges on the top or bottom of any of the strips, cut them off with a sharp craft knife.
- Seal the entire mug with another layer of Mod Podge. Let dry and repeat. Let cure for 28 days before washing.
If you all would like to see more of my fun crafts you can find me on my blog, My So Called Crafty Life. I’d also love for you to check out the following posts:
Paige
Wednesday 10th of February 2016
This mug is so fun! I love the choice of prints you chose!
Paige https://www.thehappyflammily.com/