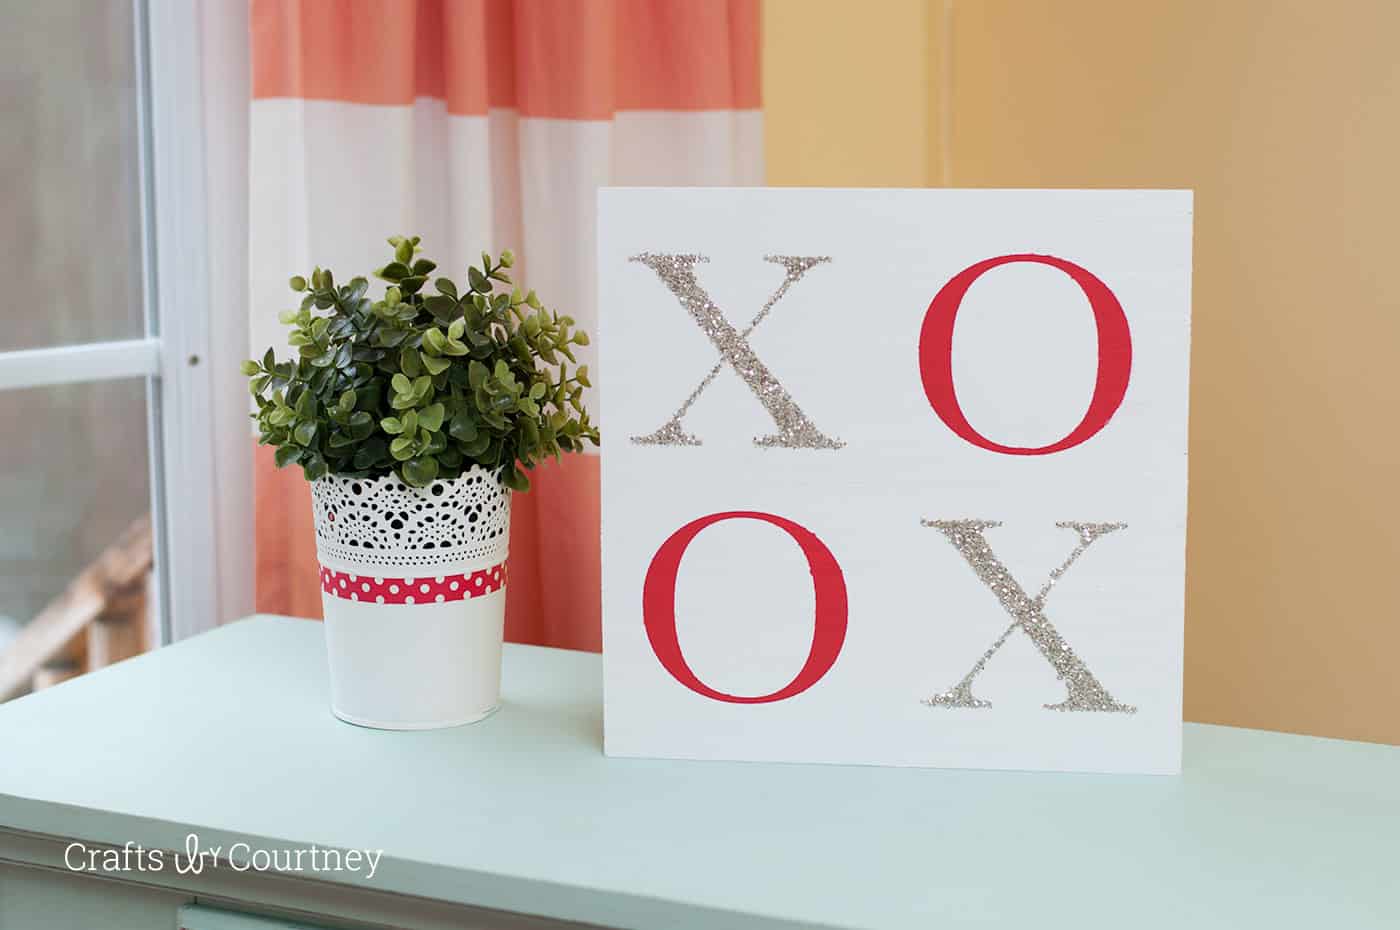
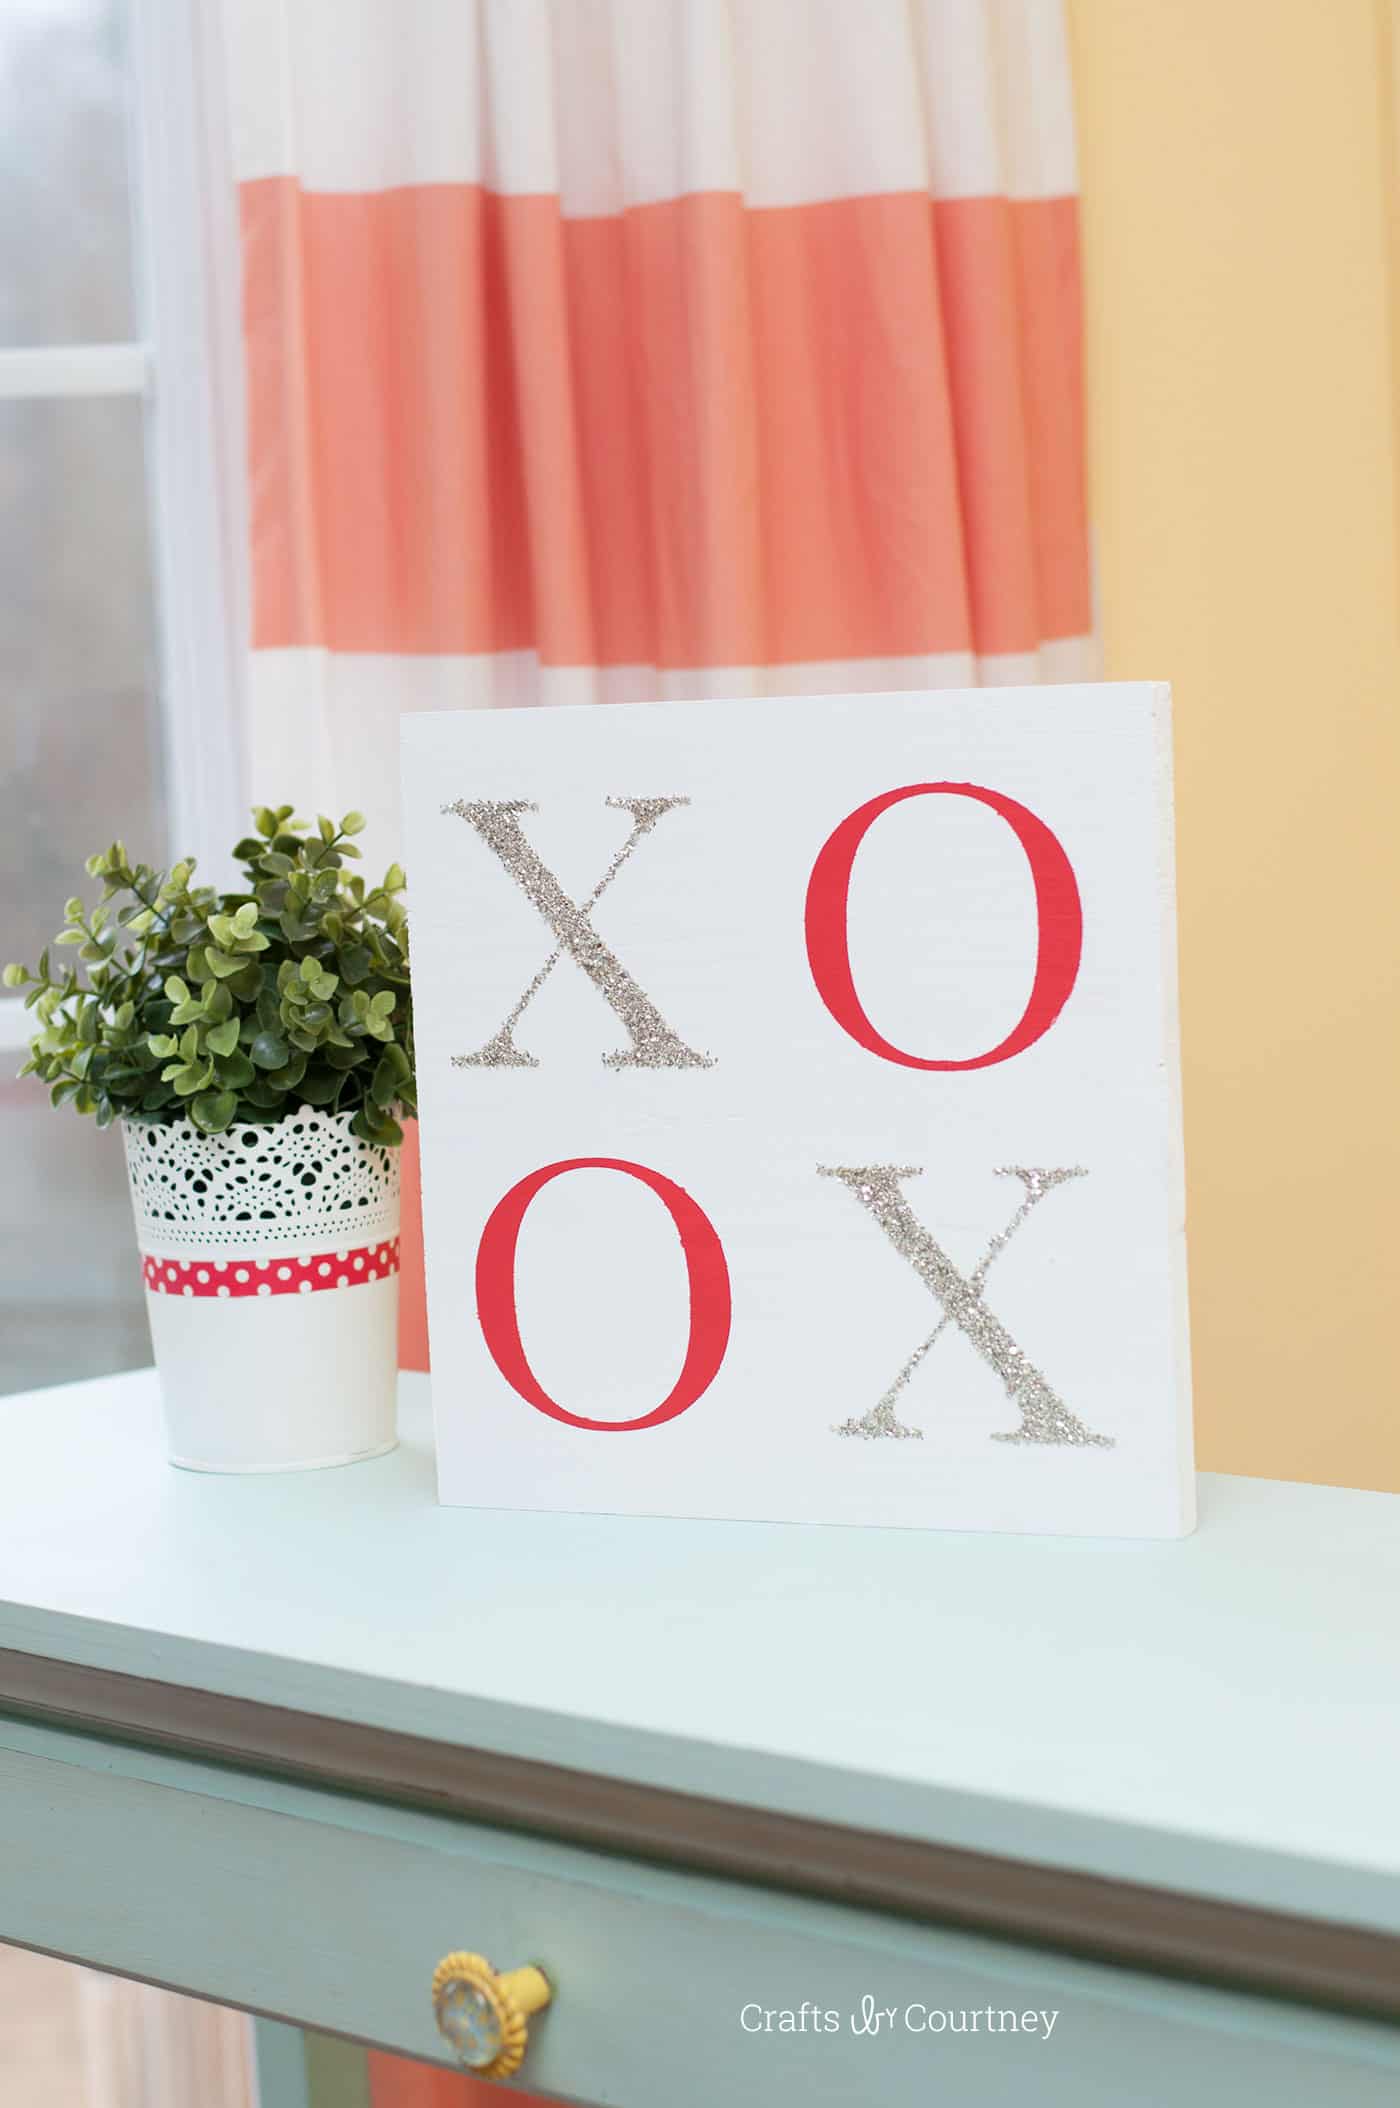
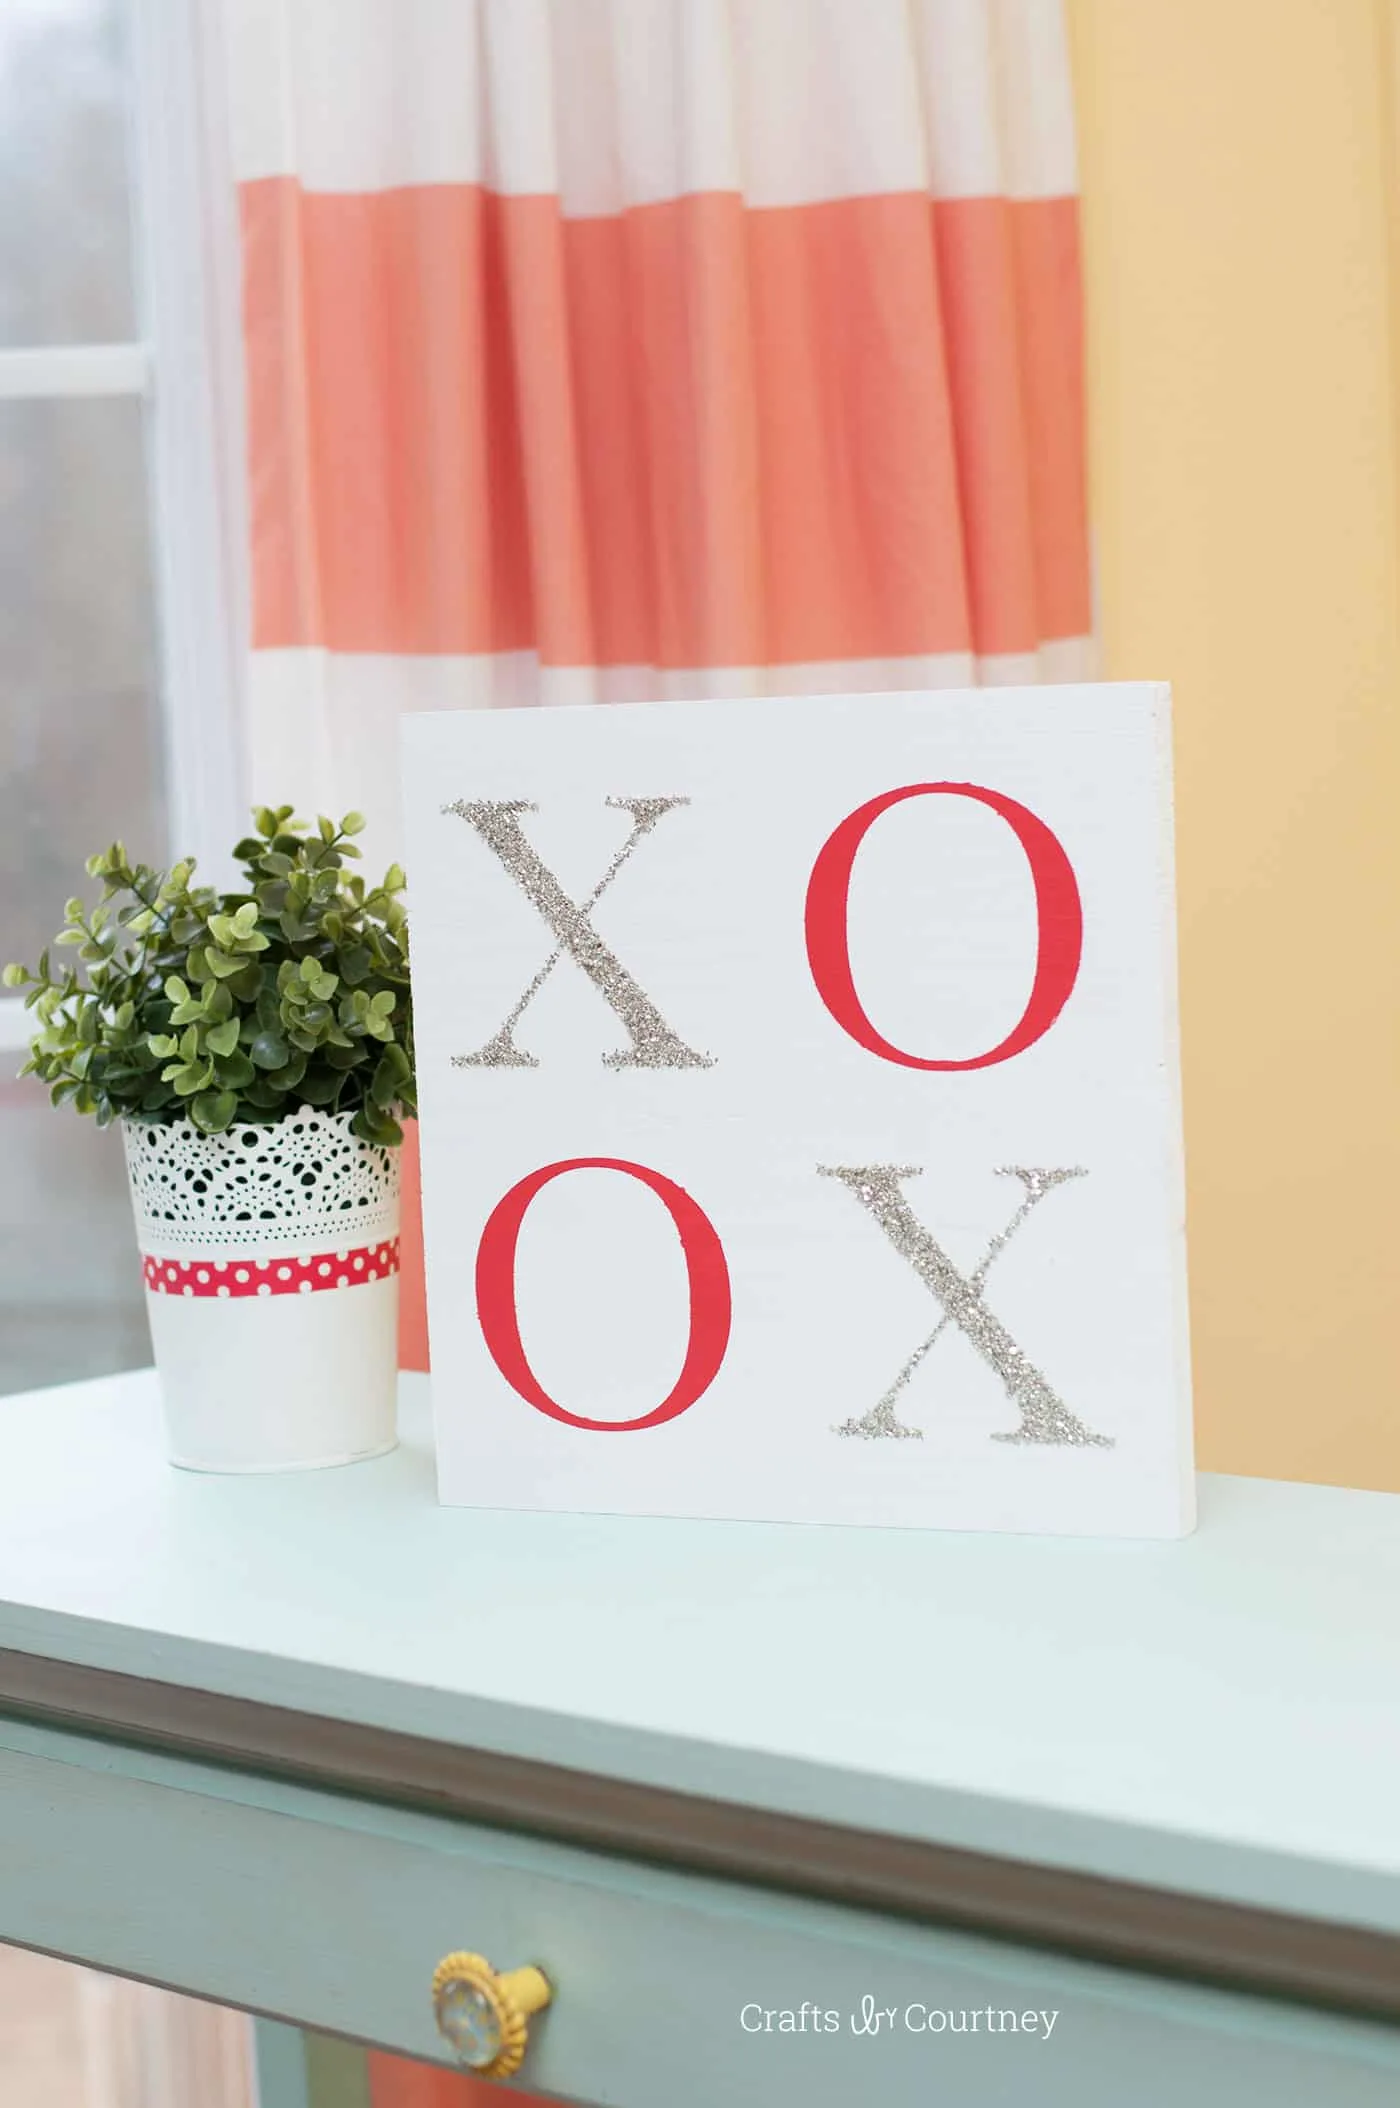
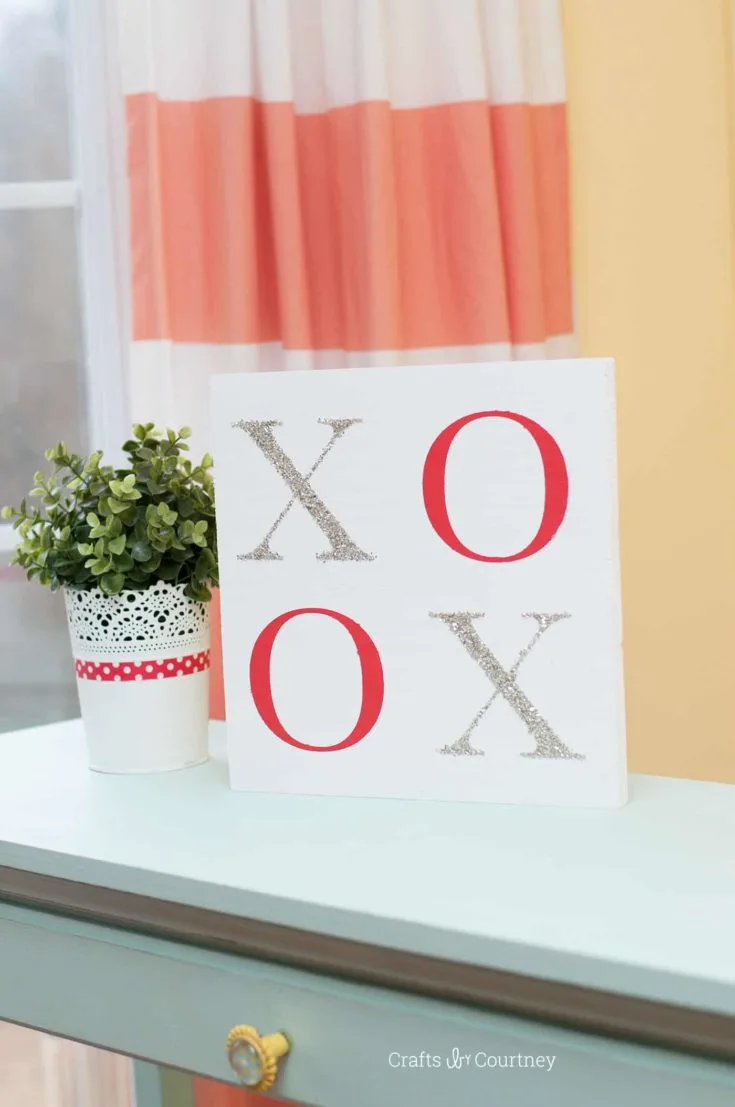
Use Mod Podge and glitter to make this sparkly Valentine’s Day sign – an XOXO decor that will look great displayed on a table or mantel! This is REALLY easy to make.
Skills Required: None. This is a great holiday project even if you’ve never crafted before. You’ll be painting and then using vinyl as a stencil to create the letters.

Valentine’s Day is right around the corner and I wanted to get started on a Valentines craft for the house. One of my go to crafts for the holidays are my easy DIY signs.
I haven’t made a Valentine’s Day sign yet, and I thought this was the perfect opportunity. Plus I get to incorporate my “trusty” Mod Podge.
I did a similar sign like this for Christmas and knew I wanted to make one for Valentines when the time came. I’ve been trying to figure out what I wanted the sign to say.
Did I want to go “Coastal” Valentine’s or stick with the classic Valentine decor theme?
Finally I decided on classic, and what’s more classic then the XOXO theme? Nothing. This is a great beginner project, even if you’ve never crafted before. Simple – but cute! Here’s how I did it.
DIY Valentine’s Day Sign
Supplies
- Wood piece – 12 x 12″
- Paint
- Mod Podge Gloss
- Die cutter or craft knife/design
- Adhesive vinyl
- Paintbrush
- Glitter
- Transfer paper (if you use a die cutter)
Step 1 – Pick Out Your Wood
I used a leftover piece of wood I had from a DIY wall art project I did for Amy. I spent $7.00 on it and had it cut to three 12 x 12 pieces. This was the third piece!!
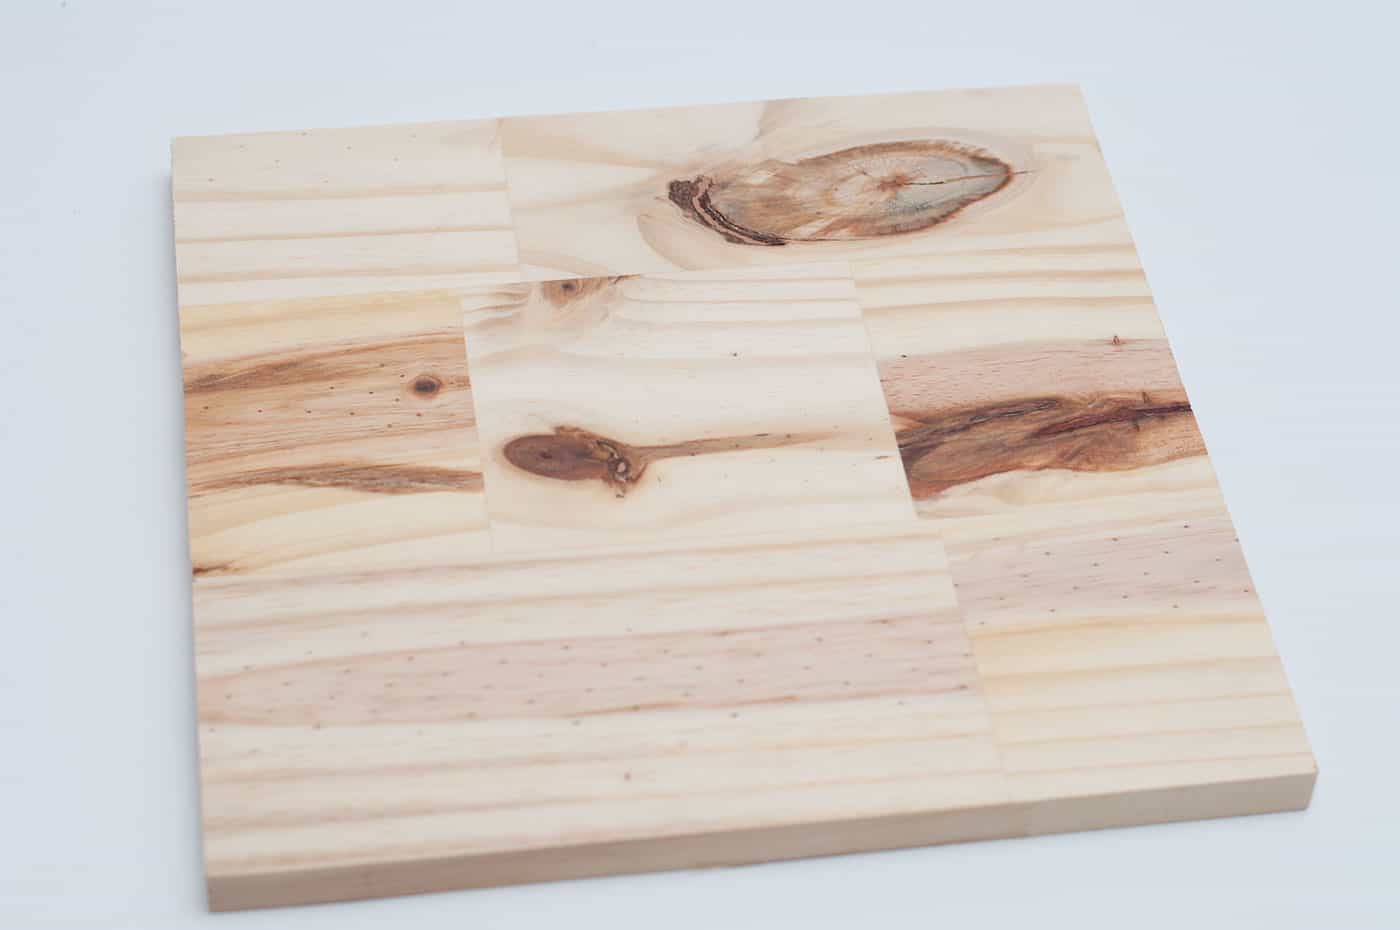

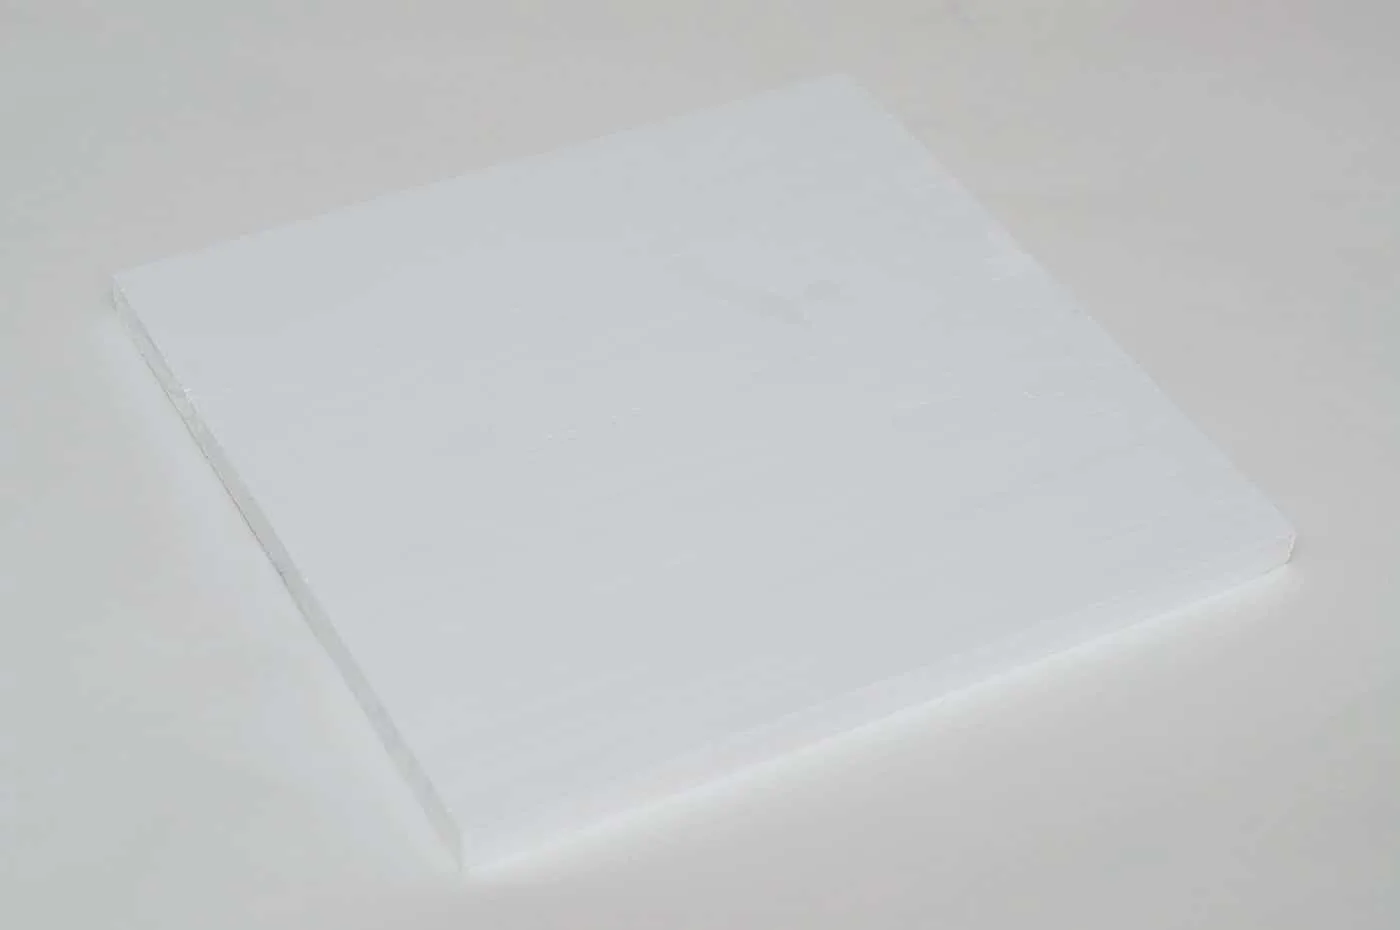
Step 2 – Paint Your Wood
Next I painted the wood. I needed to paint on a total of three coats for this project. I let each coat dry 15 minutes before moving onto the next.

Step 3 – Cut Your Stencil
Now it’s time to create your stencil. I have a Silhouette cutting machine that I use for all my sign projects. I found my perfect font and cut it on vinyl, removing the “XOXO” so that I could use this as a stencil.
If you don’t have a cutting machine, you can 1) use a regular stencil or 2) cut your own XOXO out of vinyl using a printed design from the internet.
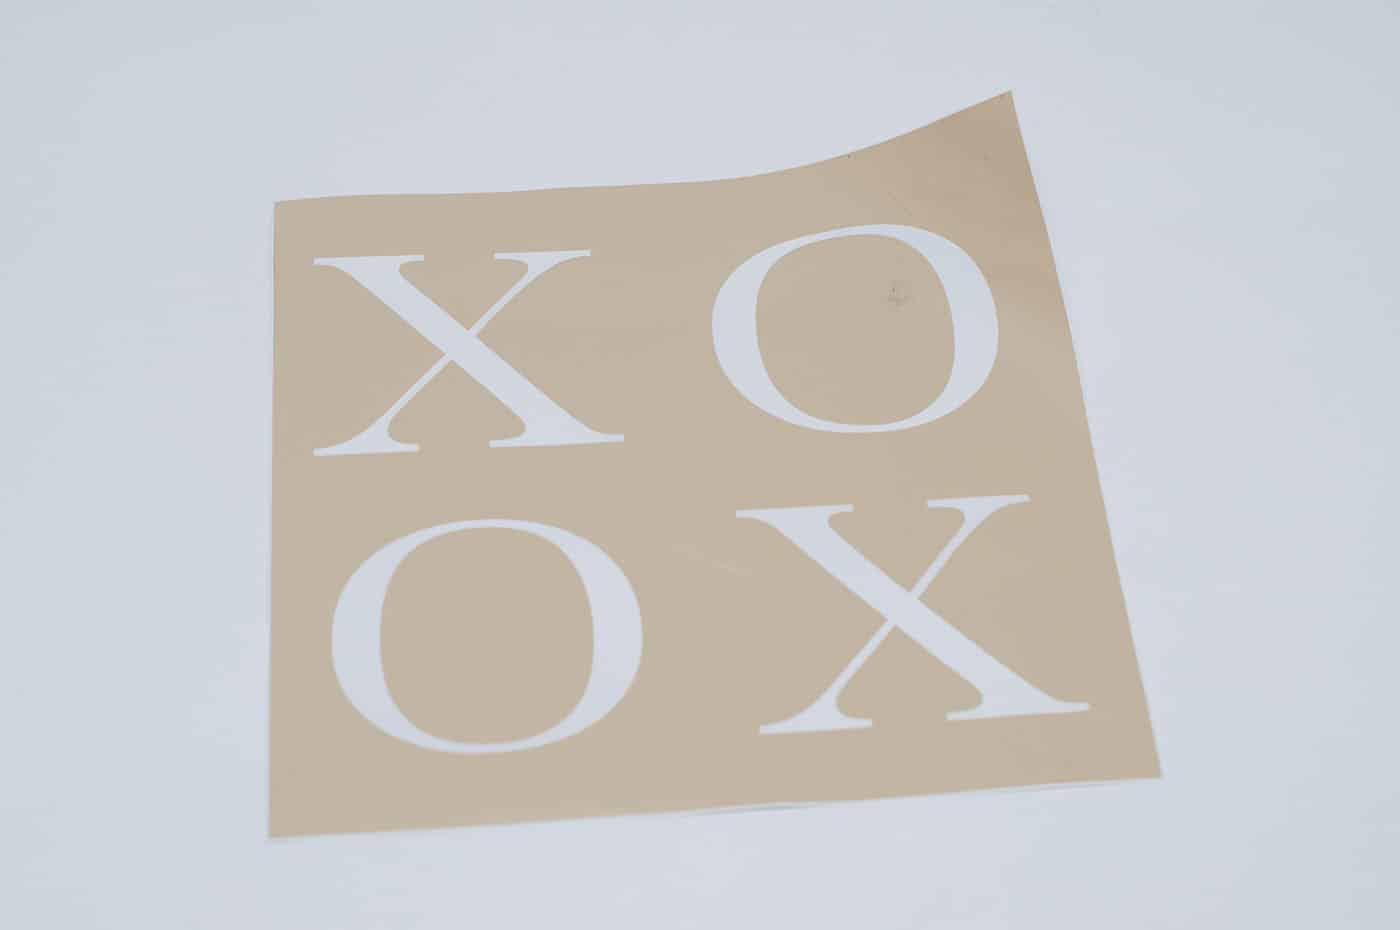

Step 4 – Add Stencil
Next I added my transfer paper to the vinyl so that I could add the stencil to the wood. I made sure to smooth down the vinyl so it would stick to the wood easily. Then I removed my transfer paper. Now I have a perfect stencil for my sign.
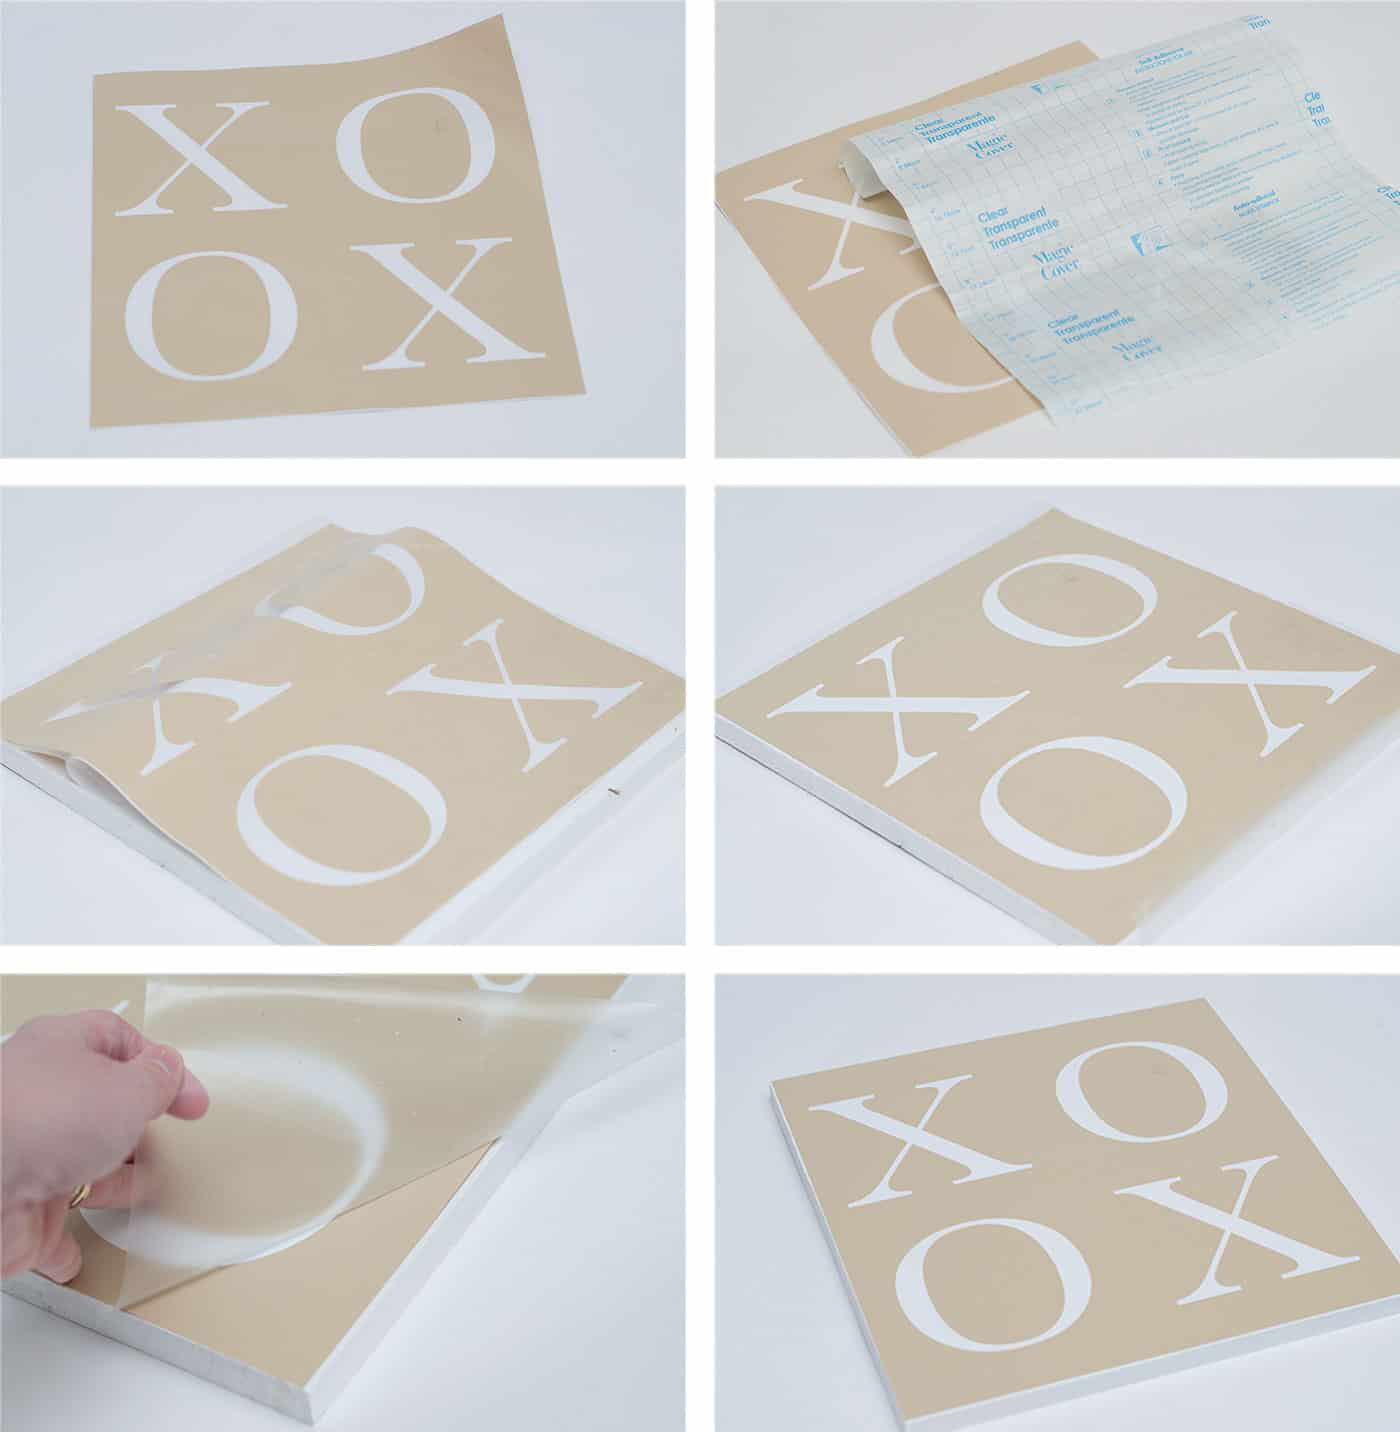
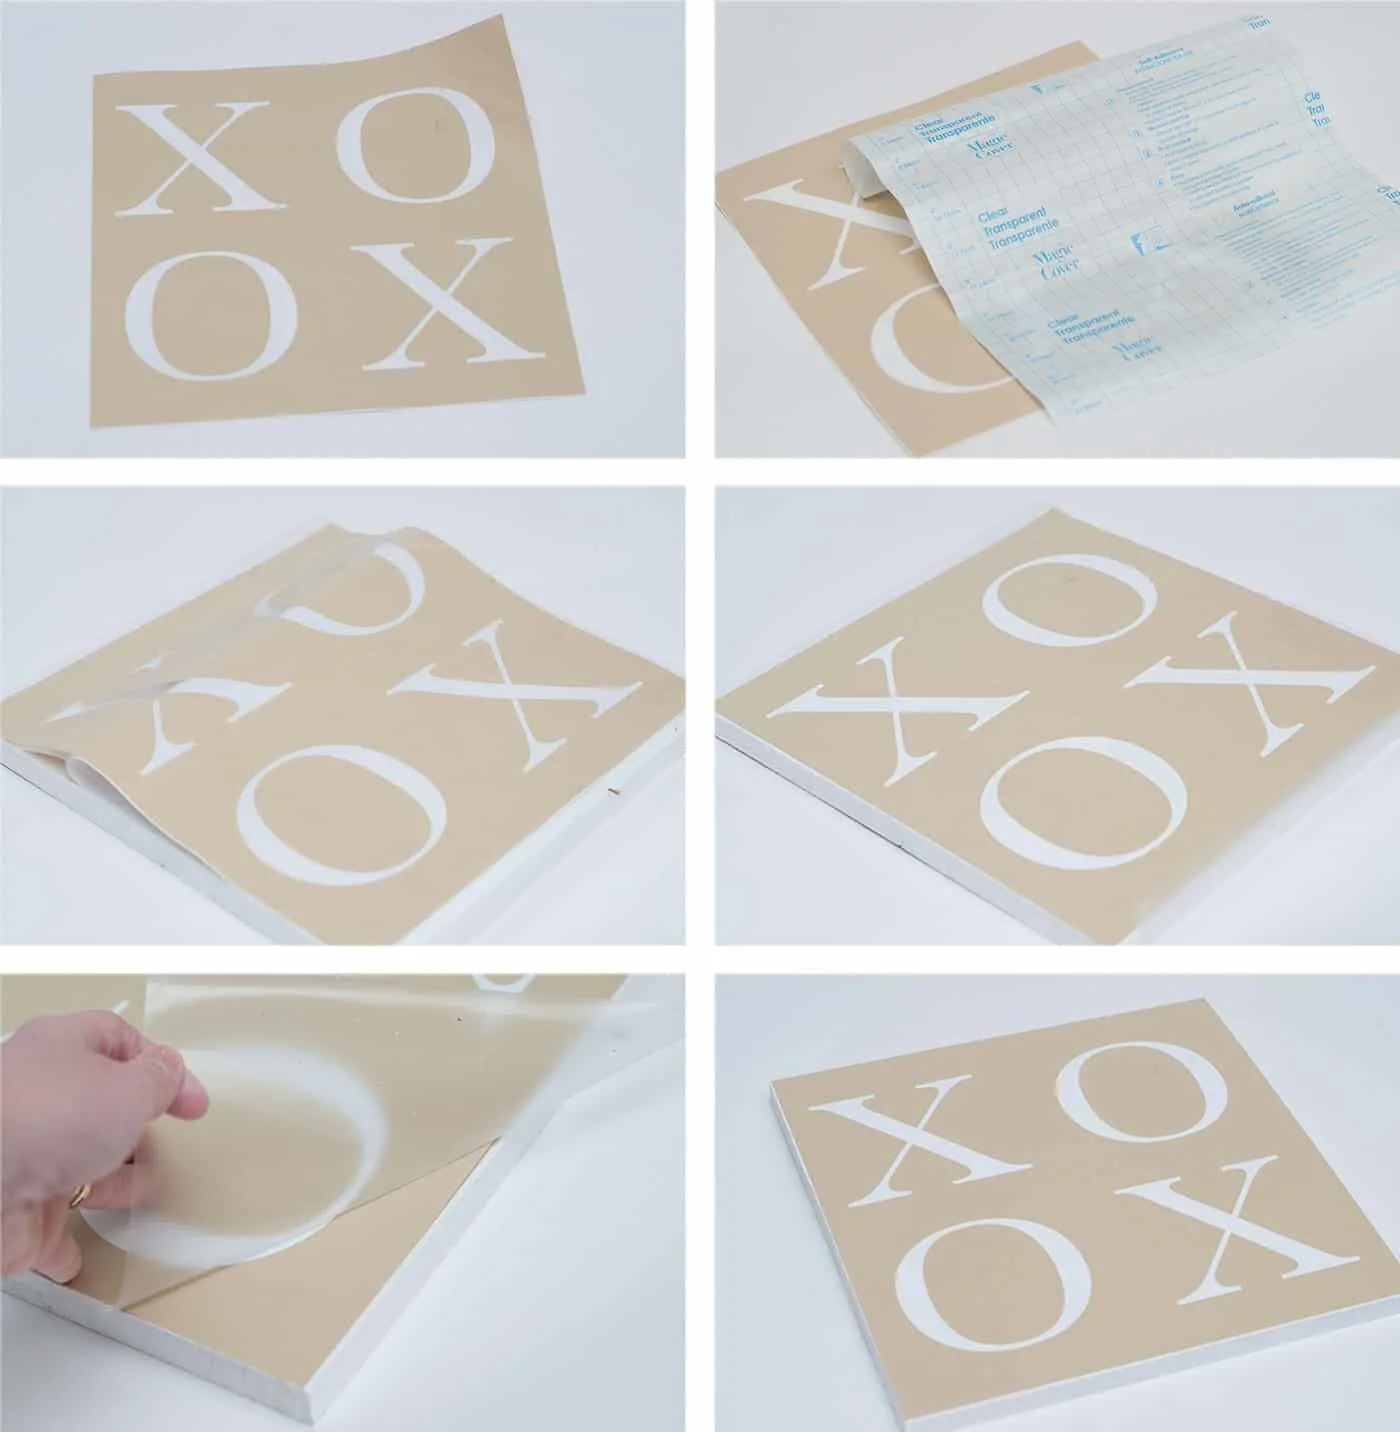
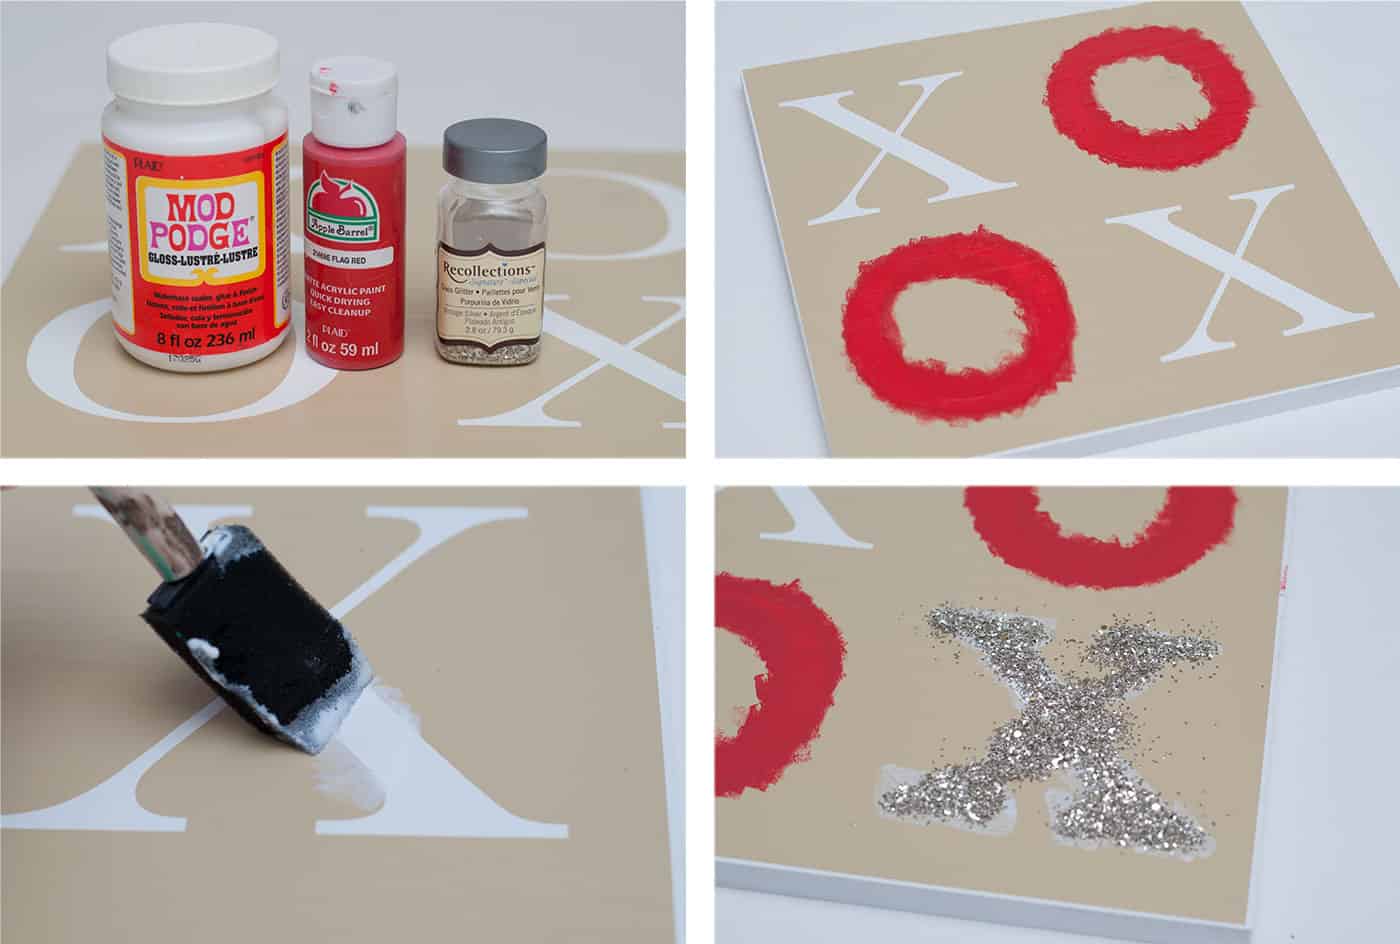
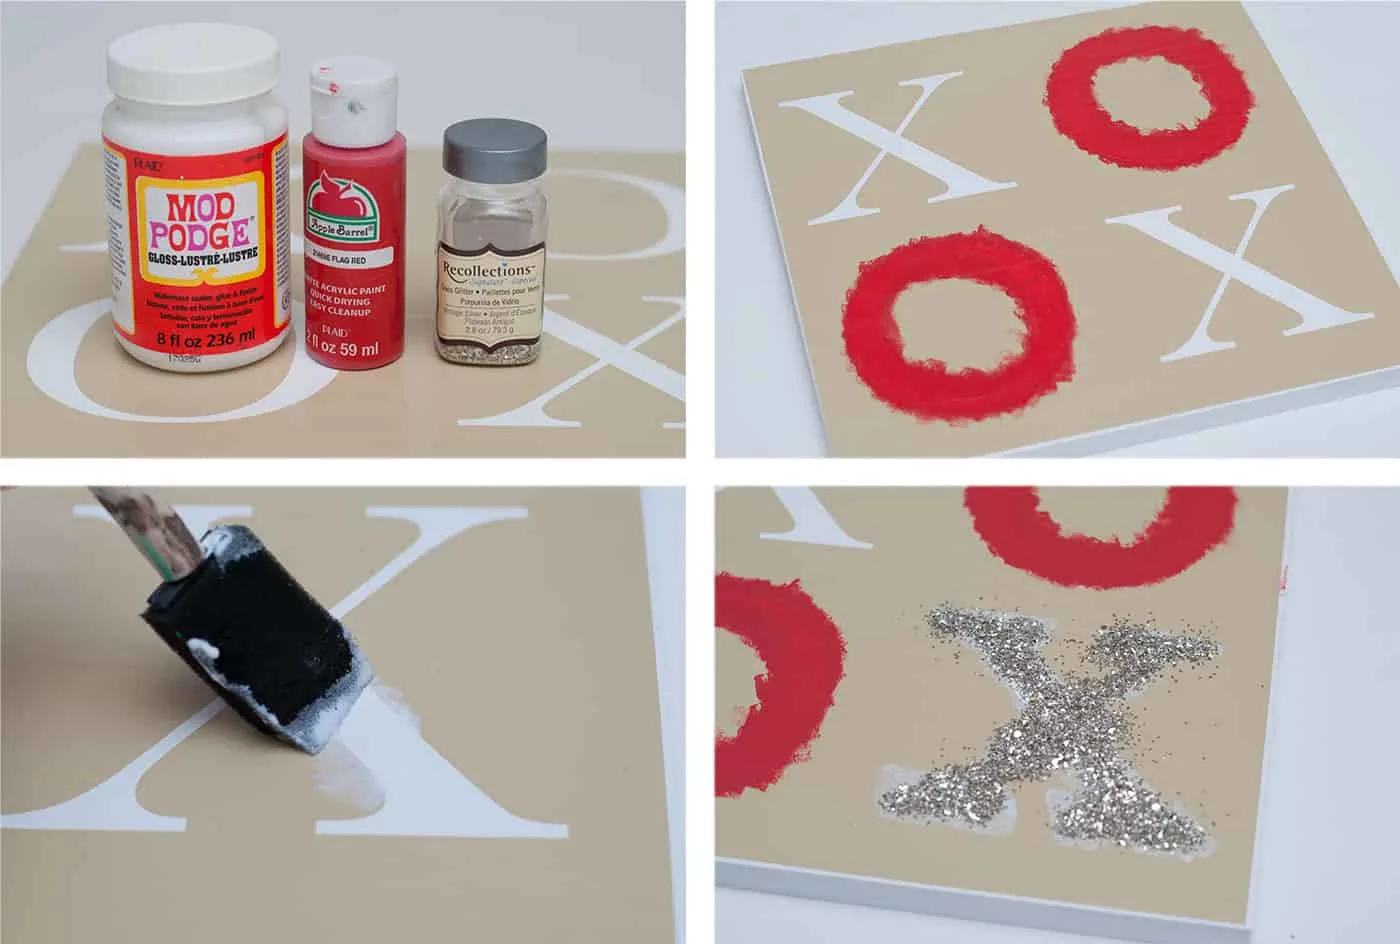
Step 5 – Fill In Stencil
Now the fun part: filling in our stencil. For the “O” I filled in with red paint and let dry 20 minutes. I wanted to make sure the paint was completely dry before I added the glitter.
Next I filled in the “X” with Mod Podge and sprinkled glitter on top. I waited ten minutes, then removed all the vinyl.
Finishing Touches
Now that I’m finished with my valentines craft, I’m ready to display. I really need to start pulling out more of my Valentine decor to go with my Valentine’s Day sign!
The kids love when I decorate for Valentine’s Day. It’s just such a fun holiday and they love the red and glitter combo.
I had this simple Valentine’s Day sign done in no time, and I think it looks great! Now I can’t wait to make a new sign like this for Easter. I just need to think of a super awesome idea . . .
XOXO Sign

Learn how to make a simple Valentine's Day wooden sign featuring an XOXO design. You're going to love this easy decor.
Materials
- Wood piece - 12 x 12"
- Paint
- Mod Podge Gloss
- Adhesive vinyl
- Glitter
- Transfer paper (if you use a die cutter)
- Sandpaper
Tools
- Die cutter or craft knife/design
- Paintbrush
Instructions
- Purchase wood that is a 12" x 12" square or have it cut. Sand the sides to smooth as necessary.
- Paint the wood with white acrylic paint. Use three coats, letting dry 15 minutes between coats.
- Create the stencil using a cutting machine or printed designs and a craft knife. Cut out of vinyl.
- Add the stencil to the wood - use transfer paper if you used a die cutter.
- Fill in the stencil. For the Os, paint with red acrylic paint. For the Xs, add a layer of Mod Podge and sprinkle glitter on top.
- Remove the vinyl immediately and allow to dry completely before displaying.
Notes
If you don't have a cutting machine, you can 1) use a regular stencil or 2) cut your own XOXO out of vinyl using a printed design from the internet.
If anyone has any questions about using the Silhouette, I’d love to answer!! I’d also love for you to check out these other Valentine’s Day decor projects:
Alie aaalohuis-JONGSMA
Thursday 11th of February 2016
Ik dank u voor uw reactie , ben er blij mee ook voor nederland lijkt mij dit geweldig. de Box zo ik graag hebben , dat heb ik perongeluk niet goed begrepen ,mijn excuus. met vriedelijke groeten
Alie lohuis
Paige
Tuesday 9th of February 2016
This sign is so cute! I love it!
Paige https://www.thehappyflammily.com/